Showing posts with label party. Show all posts

June 22, 2014

Mini Key Lime Cakes

The blessing and curse of Tastefully Simple is that you know just how good the food tastes, and you want to make all of these special treats, and just have to wait patiently for the right occasion to make them.  This was true of the key lime cheese ball mix I'd bought nearly a year ago.  One of the recommended ways to make it was to use it as a topping on Tastefully Simple's almond pound cake, which sounded delicious.  I wanted to make that little treat for a retirement party for one of my employees, but I didn't want to spend an hour prepping individual servings.  My edit was to serve up the different components and let everyone build their own little key lime cake, which worked out wonderfully.

Ingredients
  • Key Lime Cheese Ball mix from Tastefully Simple
  • Almond Pound Cake mix from Tastefully Simple
  • 2 cups or more strawberries, sliced

Directions

  1. Prepare cheese ball and cake according to package directions.  Place cheese ball in center of serving platter.
  2. Cut cake into cubes, size depending on number of servings you want to have--bigger cubes for a dozen people; bite-size cubes to serve 40 as I did.  Arrange on platter.
  3. Slice strawberries and serve with other ingredients.
I recommend writing up a little set of instructions to go with your components so you aren't forever explaining to your guests how they can serve themselves, and what the ingredients are.  A little chalkboard would be perfect for this!  I didn't think of it until I was at work, so I just printed out a little sign that I placed next to the serving platter.

All prepped!  Pound cake in 3 of the serving dishes and strawberries in the fourth, with the cheese ball in the middle.

End of the buffet line!

May 26, 2014

Strawberry Shortcake Trifle- Two Ways

I've been seeing this tasty looking Strawberry Lemon Cheesecake Parfait pin crop up recently, and decided to give it a try this weekend.  While the flavors all seemed spot on, it didn't really look like an appealing dessert.  I decided to try two approaches- a traditional trifle with the components layered, and the mashed up style of the original recipe.  The "pudding" style (as I've dubbed it) does have the benefit of fixing the one thing I don't like about trifles- that you have to get a perfect spoonful through all the layers to get the flavors together.  After having tried both, I have to say that I like the pudding better!  I'll leave it to you to judge for yourself.  :)

The Odd Couple: The Neat and Tidy Trifle and the Wonderful Mess Pudding

[Note: The ingredients are the same for both approaches; the only difference is in whether you layer these ingredients or mix em all up.]

Ingredients

  • 2 cups heavy whipping cream
  • 1/2 cup powdered sugar
  • 1 teaspoon vanilla extract
  • 8 ounces mascarpone cheese
  • 1/2 cup lemon curd (or lemon pudding, or lemon meringue pie filling if you can't find/don't want to make lemon curd; the trade off is that these have milder flavors)
  • 1 pound or more strawberries, chopped
  • 1 whole angel food cake (store bought is JUST FINE here), cut into bite-size pieces
Directions
  1. Whip the whipping cream on high speed ~1 minute, using a stand mixer with the whisk attachment or a hand mixer.  Reduce speed to medium and gradually add powdered sugar, then vanilla.  Return speed to high and beat another minute or more until whipped cream is fluffy and reaches appropriate consistency.  Turn off mixer.  If using a stand mixer, switch to beater attachment.
  2. Add mascarpone cheese to whipped cream, and mix on medium speed until incorporated.
  3. Fold in lemon curd by hand.
  4. For the Trifle: Layer a large bowl or trifle dish first with angel food cake pieces, then whipped cream mixture, then strawberries.  Repeat layers, finishing with strawberries on top.
  5. For the Pudding: Fold strawberries and angel food cake into the whipped cream mixture.  Serve in small cups and top with strawberry garnish.

April 20, 2014

Super Easy Rainbow Cake

I'm sure we've all seen the rainbow cake/cheesecake pins all over Pinterest, which often don't actually link to a recipe.  After investigating a few and some Google searching, I realized the "recipe" is really all about the technique of laying your dyed batter so you get the rainbow look in the end product.  That lesson learned, you can do this with any cake recipe, including simple boxed cake mix!  Keep it simple with white (premade) frosting and sprinkles, and this cake can lead you to crazy impressive results for minimal effort.  BINGO.

Look at that beauty!  Full on double rainbow across the plate.


So the trick here is that you mix your cake batter, separate out into 6 equal portions in bowls, mugs, whatever you have on hand, and dye each portion a different color.  You layer the batter by pouring into the center of your cake pan, and then pour the following colors in the center one by one.  This approach spreads out the layers below evenly.

See?

What's fun is deciding how to layer or change up your rainbow.  My cake is kind of reversed/upside down.  I poured in the purple first, then did the rainbow in reverse.  This gave me the fun red center spreading out to a thin purple edge, but had I started with red as the first color and flipped my cakes upside down, you can see how I'd have perfect Rainbow Brite style rainbows going on.  Bottom line?  Be creative, don't overthink it, and just have fun with the colorful result.

Ingredients

  • 1 box yellow cake mix and required ingredients (likely eggs and vegetable oil)
  • 1 container frosting
  • Food coloring (at least red, yellow, and blue)
  • Sprinkles

Directions
  1. Prepare cake batter according to package directions.  Divide equally into 6 different mugs/containers- probably ~2/3 cups in each.
  2. Dye each portion a different color of the rainbow.
  3. Prepare cake pan(s).  I used two 9" round nonstick pans, which I coated with butter.  Pour half of your first batter color into the center of one pan, and the other half into the center of the other, to have identical cakes.  Pour half of the second color slowly and evenly into the center of your 1st batter color in pan 1; repeat in pan 2.  This should slowly spread out the first color, with the 2nd color making a circle in the middle.  Repeat with remaining colors.  When done, wiggle and/or tap your batter if it isn't filling the pan fully or is lopsided.  I did, and it wiggled the whole mixture well without making the colors bleed.
  4. Bake according to package directions.  Cool completely.
  5. Optional- trim the rounded top off of each cake to get a more professional look, not the rounded look I have.  In my opinion, though, rounded makes sense for a rainbow cake!
  6. Frost the top of one cake, layer on the 2nd, and cover the entire cake in frosting.  Add sprinkles and you're done!  

January 5, 2014

Peppermint Chocolate Cake Roll

I have been meaning to write up this recipe for weeks!  I pinned this amazing dessert about a year ago and couldn't find the right opportunity to make it until this year's office holiday party.  It was a HIT.  I was also reminded of Buche de Noel (Yule Log).  While this really isn't one (different ingredients, not at all decorated like a log, etc.) it still fits the bill of "cake filled with nummy icing and rolled up."
Part of the reason I wanted to write this up is because the original pin is a bit of a wild goose chase taking you to two different pages in order to make everything.  It will be nice to have this all written up in one spot, along with notes from my experience (e.g., don't let the cake hang around in your fridge for a day).

We'll talk about the rectangle shape later in the post.  But believe me, it tasted amazing.

Ingredients
Cake
  • 5 tablespoons unsalted butter, plus more for parchment and pan
  • 2/3 cup sifted cake flour (not self-rising)
  • 1/3 cup sifted cocoa powder, plus more to dust cake for handling
  • Pinch of baking soda
  • 6 large eggs
  • 3/4 cup sugar
  • 2 teaspoons vanilla extract

Peppermint Buttercream Frosting
  • 12 tablespoons unsalted butter (1 1/2 sticks)
  • 5 tablespoons heavy cream
  • 2 cups confectioner's sugar
  • 1/2 cup chopped Peppermint Andes (I used the Peppermint Crunch ones), plus more Andes to finely chop/shave for cake topping

Chocolate Pouring Sauce
  • 2/3 cups dark chocolate (1 large chocolate bar, chopped)
  • 2 tablespoons heavy cream
  • 4 tablespoons confectioner's sugar, sifted
  • 4-5 tablespoons warm water

Directions
Cake
  1. Heat oven to 350°.  Butter a large Pyrex dish (mine is 11" x 15").  Martha Stewart's cake recipe recommends a 10.5" x 15.5" x 1" jelly roll pan.  I'm not a fan of using specialty pans/equipment for a one-time recipe, so I just used my large Pyrex and it worked just fine.
  2. Line with parchment paper.  Butter the paper and coat with flour, tapping out the excess flour.
  3. Sift flour, cocoa, and baking soda together twice into a medium bowl then set aside.  Now, this step is deceptive because I actually needed two bowls.  I sifted the mixture into bowl #1, but then needed to pour the mixture back into the sifter and sift again, without losing any of my mixture.  I just placed a small bowl under the sifter to catch any mixture that fell through during transfer, then resumed sifting into the newly-empty bowl #1.
  4. Melt butter in a small saucepan over low heat.  Skim off the white foam with a spoon, and pour the clear yellow butter into a small bowl, discarding leftover white liquid at the bottom.  Set aside in a warm place (like on top of the preheated oven).
  5. Set a small pot of water to simmer.  In a medium heat-proof bowl that will fit on top of the pot without touching the water, whisk together the eggs and sugar.  Set the bowl over the simmering water, and stir mixture until it is warm to the touch and sugar has dissolved (3-5 minutes).  Remove from heat, and beat on high speed in a stand mixer until thick and pale and has tripled in bulk, 5-7 minutes.  Reduce speed to medium, add vanilla, and beat 2-3 minutes more.
  6. In three additions, gently fold flour mixture into egg mixture with a spatula.  While folding in the last addition, dribble melted butter over the batter and fold in.
  7. Spread batter evenly in pan, leaving behind any unincorporated butter in the bottom of the mixing bowl.  Tap Pyrex dish on counter several times to remove air bubbles.  Bake until cake springs back when touched in the center, 15-20 minutes.  Don't overbake or cake will crack.  Let sit in pan on wire rack until cool enough to handle (~1 hour or more).
  8. Dust surface with cocoa powder.  To make rolling easier, run a knife along the edge of the cake to loosen from the Pyrex dish.  Cover cake with a sheet of waxed paper and a clean, damp dish towel.  Invert onto a work surface, and peel off the parchment paper from the bottom of the cake.  Dust with cocoa powder.  Starting from one long end (the 15" side, not the short 11" side), carefully roll up the cake in the towel.  Wrap in plastic and refrigerate until ready to use, but no more than a couple hours.  If you let the cake sit for a day or more, it is going to harden more into its shape and be difficult to roll later, hence the odd rectangle shape I got rather than a nice circular roll.  Still, it all tastes the same in the end so don't sweat it too much.
Peppermint Buttercream Frosting
  1. Place all ingredients in a bowl and beat until smooth.  Try not to eat it all.
Chocolate Pouring Sauce
  1. Place chocolate and heavy cream in a bowl over simmering water.  Let chocolate and cream sit for 2-3 minutes to melt without stirring.  Then slowly stir mixture until well combined.  Add confectioner's sugar and mix to combine.  Add water 1 tablespoon at a time, mixing after each addition, until pouring consistency is achieved.  It should be the texture of chocolate syrup (not watery).  Set aside and let cool until it is merely warm (not hot).
Assembly
  1. Unroll the chocolate cake and spread with buttercream filling, to about 1/4" thickness.  Make sure you spread filling evenly over entire cake.  Roll filled cake from long end to long end, just as you did when you chilled it.  Trim ends for clean finish (and so you can get the very important tasting pieces).
  2. Place fully assembled roll on a serving platter (or on a cooling rack if you want to pour the chocolate sauce, then transfer to another plate for serving with a clean presentation, which I clearly did not do).  Pour chocolate on top.
  3. Sprinkle with peppermint Andes shavings.
So. Delicious.

October 27, 2013

Crock Pot Pumpkin Spice Lattes

Ready for an extra special fall treat for yourself and/or your friends?  Pop some coffee, milk, and pumpkiny goodness in your crock pot and you're set.  The recipe really is delicious and hit the spot on a fall afternoon.  Thanks go to Crock-a-doodle-do for the recipe!


Ingredients
  • 4 cups strong brewed coffee
  • 6 cups milk
  • 6 tablespoons canned pumpkin
  • 6 tablespoons granulated sugar
  • 4 tablespoons vanilla
  • 1 1/2 teaspoons pumpkin pie spice
  • Whipped cream and cinnamon sugar for topping
Directions
  1. Pour coffee and milk into crock pot.  Whisk in pumpkin, sugar, vanilla, and pumpkin pie spice.  
  2. Cover and set on low for 4 hours, or high for 2.  
  3. Turn crock pot down to "keep warm" setting or just turn off 30 minutes before serving, unless you want coffee scorching hot.  Whisk before serving.
  4. Top with whipped cream and a sprinkle of cinnamon sugar to serve.

July 4, 2013

Red, White, and Blue Punch

Continuing the festivities, a friend recommended that I make this colorful punch for the 4th of July.  Done!  So simple, and tasty, too.  While I like the layers, I do recommend stirring to serve.  Otherwise, you're just serving one layer at a time, and not a mixture of those tasty flavors.  They do blend nicely. :)


Ingredients
  • Cranberry juice (I used a cranberry/raspberry mixture)
  • Blue Gatorade Frost
  • Diet Sprite (it HAS to be diet to separate to its own layer)
  • Ice
Directions
  1. Put ice in bottom of pitcher or beverage dispenser.  Pour cranberry juice on top, filling pitcher about 1/3 of the way.  
  2. Then pour Gatorade, being careful to pour it onto the ice, and not just into the pitcher.  If you pour over the ice, it will not mix in with the cranberry juice- it will make its own layer on top.  Pour until the pitcher is 2/3 full.  
  3. Then pour the Sprite over the ice until the pitcher is full.

March 6, 2013

Construction Birthday Party

One of my favorite things about this year's birthday party for my son is that he keeps talking about it.  From sharing details about the cake ("it had jellybean lights!  and cookie wheels!") to playing with our guests, to reminding me about the things we decorated together ("we put up streamers"), his over the top happiness over it made the work so worthwhile.

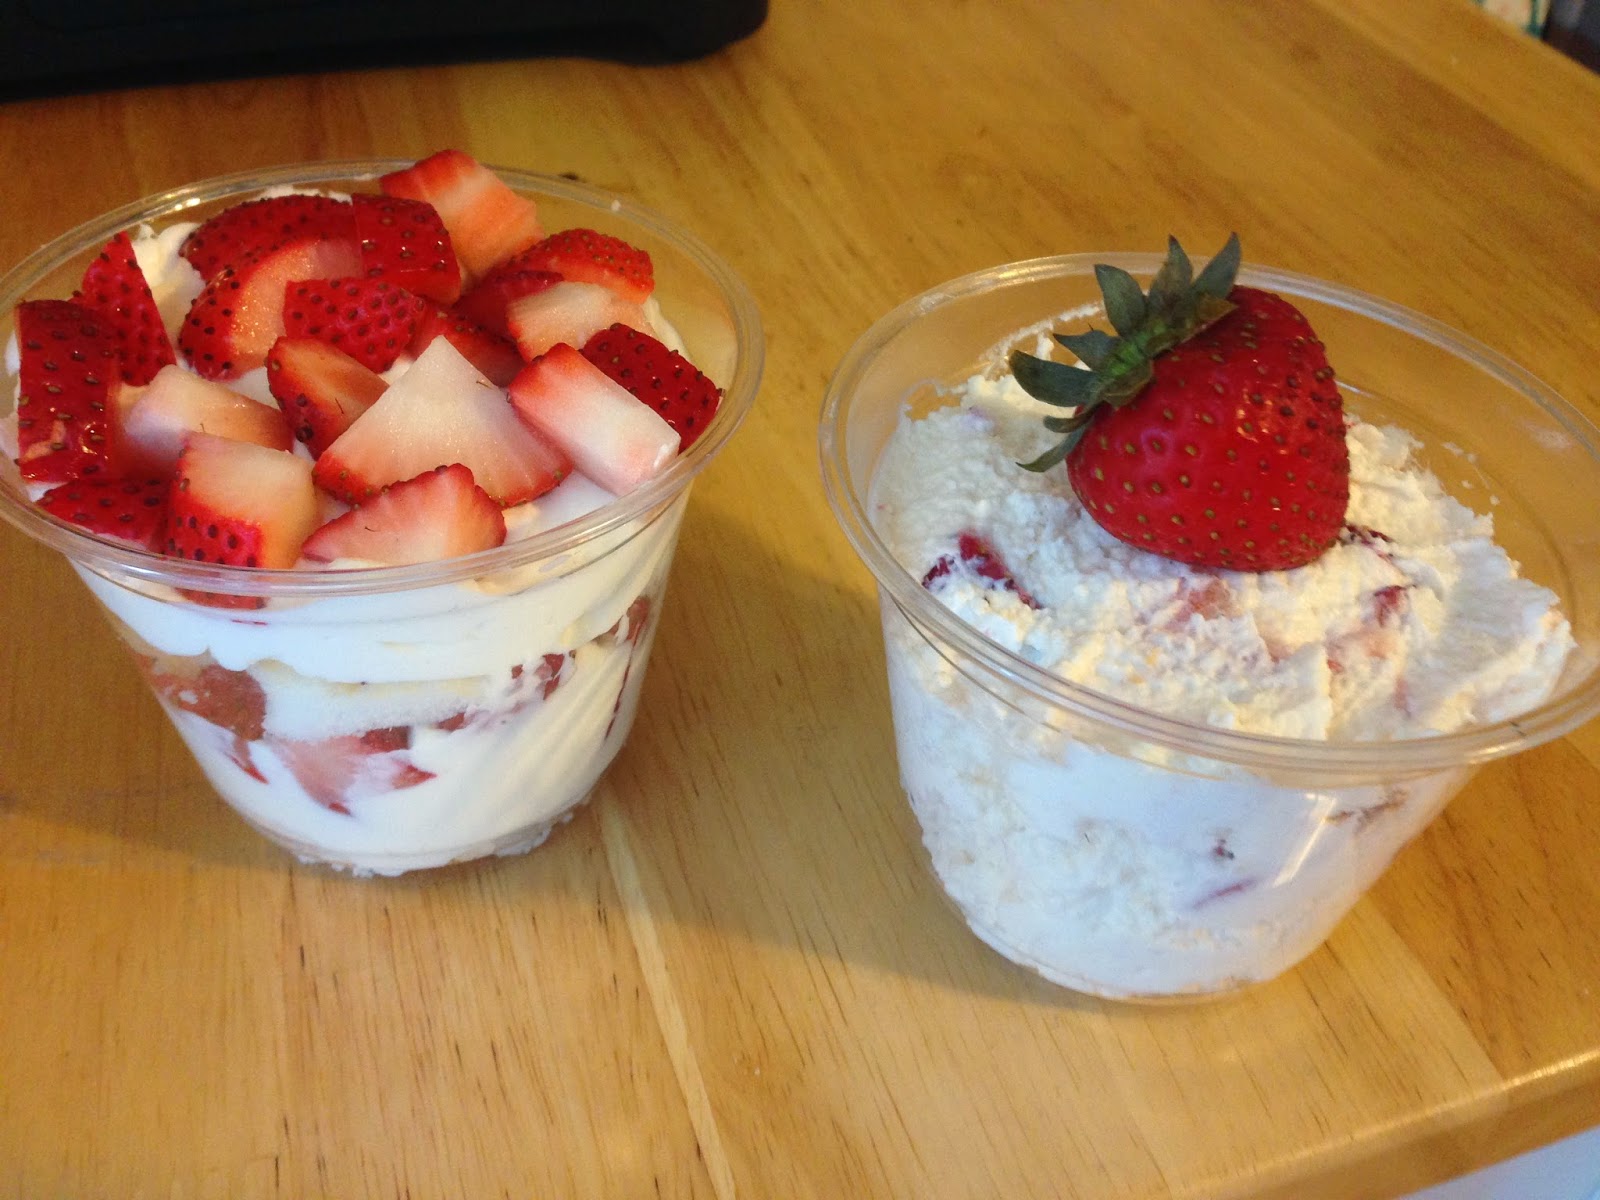
First up are the worms in dirt.  I kinda botched the recipe a bit, forgetting to stir milk into the pudding mix before I added my whipped cream.  Whoops.  Still edible, though!  I also like the idea of the Dig In sign which I stole from Pinterest.
 

I also had the idea to serve creamsicle punch.  I don't know why I stuck on that idea- maybe it was the thought of orange punch that made sense?- but I found a good recipe on Pinterest and it was a hit. The funny thing is, the pic and recipe I pinned are totally different from the ones the pin actually linked to.  Anyway, I'm happy with the one I used.

More Pinterest sign idea thievery- treating the drink area as a gas station.  Cute!  I like my sign more, too.

Now this one I can take total credit for.  What better way to serve lunch at a construction site than in lunch pails?!  Just a few bucks sent to Oriental Trading and I was in business. I forgot to nab a picture of it, but behind the lunch boxes I put up a picture of construction workers eating their lunches from pails on a steel beam as they built a skyscraper.  Extra bonus: with the lunches labeled, I didn't have to decode each sandwich for each guest like I did last year.

Lunch pails were packed the morning of the party, with sandwiches catered by The Corner Bakery (sooo good, and the ones with pretzel bread went the fastest), a handful of chips, and a napkin.

And the Best Supporting Actor of the party (second fiddle to our star, the birthday boy) is the dump truck cake!  Recipe here.  Like I say in that blog post, I couldn't find a cake pan worthy of this party, so I decided to get creative and craft my own.  Lots of oohs and ahhs and "what's that filling in the truck bed?" over this one.  (Answer: pieces of the cake from when I trimmed it, cut up Reese's pb cups, and crushed graham crackers.)

When I served the cake, I also doled out ice cream in no time flat.  I took this genius idea from the Pinterest gods, and scooped ice cream into cupcake liners before the party.  When it came time for cake and ice cream, I  just dished out a cupcake liner full of ice cream on the plate with the cake.  My friends were in love with this idea.  Nobody was left with mushy, last-scoop-from-the-container ice cream!


We can thank someone's bridal shower for this idea- stringing pictures from balloons.  My modifications: I used pics of my son from birth to just a month ago, put pictures on both sides so there was no white space, and as my mom and I learned during pre-party setup, those pictures weigh down the balloons.  I was prepared for that, so when my mom said "Well, it was a nice idea" I knew there was no "was" about it.  We just tied/wrapped the ribbon to my chandelier and voila- still worked.  A bit more subtle was the idea that the blue and white balloons were like a sky over our little tabletop construction site.

Here's a better view of the hanging pictures, as well as the little construction zone.  My husband is a city planner, so of course I put him to work laying out a black duct tape and masking tape road on the green table cloth.  I raided the play room for a bunch of construction toys and decorations, plunked down some construction worker duckies from Oriental Trading, and had one heck of a cute setup in place.  What was really sweet was watching my son investigate the pictures.  Some of them he remembered, like playing in the snow over Christmas, going to a park, Halloween, and visiting the train yard.  Others he didn't realize were of him, so he said things like "Look at the baby in the bathtub!  Baby in a blanket!"

Other side of the pictures.

Here we spy my traffic sign lollipops- another original idea, thank you!  I was disappointed that I couldn't find sign stickers to use, so I was left with printing out clip art signs I found online.  I cut those out and taped them to lollipops- easy peasy but very popular with the birthday boy and some guests.  :)

One of my son's favorite snacks is pretzels, and I thought they would be great stand ins as timber on our site.  I filled up some of his toys with them, and stacked them in a couple spots on the table, too.


In the week leading up to the party, I started asking my son these 20 questions I found on Pinterest.  He was a bit squirmy and funny answering some of these, but eventually my husband and I got answers to all 20.  I put out the album on the dining room table for our friends to look over.  The idea is that we'll add to the album with his answers each year and see how his answers change over time.  The moms and moms-to-be all thought this was a super sweet idea, and I definitely agree.

Ok this project makes me laugh, because I had it all planned out in my head as a very simple set up to use orange electrical tape to make a construction crane on the pillar and wall between our dining room and living room.  I told my husband he was going to make this for the party, and he must have been browsing the internet when I first told him because when I set out the supplies the night before the party, he was aghast at my evil plans.  He also critiqued the materials, because unbeknownst to me, electrical tape contracts.  Hence some of the off-kilter bits.  Still, our son spotted the construction crane right away and could tell what it was supposed to be, so in the end: mission accomplished.

The last bit of fun from our party: dump truck bean bag toss, another Pinterest idea.  How in the world did people plan kids' parties before Pinterest?  So many great and creative ideas out there, both to adapt or straight out steal, and to generate some ideas of your own.  Like I said, this was a great party that my son and our guests loved.  Some of the ideas will be keepers for years to come (like the ice cream scooping trick, and pre-portioned, labeled meals) and who knows- maybe some will be requested again by the special little guy.  Either way, I can tell that we're setting up some very fun memories for him, which just makes me grin ear to ear.  :)

March 1, 2013

Dump Truck Cake

I've been looking forward to posting this idea for a while now.  Perusing the construction-themed cake options online and at Michael's, I was disappointed.  I brainstormed a bit, ran ideas by a coworker, and decided to make my own dump truck cake.  I figured it could be pretty straightforward- a sheet cake with a loaf cake on top to be the cab, graham cracker walls for the truck bed, and... something... as filling in the truck bed.  I used a chocolate cake recipe from Martha Stewart, and her vanilla frosting recipe as well.  Christopher decided that yellow frosting was in order.  As far as that truck filling, well, inspiration hit after I'd carved the top off the sheet cake and carved the loaf cake to have a sloped, cab-like look.  I had piles of cake bits sitting around when Eureka! Instant truck filling!  Mixed in with some Reese's peanut butter cups and graham crackers, I had insta-dirt.  YUM.  I cannot WAIT to dig into this treat at my son's birthday party tomorrow!

Detailed pictures after directions.


Supplies
Cake
  • Butter, for coating cake pans
  • 1 1/2 cups unsweetened cocoa powder, plus more for dusting
  • 3 cups all-purpose flour
  • 1 tablespoon baking soda
  • 1 1/2 teaspoons baking powder
  • 1 1/2 teaspoons salt
  • 3 cups sugar
  • 3/4 cups vegetable oil
  • 1 1/2 cups buttermilk
  • 1 1/2 teaspoons vanilla extract
  • 3 large eggs, lightly beaten
  • 1 1/2 cups hot water

Frosting
  • 1 1/2 cups (3 sticks) unsalted butter, room temperature
  • 1 lb (4 cups) confectioner's sugar, sifted
  • 1/2 teaspoon pure vanilla extract
  • Gel food coloring (I used yellow)

Decorations
  • 4 graham crackers
  • 4 Oreos
  • Jelly beans (2 red, 2 white)
  • 2 pretzel rods
  • 12 Reese's peanut butter cup minis
  • Chocolate cake pieces


Directions
Cake

  1. Preheat oven to 350°.  For the dump truck cake, I used one 9 x 13 pan and one 9 x 5 pan (loaf size).  Butter cake pans.  Line bottoms with parchment paper, and butter paper.  Dust the pans with cocoa, and tap out the extra.
  2. Sift cocoa, flour, baking soda, baking powder, salt, and sugar into a mixing bowl.  Fit the bowl into the base of your stand mixer, and one ingredient at a time mix in the oil, buttermilk, vanilla, eggs, and hot water, mixing at low speed.  Beat until smooth, about 2 minutes.  The batter will be very thin.
  3.  Pour batter into pans.  I filled the loaf pan about 1/3 full, and the sheet pan about 1/2 full.  Bake 45 to 55 minutes, or until a toothpick inserted into the centers comes out clean.  My cakes were done at 45 minutes.
  4. Let cakes cool in pans on wire racks, 20 minutes, before inverting to remove.  Discard paper.  Cool completely on racks, tops sides up.  Cut off top of each cake for a flat, smooth top.  Cut a slope into the loaf pan for the truck's windshield.  Set aside scraps for dump truck filling.  Place the small loaf cake on top of the large cake, then frost.
Frosting
  1. In a stand mixer, beat butter on medium-high speed until pale and creamy, about 2 minutes.
  2. Reduce speed to medium.  Add the powdered sugar, 1/2 cup at a time, beating well after each addition and scraping down the sides of the bowl as needed.  After every two additions, raise the speed to high and beat 10 seconds to aerate the frosting, then reduce to medium speed again.  Frosting will be very pale and fluffy.
  3. Add vanilla, and beat until frosting is smooth.  Spoon about 1 cup of frosting into a pastry bag fitted with a round writing tip.  Add about 1/4 teaspoon gel food coloring and mix, adding more if needed, until frosting reaches desired color.  Scrape down sides of bowl to thoroughly incorporate food coloring and mix until color is even, without any white streaks.
Note: If not using immediately, frosting can be refrigerated up to 10 days in an airtight container.  Before using, bring to room temperature, then beat on low speed until smooth again (about 5 minutes).


Decorate

  1. Thoroughly frost the cake, on all sides, with colored frosting.  Apply a thinner layer to start, and then cover with additional frosting for a smooth top coat.
  2. Place graham crackers along 3 sides of back of cake.  For the edge along the bumper, just break one graham cracker in half, and pipe white frosting along the seam.  Place Oreos as wheels on cake.  Put two white jelly beans on front bumper as headlights, and two red jelly beans on back bumper as tail lights.  Gently insert pretzel rods in truck cab as exhaust pipes.  
  3. Pipe on detail with the white frosting: windows, and windshield, truck grill, along graham cracker truck bed, license plates, and wheels.  For the windshield, I piped on the frosting generously and spread with a knife.
  4. Fill dump truck bed first with leftover cake scraps from trimming the cakes, broken into pieces.  Chop Reese's minis and sprinkle over cake pieces.  Crush remaining graham cracker half and sprinkle over top.  Add more as desired.  A couple gummy worms could be welcome additions, too!
Carved, stacked cakes

Alternate side of the cake

Back.  Those jelly bean tail lights are too cute.

"Dirt" filling

December 2, 2012

Grinch Punch

There were some misleading accounts on Pinterest on how to concoct this beverage, so I kinda mashed up a couple that I saw to get my own tasty version.


Ingredients

  • Sprite, 7 UP, or any other lemon lime soda
  • Lime sherbet (I always thought it was sherbert.  The packaging told me NO, only 1 r.  Hmpf.)
  • Green sprinkles
Yeah, seriously, that's it people.

Directions

  1. Fill a pitcher about 3/4 full with Sprite.  Add 7-8 scoops of sherbeRt (take that stupid word) and stir.
  2. Wet top of drink glasses with water.  Dip top of glass in sprinkles.
  3. Pour punch into your festive glasses and enjoy!

December 1, 2012

Pinterest Party

I had friends over today for what we all agreed was the first of many Pinterest Parties to come.  Each of us made a snack to share, and brought a bunch of supplies to make different crafts we'd been pinning to a secret board on Pinterest for the last few weeks.  Some were making gifts, others decorations, most of us making at least a couple ornaments.  It was a great few hours, with many repeat comments of "this is really relaxing" and "we're totally doing this again for Valentine's Day".  One of the best parts was getting excited seeing other people make things, getting input from everyone else while we were struggling to put things together or say "is this ok or need more [glitter/paint/jingle bells]?", and in general taking a more relaxed approach to making these glittery goodies.

I made grinch punch, which was really tasty and a nice little treat.  It's just Sprite and lime sherbert.

I also made a cheese ball!  And I just now realized I forgot to put on the green pepper stem to make it look like a pumpkin.  Oh well!

A little round up of our finished handiwork.  Really impressive, and this is just a sampling of what everyone did.  I did the confetti ornament, red and white ornament, silver glitter ornament, the golden snitch ornament, and the glitter reindeer silhouette.

When we were doing the craft round up picture, my ribbon tree was still missing its top couple layers.  I was in a predicament about how to top it, and ended up just doing a ribbon cone with a gold pom pom in the top.  The really sad stars I tried to cut out of the ribbon were just too sad for words.  At least the tree is pretty!

November 23, 2012

Thanksgiving Spread

This was a great Thanksgiving, with a lot of great things to be happy for, a combination of family and friends that felt really special, and a touch of pride in seeing different projects and recipes pulled together to create a great holiday for me at least.  Really, the Pinterest creations are ultimately selfish- I love the way it all looks and don't care too much if anyone else cares.  They make me happy and that's all I can control, though of course I hope my gusts enjoyed them, too.  :-)

Now if you've been following along for a little while, you've seen my rustic crafts.  I was making them to create a really pretty table setting for Thanksgiving, and it was great seeing them come together!  Everyone really liked the place card holders and ornaments.  My son especially liked playing with the place card holders, haha.


My husband, son, and I alternate our holidays between Maryland and Pittsburgh (where my in-laws live). For the last couple years, we've done a bit of a potluck for the holidays here in Maryland. It's a nice way for the vegetarians in our lives to fend for themselves without getting told they can just make a meal out of sides (poor vegetarians), doesn't put the strain of a huge meal all on one person, and it's a nice chance to try out some recipes without the fear that should they not be up to par, you've blow the whole shebang.  Phew! :)

I made an appetizer found on Pinterested: Neimann Marcus Dip.  I wish it had a more descriptive name, but Cheesy Bacon Onion Almond Dip doesn't quite have the elegance of the former name.  BUT, hmmm... rearrange those and call it B.A.C.O. dip, and you've got a winner!  omg I'm a genius.

Next up was my side dip contribution to dinner: cheesy corn casserole.  Thank the Thanksgiving Day Parade Gods  for Paula Deen and her stick of butter per recipe pre-diabetic cooking.  This was a delicious hit.

The final spread: look at the amazing deliciousness.  The vegetarian side of the table is in the foreground; green bean casserole, tofurkey, bread and butter, vegetarian stuffing, warm cranberry sauce, mashed potatoes, sweet potato casserole, a more different cold cranberry sauce, the turkey on a big honkin platter, my mom's stuffing from the turkey (drooool), corn casserole, and I know there are a couple gravies out there somewhere; one veggie approved and the other meatatarian.  My little brother recommended little toothpick flags identifying the different dishes, which of course I now must do at all future holiday meals.  Way to crank the hostess crafting to a new level, Robbie.


After we had properly stuffed ourselves, experienced various degrees of food coma on the couch, had some coffee and worked ourselves up for dessert, we had an amazing chocolate tart with vanilla bean ice cream.  I left it Pac-Man style without nuts for those of us who aren't huge pecan fans.  This was a very fancy recipe that required scouring the stores for mystical ingredients such as moscovado sugar (found at The Fresh Market) and flaky sea salt (found nowhere; substituted with regular sea salt).  Now the hard thing with fancy recipes, aside from the advanced cooking techniques and amount of time and labor involved, is properly substituting when you don't find their fancy ingredients.  In hindsight, I should have reduced the amount of coarse salt used because it isn't an equivalent flavor to the flaky variety (I'm thinking the coarse has a much stronger flavor).  While good, those of us who didn't use the ice cream to cut down on the salty richness couldn't eat more than a few forkfuls of the gourmet Pac-Man.  Oh well: MORE FOR ME, and a delicious lesson learned.  I was thankful for my love of vanilla bean ice cream to make the dessert edible.

So there you have it: our Thanksgiving Round Up for 2012.  It was a great one, had a wonderful time with my loved ones, and can't wait to see what Christmas brings this year!  To gear up for that, I'm hosting a Pinterest Party next weekend.  Stay tuned!

November 21, 2012

Rustic Place Card Holders

I came across a beautiful picture of stick place card holders on Pinterest and just had to make them myself.  I happen to prefer my ragged edge to Martha Stewart's gilded one, thank you.  I did use a jig saw to trim the ends of some of my branches, but I think the ones I left "raw" were perfectly nice, too.  I also will share with you my secret weapon: little twigs.  I used them where necessary to prop up the place card holders when they were a bit wonky.


Supplies
  • 2 slim branches or thick twigs per holder, plus small twigs to use for adjusting
    • Go for branches with lots of personality!  Interesting bark, texture, or color make each one really special.
  • 1 spring of pine needles per holder
  • Parchment paper
  • Hot glue gun and glue
  • Garden shears or another tool to trim ends of holders, if desired

Directions
  1. Print out or write out each guest's name on a 3" x 2" piece of parchment paper.  Tear edges to be ragged.
  2. Trim branches down to even sets of 2.  No branches should be smaller than 4" long, and probably no longer than 7".
  3. Slip place card between two branches, flip holder over, and hot glue the seam between the branches, preferably with a bit of the parchment paper as well.  Tilt on side to dry.
  4. When dry, add a dab of glue to the base of the pine sprig and nestle in next to place card.
  5. If necessary, hot glue small twigs to base of holders to prop them up nicely so you can read guests' names.