Showing posts with label copycat. Show all posts

November 22, 2014

Ornament Wreath


I have been wanting an ornament wreath for years now.  Each fall/winter I see Pinterest blow up with these awesome looking wreaths, but I can never find inexpensive shatterproof ornaments to do it myself.  I'm also not ok with shelling out $100 for one of these store bought guys.  This year, I finally found it- $5 for a set of 12 shatterproof ornaments at Bed Bath & Beyond.  Yes!!!  And of course once I clued in to the term "shatterproof" I saw tons of listings on Amazon to get anywhere from 60 to 100+ of these bad boys.  Anyway, now that I'm in the know, I'm happy to share my great wreath with you.

Supplies

  • 4-6 dozen shatterproof ornaments
  • 2-3 dozen mini ornaments
  • Foam wreath form
  • Hot glue gun and glue
  • Knife
Directions
  1. Cut hole in wreath form large enough to fit the top of your large shatterproof ornament into (the part you normally put the hook in).  Put a dab of hot glue in the hole, and set the top of the ornament into the hole.  Hold a minute to set.  Repeat times a gajillion until the wreath form is evenly covered in larger ornaments.
  2. Hot glue a circle around the top of a mini ornament and glue into gaps between the large ornaments.  Repeat times a gajillion until gaps are well filled in.
  3. Hang!  Bow optional. :)
This really isn't a complex project.  The key is to varying the placement of your ornaments so they have a pretty organic flow and don't look like perfectly lined up rows of ornaments.  You want them to look random and bubbly, and you use those small ornaments to fill in the spaces so you don't see your wreath form underneath.  That's it!

First layer down.  Looking good!  The base is well covered, I alternated red and silver, shiny and matte, and the inner part of the wreath out to the edge.

Now we've got the mini ornaments layered on to fill in those gaps.  I even pulled out and rearranged and added more of the larger ornaments as I went.


November 15, 2014

Copycat Pottery Barn Glitter House


Continuing my trend of redoing Pottery Barn decor for a fraction of the price, I bring you my $2 glitter house!  That's right- instead of spending $30-$40 for a flimsier version from Pottery Barn, you can make your own sparkly gorgeous glittery houses for just a couple dollars each.
I first fell in love with the idea of a snowy white gingerbread house when I saw an adorable pin on Pinterest a couple years ago.  The link it went to is now defunct, but you can still see the picture here.  This has been at the back of my mind since, and when I came across a super cute plain gingerbread house at Michael's, it all started to come together.

Supplies

  • Unpainted wood house from Michael's (usually ~$5; take advantage of sales and coupons to get it for just $2)
  • White craft paint
  • Mod podge
  • Fine white glitter
  • Clear spray paint
Directions
  1. Paint the whole house with white paint.  Let dry.
  2. Coat in Mod podge, small sections at a time, and sprinkle with glitter before glue dries.  Let dry all over.
  3. Spray with clear spray paint to set the glitter, so it doesn't come off every time you touch the house!
Suggestions: Add small bottle brush trees, use silver glitter for accents like the roof and windows, hand paint designs in contrasting colors like green or gray.

Ooooo.  Aaaahhhh.

September 27, 2014

Copycat Pottery Barn Candle Holders: My First Flea Market Flip!


I recently discovered and fell in love with an HGTV show called Flea Market Flip.  It's basically rewarding people for their Pinteresty reinvention skills of an artist.  Now, my husband has always tried to convince me how rewarding a flea market scavenge can be, but after my first experience with an indoor flea market at a rundown strip mall near Pittsburgh, wherein people were selling all sorts of guns and ammo and more knives than I knew existed, I begged off.  It was an ongoing joke to take me to flea markets as a form of torture.  This show gave me a new perspective and willingness to try, though, so we found ourselves at the Harper's Ferry Flea Market in West Virginia last weekend.  We didn't have any specific projects in mind and just meandered, looking for things to catch our eyes.  There was one very cool trunk that I didn't investigate when we walked by, and later regretted because it was gone on our way out.  Lesson learned.  What we did walk away with was this little stash:


2 lanterns: $8
Side table: $5
Pillar candle holders: $2
Magazine caddie: $10

I can't even imagine where else $25 would get me so far.

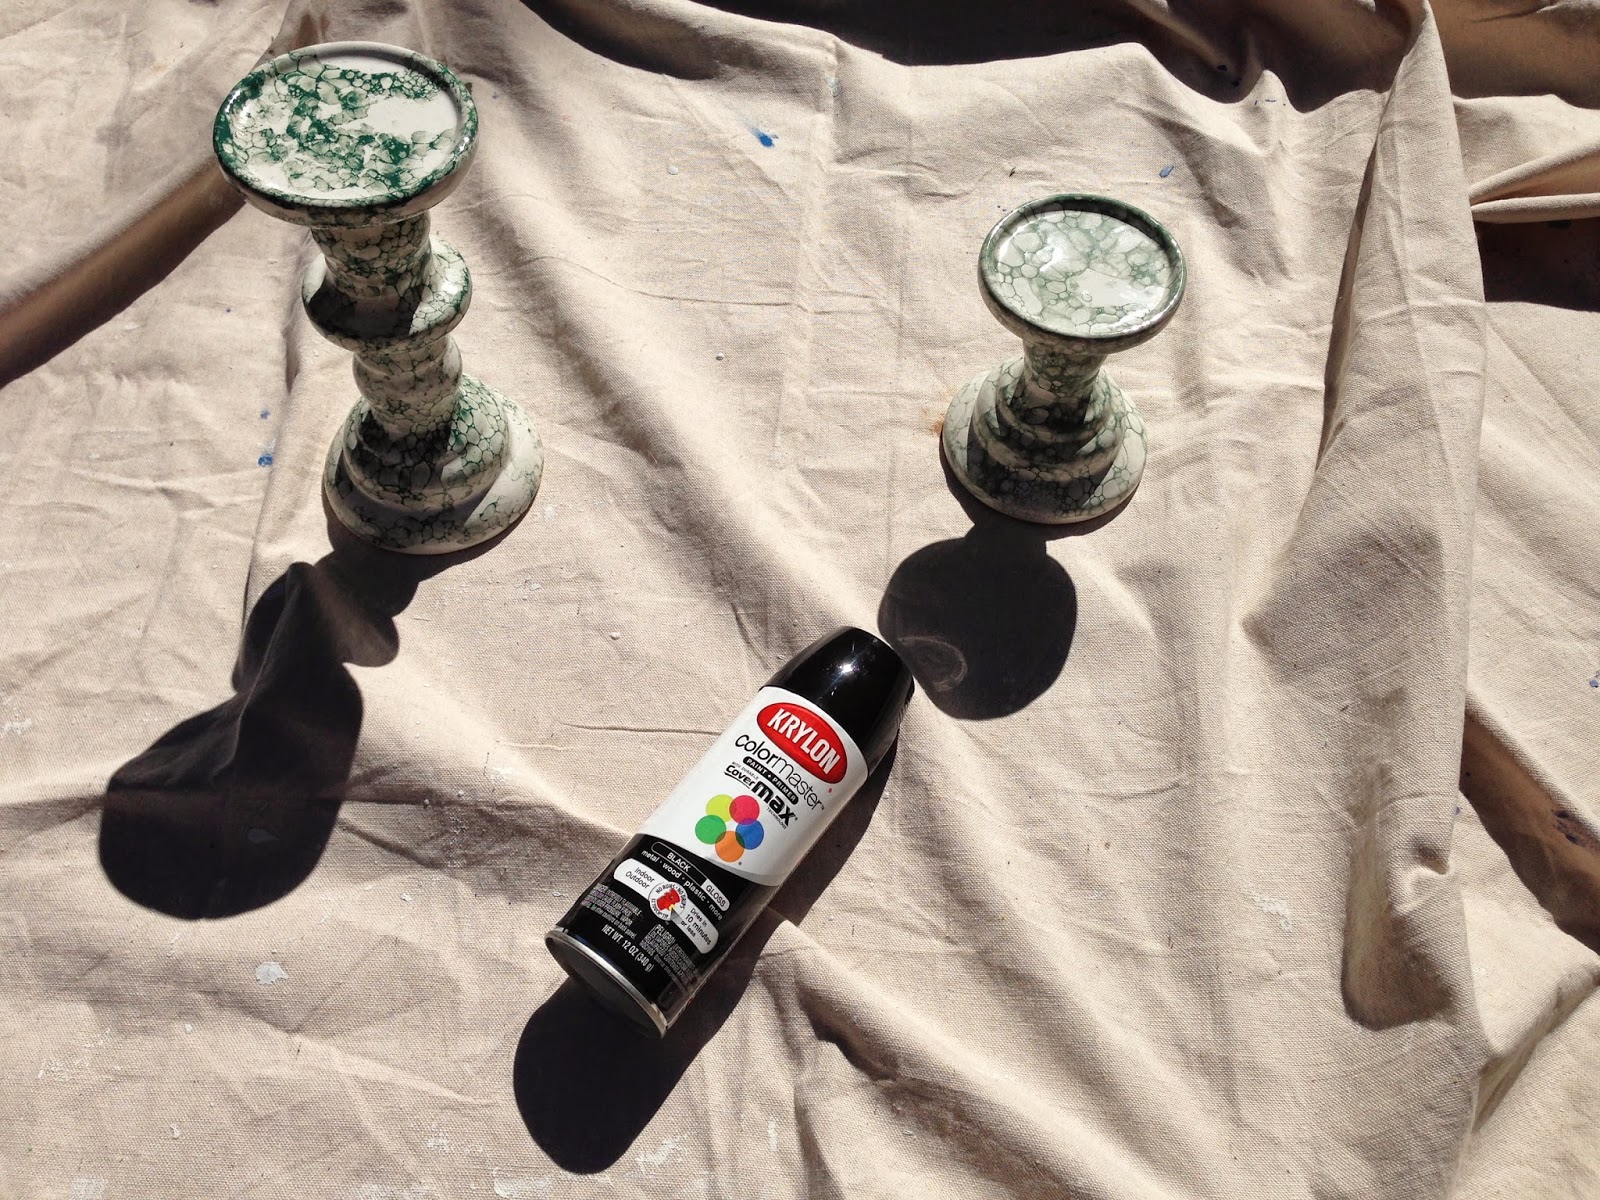
So the first find was that pair of candle holders.  We were walking down a row and I immediately locked eyes with those.  I hated the bubbled green treatment on them, but they had great shape.  The #1 rule I hear from Flea Market Flip and every other makeover/DIY show I've watched is to look for good bones, and sure enough the underlying shape of those cheap ceramic candle holders was one I liked a lot.  I knew that with a coat of glossy black spray paint, they'd look Pottery Barn worthy.  Turns out I was spot on.  Check out this set I could have spent $70 on instead of my $2.


Oooo I love the feeling of a good deal!  Muahahahaha.

So first things first- cleaning up these holders.  They had old wax drips on them and a layer of dust/grime.  Because they're ceramic, I used a plastic child's spoon to scrape off the wax without damaging the base.


You've gotta go, gunk.

Once the wax was scraped off and I gave them a nice scrub with my Mister Clean Magic Eraser (really- it's magic), it was time to spray paint.

I used Krylon shiny black spray paint and checked the back of the can to make sure it would adhere to glass and ceramic.  The candle holders are made out of ceramic but the coating on them was glassy, and I wanted to be sure the spray paint would adhere well.  I'm happy to report that yes it did!

I sprayed on two coats.  The first one was as shown here, with the holders upright.


I let that dry, then flipped upside down and did coat #2 to catch everything from the opposite angle.  This was my first time spray painting in a LONG time, and I could have been more careful about making sure I did a good job at the base.  It was too sunny outside to really see where I was missing spots, and I only noticed that I didn't have a completely even coat until I was inside.  I am just being overly critical, though.  They look great- I'm just sharing advice on what I encountered. Anyway, when spray painting, remember- nice even spraying at a good distance, and be careful you don't overload with paint and cause drips.

End result: don't they look great?!  And I'm not talking just for Halloween, here.  They'll be wonderful all year long.

August 21, 2014

Make Your Own Starbucks Caramel Frappuccino


I am craaaazy crazy about Starbucks, but need to watch my coffee budget more closely these days.  I've been craving my beloved Caramel Frappuccinos but can't stomach the cost for a daily dose of that sweet, caffeinated bliss.  I experimented at home today and sure enough, for the cost of 2 of these drinks, I can easily make 6-8 at home.

Starbucks: $4.25 for one tall
Home: $4.99 Vanilla Latte, $1.99 Caramel syrup, $1.49 whipped cream, ice = $8.47 for at least 6 talls

And I promise you, the taste is spot on because I used the premade Starbucks iced vanilla latte (sold at most grocery stores).  You could easily make yours completely from scratch with brewed espresso (you can buy tins of espresso instant coffee) and milk, but then your flavor will be different.

Anyway, here's the simple recipe!  Let the savings and cravings commence.  :D

Supplies

  • 4 to 8 oz Starbucks vanilla latte drink (vary depending on desired size and consistency)
  • 5-6 ice cubes
  • Drizzle of caramel syrup (I like the Hershey's bottled kind)
  • Whipped cream
Directions
  1. Blend latte, ice cubes, and a drizzle of caramel syrup in blender.  I first used the ice chop setting for about 20 seconds, then the liquefy setting for 45 seconds until the drink reached the right consistency.
  2. Drizzle caramel syrup in glass (or better yet- reusable Starbucks cold cup!), pour in blended drink, top with whipped cream, and drizzle with additional caramel syrup.
My tips: 
If the drink is too liquid, resembling a slightly more frozen version of the latte drink, add more ice.  
If the drink is separating into ice and liquid layers, you need fewer ice cubes and/or to blend for a shorter period of time.

January 29, 2013

Domino's Parmesan Bread Bites

Ok guys, this one is a work in progress.  Ever since Domino's came out with their Parmesan bread bites, I've been in love.  A few weeks ago, my husband dared me to recreate them at home.  Sure enough, I was able to find a recipe on Pinterest.  I didn't have have the patience to make my own bread dough, so I cheated and got the Pillsbury pizza dough in the blue can.  No shame here.  Mine came out really tasty and I thought they were really close to the real deal, if a tiny bit garlicy.


Ingredients
  • 1 can Pillsbury pizza dough
  • 1/2 tablespoon garlic powder
  • 1 tablespoon olive oil
  • 1 tablespoon butter, melted
  • 1/4 cup grated Parmesan (use the green can for this one, not the fresh stuff), plus 2 tablespoons for sprinkling
  • 1/2 teaspoon kosher salt
Directions
  1. Preheat the oven to 425°.  Line a cookie sheet with parchment paper.
  2. Roll out the dough into its rectangle shape.  Using a pizza cutter, cut into thick strips.  Roll the strips to make 1" wide snakes of dough (like you're playing with Play Doh again!).  Cut the snakes into 1", bite size pieces.
  3. Arrange dough onto prepared cookie sheet, and sprinkle with 2 tablespoons of Parmesan cheese.  Bake until golden and puffy.  I used the dough baking guidelines and mine were at that point after about 11-15 minutes I think.  
  4. While bites are baking, mix remaining ingredients in a large zip top bag.  When bites are done baking, add to bag and shake to thoroughly coat the bites in the seasoning mix.
If you make any modifications, please share!  I plan to modify this recipe as I try variations.