Showing posts with label baby. Show all posts

September 13, 2014

Mummy Onesie!

This quick baby craft came courtesy of my friend Kelly, who sent me this adorable pin a whole day before the most recent Pinterest party.  Sneaky Kelly!  How could I resist?  Luckily this little treat is SO SIMPLE, I already had everything on hand at home.

So cute!!!

Supplies

  • White baby onesie
  • Gauze or strips of white fabric
  • 2 googly eyes
  • White thread and needle
Directions
  1. Sew strips of gauze criss-cross on the onesie.  I only attached mine at the ends, but I may go back over it and sew down the whole way on each strip.
  2. Poke needle through the back of a googly eye and thread through.  Sew to the onesie and knot firmly.  Repeat for the other eye.
How easy is THAT?!

Framed Burlap and Bunny Silhouette

I came across this super cute framed bunny silhouette pin a while ago, and loved the idea of it in my daughter's woodland-themed nursery.  The original blogger meant it for Easter but pfft, why limit yourself like that?  They also painted the silhouette on their burlap, while I just cut mine out of construction paper.  I think my way is great, naturally.


Supplies

  • Frame, such as this laser cut frame I got at Michael's for just a few bucks!
  • Paint
  • Burlap- enough to fill frame opening
  • Black paper
  • Ribbon
  • Hot glue
Directions
  1. Paint frame white and let dry.
  2. Cut burlap to size, and use hot glue to attach to frame back.
  3. Print bunny silhouette outline (found here or here or going with any Google image search result you're happy with) on black paper.  Cut out bunny shape.  I cut inside the outline, rather than leaving that thick black ink outline on my bunny.
  4. Glue bunny to center of burlap.  
  5. Tie ribbon into a bow and glue to bunny's neck.
Optional: Decorate your bunny for the season!  Give him a trick-or-treat bucket, pilgrim hat, Santa hat, wings and a bow and arrow, etc.  Let your bunny be an active guy in your home!

Fall Pinterest Party Roundup

Today was the latest Pinterest party, and I put those hours to good use!  I made my chubby hubby cookies as my food offering to the crafting Gods, and set out to make 2 frames and a mummy onesie.  I didn't progress to the ghost yard decoration for Halloween, but there's still plenty of time to get around to that.  :)

I have little write ups below, with links to full posts on each craft to walk you through it step by step.

First up was the versatile photo frame.  Painted a frame with some interesting detail, put scrapbook paper on the frame backing, and hot glued a bull dog clip.  I plan to have this at my desk at work, where I can swap out pictures easily and have something colorful in the office.  Lord knows that is necessary.


Next up was the bunny silhouette for the nursery.  I painted one of those cheap laser cut frames from Michaels, added burlap backing, cut out a bunny silhouette, and glued on a little bow for good measure.  SUPER easy and I absolutely love it.  I plan to decorate this bunny throughout the year.  Maybe he'll get a little mask for Halloween and a Santa hat at Christmas.

And lastly, the mummy onesie!  I sewed on some gauze and googly eyes, and we were in business.


Here's my lovely daughter showing her enthusiasm for this cute getup!

August 24, 2014

Layered Circle Skirt

A little while back, I made a couple cute circle skirts for my baby girl.  She's getting bigger, and the newborn size skirt has started looking more like a tutu, so I decided to add a layer.  Easy peasy, and while I was at it, I ripped the old messy stitches on original skirt's the bias tape and re-stitched.  Things are nice and clean now, and extended the life of the skirt a couple more months!  I thought I'd share the easy steps so you can keep up with my sewing lessons learned.  :)

Supplies

  • 1/2 yard fabric- same as top layer, or coordinating color/pattern
  • Bias tape
  • Sewing notions
Directions
  1. Fold top layer of circle skirt into quarters.  Fold 1/2 yard fabric for bottom layer into quarters.  Lay folded top layer on folded bottom layer, as shown below.
  2. Trace curve out of corner of bottom layer, making a bigger opening than that of the top layer (~1" further down from corner).  Measure out at least 2-3" past hem of top layer and cut.
  3. Unfold the top and bottom layers, and place them on each other, right side up.  You should have two donuts, with fairly similar openings.
  4. Flip upside down, and pin the larger skirt layer to the smaller top layer, just past the elastic of the smaller layer's waist.  Pleat every inch or so to use up the excess fabric and create waves that mimic the ripples in the top layer.  Sew.
  5. When you flip the skirt right-side-up again, your layers should be nicely attached.
  6. Pin bias tape, right side against the right side of the fabric of the larger bottom layer, and sew in the fold of the bias tape.  Cheating and sewing as you go, instead of pinning in place, may result in a surprise shortage of tape when you reach the end.  Oops!  I decided this just determined where the back of this otherwise perfectly uniform skirt belongs.
  7. Fold over the raw edge of the skirt, and fold again.  Pin and sew.
  8. Done!

August 20, 2014

Making the Most of a Small Nursery


My family is now two months in with baby #2, my sweet and poop-laden little girl.  I finally caught her nursery in a moment where the planets had aligned- my favorite sheets on the crib, everything clean and tidy, nice afternoon lighting, and both kids asleep and out of my hair for a while.  I took my chance to nab some pics to show off the nursery and to use as a bit of documentation for my nursery organization tips.  Both my son and daughter have pretty small rooms- perhaps 9' x 10'?- in our townhouse.  This really isn't a problem during the baby/toddler years as there is no need or expectation for these to be places for the kids to really run around and play in.  However, for taking care of a baby, you need to jam pack that space in a functional way so that you can change, feed, and soothe that screaming baby at any moment of the day, on any scrap of sleep (or lack thereof) you may have claim to.  Most of the things I've done are carryovers from lessons learned with kid #1, so they've stood the test of time and if anything got a bit honed with experience.

But first, the ooh and aah pics:


Oh dresser, your remodel was so fun!


Psst- quilt!


Love it.  Mossy monogram and mobile skills- yay!  As my husband said, a bit surprised, everything goes together so well.  It's like I had a plan in mind or something.  ;)


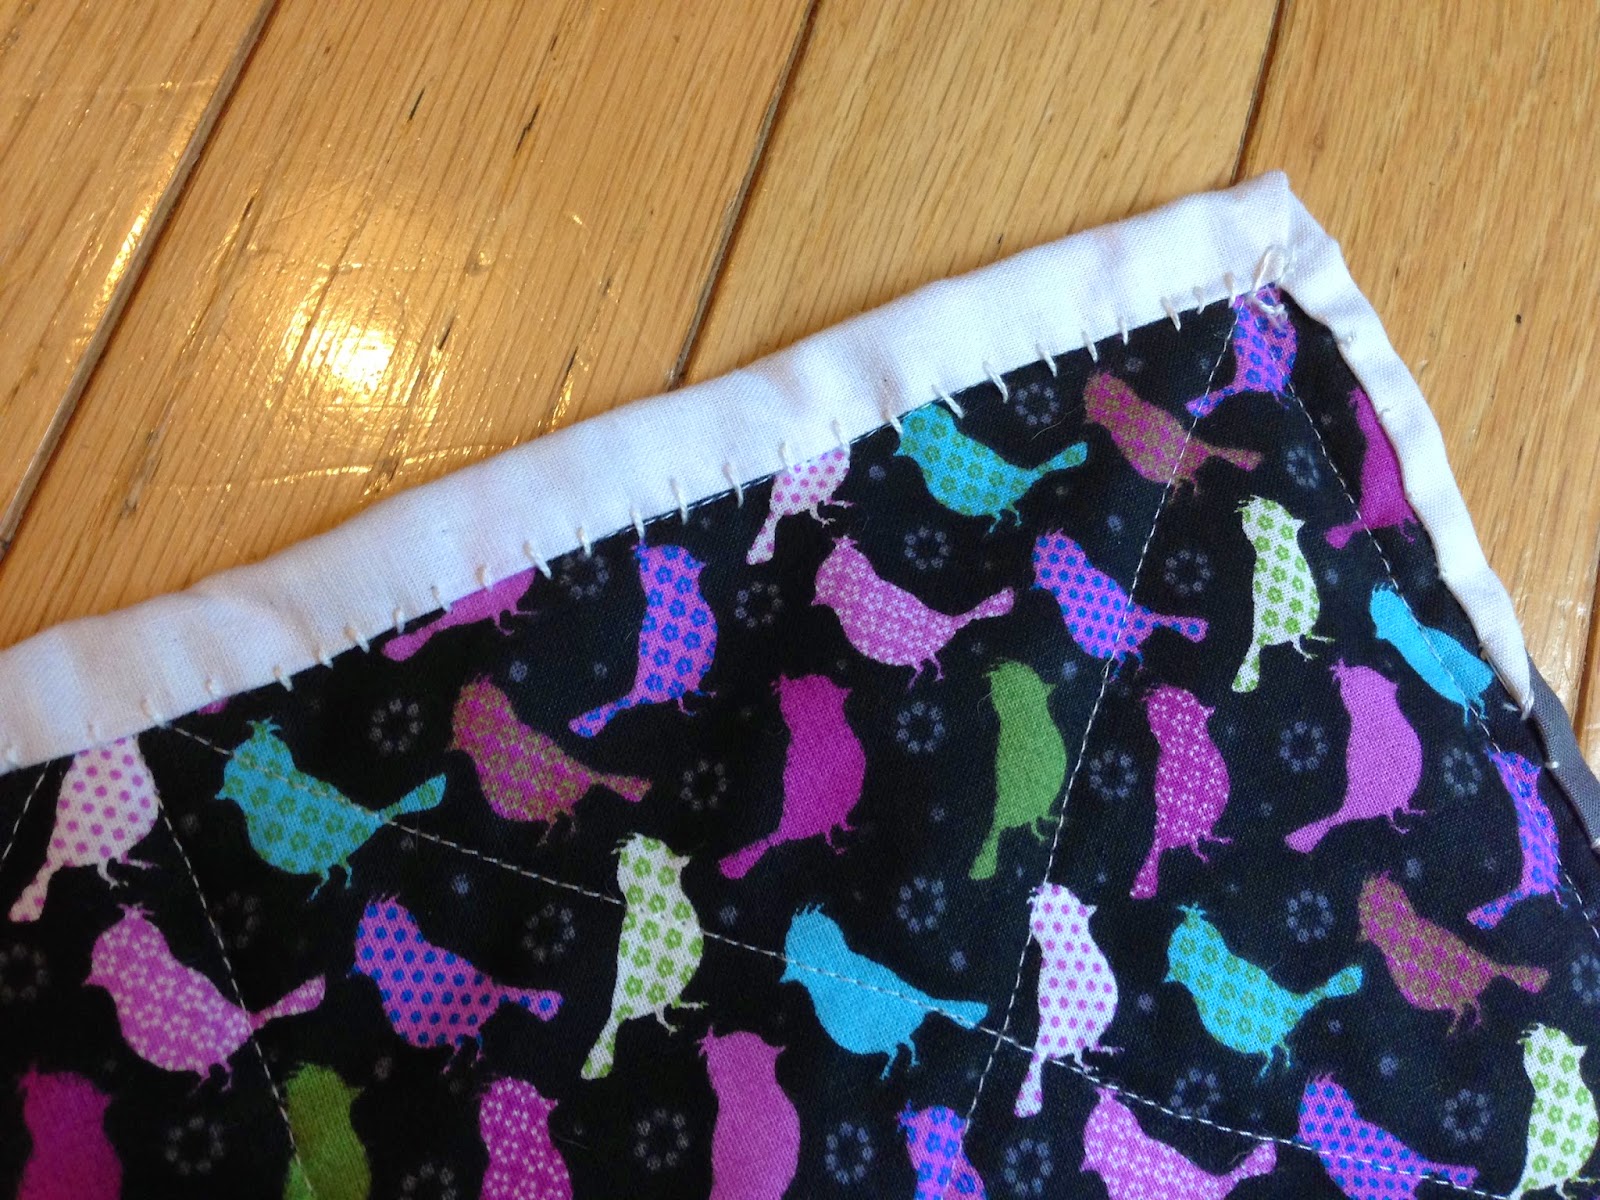
Before we knew the sex of the baby, I already had my heart set on a forest theme.  I wanted blues, greens, and browns for the color scheme, all because I fell in love with a picture from Pinterest.  Once we knew we were having a girl, I made the theme feminine with the patterns, textures, and details.  Birds became a recurring theme, white elements with curls and spirals were introduced by way of the floor lamp and the little bunny potpourri holder, and I chose that great floral crib sheet.  I think it all came together in a great way, not in a traditional girly theme but still feminine.  To me, it's Mod Cloth meets Etsy.

Anyway, on to the organization tips!  

1. Double Duty Furniture. First up is my furniture find with the two-in-one crib and changing table.  I simply placed a changing pad on my son's dresser with our first rodeo, but that did mean I needed a nearby stand to hold all the diapers and wipes.  It worked, but I knew there could be better options.  I liked the idea of the corner changing tables as another space-saving approach, but fell in love with the crib I found on Wayfair.  Everything is close and easy at hand, but takes up less space than having separate pieces to accomplish the same goal.

2. Double Duty Decorations.  That bird cage with the twinkle lights?  It's both adorable AND serves as a dim light for middle of the night wake ups, diaper changes, feedings, etc.  Why have a separate table lamp when we can combine needs and style this way?  I also wanted a cute bird house for the room, and realized I needed a hook to hang wet laundry.  Screw a hook into the bottom of a $1 birdhouse from Michaels that I painted white, and we're in the double duty decoration business.  It really is that easy!

3.  Store Like Items Together.  This may seem intuitive but really, it needs to be said.  Each type of thing does not need its own storage space.  You do not need separate drawer space or storage bins (as cute as they may be) for swaddle blankets, burp cloths, crib sheets, pack and play sheets, bassinet sheets, etc.  Think about the function of the item, and group like that.  Here's how the changing table shelves are organized, as an example:

Now, diapers and hair bows may not seem like they go together, but when I'm doing quick work on the changing pad, they're things I like to have right at hand and don't have to fuss around with.  I'm not gazing adoringly over hair accessories all laid out nicely in some display- I'm grabbing one from a stash that isn't taking up valuable drawer space.  Because of the size of my basket, I can fit 3 rows of diapers but have an extra couple inches of otherwise wasted space.  I thought of what else would fit in that area and also be necessary to grab with ease, and that's when the bows came to mind.
Take a look at the next container for medical items- I needed something with a low side so I could easily pump some hand sanitizer without picking it up out of the bin, and where I could arrange things like diaper rash cream where they wouldn't be in a jumble.  Lesser-used items like q-tips, baby tylenol, baby oil, and lotion are further back.  I even have a few spare pacifiers tossed in there.
I have a pack of wipes on top of the changing pad, and the refills are in the big basket at the back, as well as nursing items like extra pump parts, creams, etc.  This is my stock basket if you will- things not in the daily rotation.  It's my baby supply pantry I guess.
Next row down, at the front we have swaddle blankets (both small and large, cotton and muslin, as well as those velcro kind) and burp cloths.  The thinking again is- what do I need frequently, and needs to be easy to grab?  Well, we go through swaddlers and burp cloths all day every day at this stage, so they get pride of place at the front of the shelf where they can be grabbed the moment that Mount Vesuvius of spit up starts to bubble in my daughter's mouth.
At the back are the backup items again, this time for all things fabric- sheets, covers, towels, etc. that are not necessarily daily use.  That basket is stacked to the brim.  I don't mind digging through the assorted treasures in there for what I need because I'm not doing it often.  And that's the big trade off you make with the small space- use prominent space for the essentials needed all day every day.  Use tucked away spaces for the infrequent items, lumped together (though still organized).
Underneath the shelves I have the humidifier tucked away, as well as my memory box for odds and ends during baby's 1st year.  When she outgrows favorite outfits, gets special cards from family, a growth chart or two from the pediatrician, those things will get put away in the box along with our hospital bracelets and her crib card.  I may or may not turn some things into a scrapbook, but I like having a set place to toss these little items without having to think about what I may or may not do with them down the road.  The important thing is that there IS a designated box for them, instead of having them squirreled around the nursery, my room, the attic, etc. and that it is easy to get to so those special items don't pile up in a "to be organized" stack.
This is the same mantra for baby toys stored in the ottoman, and stuffed animals and blankies in the basket next to the crib.  Need something soft and snuggly, or something fun?  To me, those are different purposes, and are needed with different degrees of urgency.  Soft comfort item- NOW! means instant access with a basket.
Even the dresser is organized this way.  Daily clothes in the top drawer (grabbed most often).  Pajamas and socks in the 2nd drawer, typically only used once a day.  Larger clothes baby girl can't wear yet are in the 3rd and 4th drawers.

4. A Nursery can Store Other Things, Too.  Before this room was an adorable nursery, it was a guest room, office, gift wrap central, and storage room for more frequently used things.  We gave the daybed to a friend, shifted some of the storage to other areas in the house, moved a bookshelf to the living room, and donated end tables to Goodwill.  That pretty much cleared out the main space of the room, but the whole closet was still full and more than that, still in use.  This was needed space that was working well for us, and at a certain point I realized that didn't need to change.  Now, I will need to baby proof that space with time, but for now I realized that my family can still use the closet space in exactly the same way.  Just because this is the baby's room doesn't mean that all other things must be banned.  So here is the dirty secret behind those cute closet curtains:

The closet still houses important documents, ribbons, fabric, gift wrap, and office supplies.  It now has the pleasure to keep a baby gate for future use and boxes of diapers.  Eventually the little girl clothes will take over this space, but for now we're good, and I think that is my biggest motto of parenting: do what works for today.  When it doesn't work anymore, find a new way, but figure it out when the time comes.  :)

August 18, 2014

My First Quilt!

Last night, I finished my very first quilt.  BIG sense of accomplishment here!  I had been thinking about trying a quilt for my daughter's nursery, and within days of that thought was given some fabric for just that purpose.  That was all the nudge I needed!  A month and lots of lessons learned later, I have this gem to show off:


I used the great tutorials from Lella Botique as well as a few other Pinterest pins, the Googles, etc. with bits of advice I picked up over time.  "Stitch the ditch" for example is a choice phrase I loved before I even knew what it meant, let alone got to do it in practice, singing "stitch the ditch!" in my head as I worked.
I'm not going to walk through how I got all this done, as the tutorials do that quite well and I didn't take pics along the way, but I will share some things I learned from experience (and jot them down to jog my memory later).

So, I started this project after getting the pink toile fabric with the Mother Goose scenes and the white birds.  I decided to cut out my two favorite scenes and some of the bird border.  The scenes were great but more traditional than my usual decorating style.  This actually worked well for the nursery, where I've been blending mod design with feminine touches.  Think geometric bedding and a shabby chic lamp.  So continuing with that, I paired the toile with a mix of mod and classic fabrics.  I thought the yellow stripes, grey bunnies, and pink/white squares did the traditional trick nicely.  Chevrons, arrows, and black fabric with birds brought out the mod.  I loved the black fabric and used that for the backing on the quilt.

Lesson 1: editing.  You know I have no problem editing, and that certainly held true with quilting.  I actually bought a couple more kinds of fabric which didn't make the team in the end.  While I loved them in the store, when everything was laid out on the table they just weren't jiving with the rest.  At first I was fighting it, but as I removed those squares and rearranged I saw just how right it was to keep them out.  While the thrifty side of me didn't like "wasting" that fabric I had just paid for, my artsy side knew this was a good move.  I saved the other squares and will keep them on hand for future projects because like I said, I did like them.  I'm not sure how I could have done that editing job in the craft store prior to purchase, but c'est la vie.  This lead to...

Lesson 2: planning.  I quickly learned that in quilting, rough estimates don't do the job.  You really do need to effectively plan out your piece before you set foot in a fabric store.  This way you'll know just how much you need in total fabric, and with some good calculations you'll be able to make simple adjustments as you change the number of fabrics you fall in love with from say, 5 kinds to 7.  Don't forget the backing fabric or the binding to do the edges.  Actually figure out how much you'll need for that.  I lucked out that my thought of "1 yard will do the job for the backing" sufficed, but didn't leave me with much to spare.  My hunch that a fat quarter would give me enough fabric to do the binding was definitely not accurate.

Lesson 3: Be comfortable making adjustments.  The instructions I had followed were all for basic quilts with 6" squares, not making any kind of patterns with the blocks.  Just fine, but I had these two larger pieces.  How did I make those work?  Logical me thought that if I just added some fabric to the larger pieces to make them total up to 12" square all would be well.  I didn't realize/think through that when the surrounding squares were sewn together, they would not in fact be 12" wide or 12" tall because I was losing bits all over to the seams.  Oops.  I had to take apart some pieces, sew together again, take apart more, sew again, etc. until I got things appropriately cut down to size and situated properly.  This meant that the text at the bottom of the scenes (Hey Diddle Diddle and Little Bo Peep) got sucked into the bottom seams, but I made my peace with that because far be it for me to flip out over this lesson.

Lesson 4: Improvise.  Now, this is similar and yet different from lesson 3.  This isn't just about making do- it's about being creative as well, and making the project your own.  I think this is key to sewing for me, and makes these things mine and better than factory made.  I quilted Xs through the fabric squares, but didn't want a big X through each of the Mother Goose scenes.  How to quilt those pieces in place, then, and keep the batting from shifting around on the inside?  Improvise by back stitching incorporated into the scenes.  In Little Bo Peep, I stitched the outline of the barn and one of the sheep.  For Hey Diddle Diddle, I sewed in with the clouds which is all but invisible, and along the dog.  I was so happy with how that turned out!


Lesson 5: Be patient and forgiving.  I needed some coaching from a friend when I was distraught over my imperfect lines, and avoided beating myself up for not getting things just right or having to redo portions.  This was my first try- these lessons are to be expected and in fact really good to go through.  As I stitched the binding on the back, I just had a mantra of "practice makes perfect" and kept at it, even though I felt like my initial stitches looked like the work of an earnest but clueless 5-year-old trying to sew.  By the end of the stitches, I was pretty proud of myself.  When I looked again this morning, things didn't look nearly as haggard as I had made them out to be in the moment.  So time, distance, and patience really are worthwhile here.

A bit Frankenstein-like?  Perhaps a bit clumsy, but honestly not SO bad.

Smaller stitches, more closely spaced.  Looking better now!

So there we have it.  :)  First one done, lots learned, and excited to do another!  I'm thinking of doing a herringbone quilt for the living room next.  Wish me luck!

July 26, 2014

Scrapbook Paper Globe and Bird Mobile

In the months leading up to my due date, I had my heart set on making a mobile for my daughter's nursery.  I knew I wanted to make it with scrapbook paper to get some patterns into the room, and incorporate twigs or branches in some way.  I perused Pinterest to get ideas, and really liked these globe mobiles that cropped up in my search.  I also thought that birds would be a great way to tie the mobile to the rest of the forest theme in the nursery, and if I suspended these from a great branch we'd be in business.  I started making the globes and had them set aside, ready to suspend from a perfect branch I nabbed in the nearby woods one day, and then baby girl's early arrival interrupted things for a while.  Once I resumed the mobile assembly, some of my globes were a bit wonky and more pumpkin-y than I'd intended, but in my new mindset to accept the imperfect, I let it go and in the end, I think it all worked out just fine.  :)


I basically followed the globe instructions from this site.  I made the birds up on my own.  Here are step-by-step pictures for both.

Supplies

  • Scrapbook paper (variety of sheets)
  • Brads (twice the number of globes you want, as each globe will use 2 brads)
  • Tape
  • String
  • Picture-hanging wire
  • Tree branch or bundle of twigs
  • Ceiling hook
Directions

The globes are really straightforward.  Cut 6-10 equal strips of scrapbook paper.  Hole punch each end.  Stack and run a brad through the hole at each end of the stack.  Fasten brad, then fan out scrapbook paper to form a globe.

I varied my scrapbook paper length and width.  This was one of my biggest globes, about 2/3 of a sheet of scrapbook paper cut into 1"-wide strips.  For others, I folded my scrapbook paper in half and made 1/2"-thin strips.  I think the variety is really important!

Hole punch each end.  My hole punch was weak sauce so I could only do a few strips at a time, then stacked them when all punched.

Put a brad through and fasten.  I was really happy to find these brads with the little jewels on them- perfect bit of sparkle to catch baby's attention amid all the patterns!

Now at this point, you can assemble your globe one of two ways.  

Way 1: Here, I fanned out the paper and then fastened, strip by strip, around the other brad.  After trying way 2 (below), I quickly abandoned this approach.  Still, I wanted to share.

Holding and slipping each strip over the brad.  Tedious.

Brad fastened.  The wrong way.  Gah!  Had to take it out and try to carefully slip it back through, sparkly-side-out.


Way 2:  Just put a brad through the punched holes at each end of the stack of paper strips.

Fan out strips to make a globe.  How easy is that!?

However you get to this stage where your globe is globe-y, you may end up with droopy deflated balloon-looking globes.  My secret is to tie a string from one brad to the other, shortening the gap between the top and bottom so you get a globe!


 The birds were fun to make, in my opinion.  They were also a nice way to make use of excess bits of paper.  :)

Start with two equal strips of paper, at least 1" wide.  Arrange with blank sides together.

Tape together at each end.  You actually want the papers nicely lined up- I just shifted them a bit here so you could see I was taping 2 pieces together.

Both ends taped together.

Next, insert a third piece in between your taped pieces- pattern facing up.  This piece will be the same width, but only about 3/4 the length of your other pieces.

Pinch the front of your bird, holding all 3 pieces of paper together.  Tape around the edges to hold at least an inch or so of paper in place where you were pinching.

Taped portion where I had pinched shown to the left.  My bird's beak!  Next, pinch the 3 pieces together at the other end.  Notice that you'll be curving the longer top and bottom pieces to make them meet the shorter middle piece.  This gets your bird shape started.

Tape small bit at opposite end to secure all pieces together.

This part is a little weird to explain.  Manipulate the excess paper so that your curve at the top is toward the front (left side) if your bird, making the head, and the bottom curve is toward the middle of the back, forming the bird's stomach.  Basically, this just means pinching the top 2 pieces of paper together at the middle.  Tape in place.

Side view when taped.

Next up- the wings.  Cut two hill shapes out of scrapbook paper the same width as the rest of your bird.

Arrange over center of bird's back and tape into place.

Fold down gently where wings extend past body.

Poke a small hole with a needle and thread with string to suspend from mobile branch.


When your globes and birds are complete, it's time to arrange on the branch!  For the globes, tie one end of string around top brad with a secure knot (or 2 or 5), then wrap other end of string around branch multiple times and knot in place.  Arrange at different heights.  Hang birds at random as well.

Wrap picture wire around one end of branch, extend to other end of branch and draw out a lot of excess.  Wrap other end of wire around other end of branch.  In the middle, twist wire and loop so it can go over ceiling hook.

Screw ceiling hook into ceiling.  Hang mobile!