This easy-to-follow post helped direct me, but I made changes based on the materials I was using and what I had in mind. I wanted to use an ottoman I already liked, so that I could remove the mushroom covering when the baby outgrew the nursery theme. I'm thinking long term reuse here! I also wanted a separate lid, rather than a one-piece affair, so I could use it for toy storage. Storage is EVERYTHING these days.
I worked on this project on and off through the day, probably a few hours in total, and spent roughly $50 on supplies. I call it a win. :)

Supplies
- 1 lidded pre-made storage ottoman, or bucket with a lid
- Fabric to cover base and lid, measured to fit (mine was 2 1/2 yards off white for base, 1/2 yard red for lid)
- Scraps of white fabric to cut into circles
- Scraps of green felt for grass accents
- Pins
- 1/2" to 1" foam pad for lid
- Electric carving knife
- Cotton batting
- Staple gun and medium staples
- Scissors
- Sewing machine and thread
Directions (pictures to follow)
- Iron all fabrics, focusing on steaming out any deep pleats or wrinkles. The fabric will get a bit wrinkled again as you work, but will look fine when stapled into place in the end as long as you don't have any deep wrinkles.
- Trace circles of varying sizes onto scrap white fabric. I used measuring cups, prep cups, a drinking glass, and a tablespoon to get my sizes. Cut circles from fabric.
- Lay out red fabric and pin circles in a random arrangement in center. Sew in place.
- Cut foam pad to fit on top of lid without any overhang. Then trim corners and edges to make a rounded shape. It does not have to be neat and can even be lopsided for extra character.
- Roll cotton batting onto sides of storage ottoman base, overlapping slightly or even rolling enough for two layers. Arrange so that there is at least 2" of overhang on both the top and bottom of the ottoman. Pin into place.
- Stand ottoman on end, but be careful not to pull the batting to lose the overhang on the bottom. Staple batting to the inside lip of the ottoman. Flip upside down, and staple batting to bottom of ottoman, pulling taut. Remove pins from vertical seam.
- Arrange foam on ottoman lid, and lay batting on top. Flip upside down, and staple batting to underside of lid, pulling taut but not so tight that you squish the foam. You can use the existing ottoman fabric as a guide on where to staple the batting in place. Staple the batting just at or past where the current fabric ends, likely about 1" in from the edge of the lid. Trim excess batting.
- Lay red fabric on top of batting-covered lid, arranging so that your white circles look good to you. Note that some of mine extend under the edge of the lid. The idea is that your project does NOT look perfectly arranged, but more random and natural, adding to the cute whimsical look. Flip lid upside down and staple into place, pulling fabric taut as you work, just as you did with the batting. Trim excess fabric.
- Roll off white fabric onto the ottoman base just like you did with the batting earlier. Pin into place if needed, though the batting may hold it nicely in place. Be sure to leave at least 2" fabric overhang on both the top and bottom, then flip and staple the top end under the lip. Flip upside down and staple the fabric to the bottom of the ottoman, pulling straight and taut, adjusting as you work so that it remains taut. Trim excess fabric where necessary, especially on bottom of ottoman so it sits flat.
- Cut green felt scraps into grassy pieces, and lay in place. Attach with spray adhesive, hot glue, or by hand sewing. I went with hand sewing because I didn't want to risk damaging the existing ottoman fabric with glue stains.
- Place lid on top and marvel at your awesome re-purposing skills, because seriously wasn't that pretty straightforward?
The before. Very pretty, and I'll love having this even when it's no longer a mushroom.

Circles cut and pinned into place. I told you- keep it random!

Circles are now sewn on. I showed the fabric all laid out so you could see how I placed everything in the center of the fabric.

Foam trimmed at the corners and edges so it isn't boxy, but instead slope-y. My foam was a thin rectangle (and also reused! It was cushioning in a mailed package.) so I actually cut it in half and made two layers which I cut together. Spray adhesive would definitely help here to keep the layers attached to each other.

Bottom covered in batting, and stapled in place.

Time to cover the lid! Foam laid on top, then layer of batting over everything.

Batting in place, and now time to arrange the red fabric with an eye toward how those circles look.

Half the fabric stapled in place to lid, and I needed to trim so I could keep working without getting lost in fabric.

Close up of stapling to inside of lid.

SO close to done! Really!
Off white fabric laid out, showing the excess allowed on the top and bottom of the ottoman base. I rolled the ottoman up in the fabric, pulling taut as I did so to keep it nice and tidy.

Stapled in place along the top, under the lip of the ottoman. I actually didn't trim the excess fabric because it wasn't too bad here, and not really troublesome anyway.

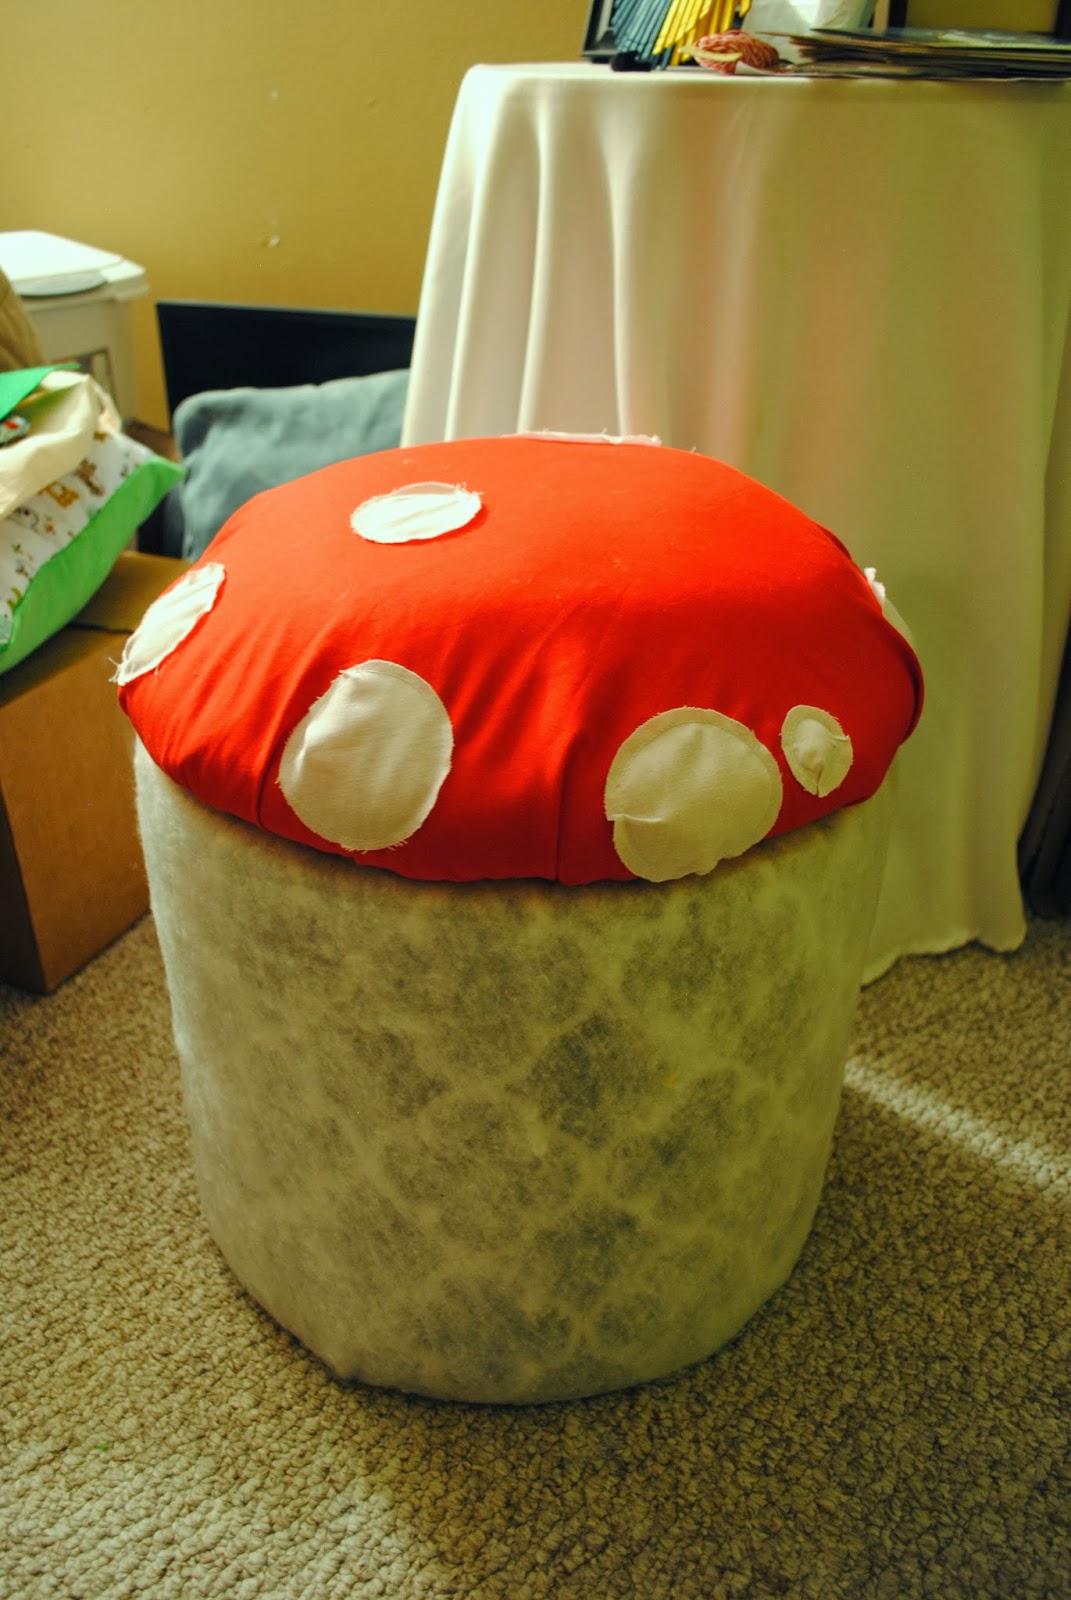
Ooo, lid on top of the covered base!

Felt cut and laid in place, then hand stitched on. TA DA! All done!

No comments:
Post a Comment
You want to comment? Awesome! Have at it, rock star.