
I'm not going to walk through how I got all this done, as the tutorials do that quite well and I didn't take pics along the way, but I will share some things I learned from experience (and jot them down to jog my memory later).
So, I started this project after getting the pink toile fabric with the Mother Goose scenes and the white birds. I decided to cut out my two favorite scenes and some of the bird border. The scenes were great but more traditional than my usual decorating style. This actually worked well for the nursery, where I've been blending mod design with feminine touches. Think geometric bedding and a shabby chic lamp. So continuing with that, I paired the toile with a mix of mod and classic fabrics. I thought the yellow stripes, grey bunnies, and pink/white squares did the traditional trick nicely. Chevrons, arrows, and black fabric with birds brought out the mod. I loved the black fabric and used that for the backing on the quilt.
Lesson 1: editing. You know I have no problem editing, and that certainly held true with quilting. I actually bought a couple more kinds of fabric which didn't make the team in the end. While I loved them in the store, when everything was laid out on the table they just weren't jiving with the rest. At first I was fighting it, but as I removed those squares and rearranged I saw just how right it was to keep them out. While the thrifty side of me didn't like "wasting" that fabric I had just paid for, my artsy side knew this was a good move. I saved the other squares and will keep them on hand for future projects because like I said, I did like them. I'm not sure how I could have done that editing job in the craft store prior to purchase, but c'est la vie. This lead to...
Lesson 2: planning. I quickly learned that in quilting, rough estimates don't do the job. You really do need to effectively plan out your piece before you set foot in a fabric store. This way you'll know just how much you need in total fabric, and with some good calculations you'll be able to make simple adjustments as you change the number of fabrics you fall in love with from say, 5 kinds to 7. Don't forget the backing fabric or the binding to do the edges. Actually figure out how much you'll need for that. I lucked out that my thought of "1 yard will do the job for the backing" sufficed, but didn't leave me with much to spare. My hunch that a fat quarter would give me enough fabric to do the binding was definitely not accurate.
Lesson 3: Be comfortable making adjustments. The instructions I had followed were all for basic quilts with 6" squares, not making any kind of patterns with the blocks. Just fine, but I had these two larger pieces. How did I make those work? Logical me thought that if I just added some fabric to the larger pieces to make them total up to 12" square all would be well. I didn't realize/think through that when the surrounding squares were sewn together, they would not in fact be 12" wide or 12" tall because I was losing bits all over to the seams. Oops. I had to take apart some pieces, sew together again, take apart more, sew again, etc. until I got things appropriately cut down to size and situated properly. This meant that the text at the bottom of the scenes (Hey Diddle Diddle and Little Bo Peep) got sucked into the bottom seams, but I made my peace with that because far be it for me to flip out over this lesson.
Lesson 4: Improvise. Now, this is similar and yet different from lesson 3. This isn't just about making do- it's about being creative as well, and making the project your own. I think this is key to sewing for me, and makes these things mine and better than factory made. I quilted Xs through the fabric squares, but didn't want a big X through each of the Mother Goose scenes. How to quilt those pieces in place, then, and keep the batting from shifting around on the inside? Improvise by back stitching incorporated into the scenes. In Little Bo Peep, I stitched the outline of the barn and one of the sheep. For Hey Diddle Diddle, I sewed in with the clouds which is all but invisible, and along the dog. I was so happy with how that turned out!


Lesson 5: Be patient and forgiving. I needed some coaching from a friend when I was distraught over my imperfect lines, and avoided beating myself up for not getting things just right or having to redo portions. This was my first try- these lessons are to be expected and in fact really good to go through. As I stitched the binding on the back, I just had a mantra of "practice makes perfect" and kept at it, even though I felt like my initial stitches looked like the work of an earnest but clueless 5-year-old trying to sew. By the end of the stitches, I was pretty proud of myself. When I looked again this morning, things didn't look nearly as haggard as I had made them out to be in the moment. So time, distance, and patience really are worthwhile here.
A bit Frankenstein-like? Perhaps a bit clumsy, but honestly not SO bad.
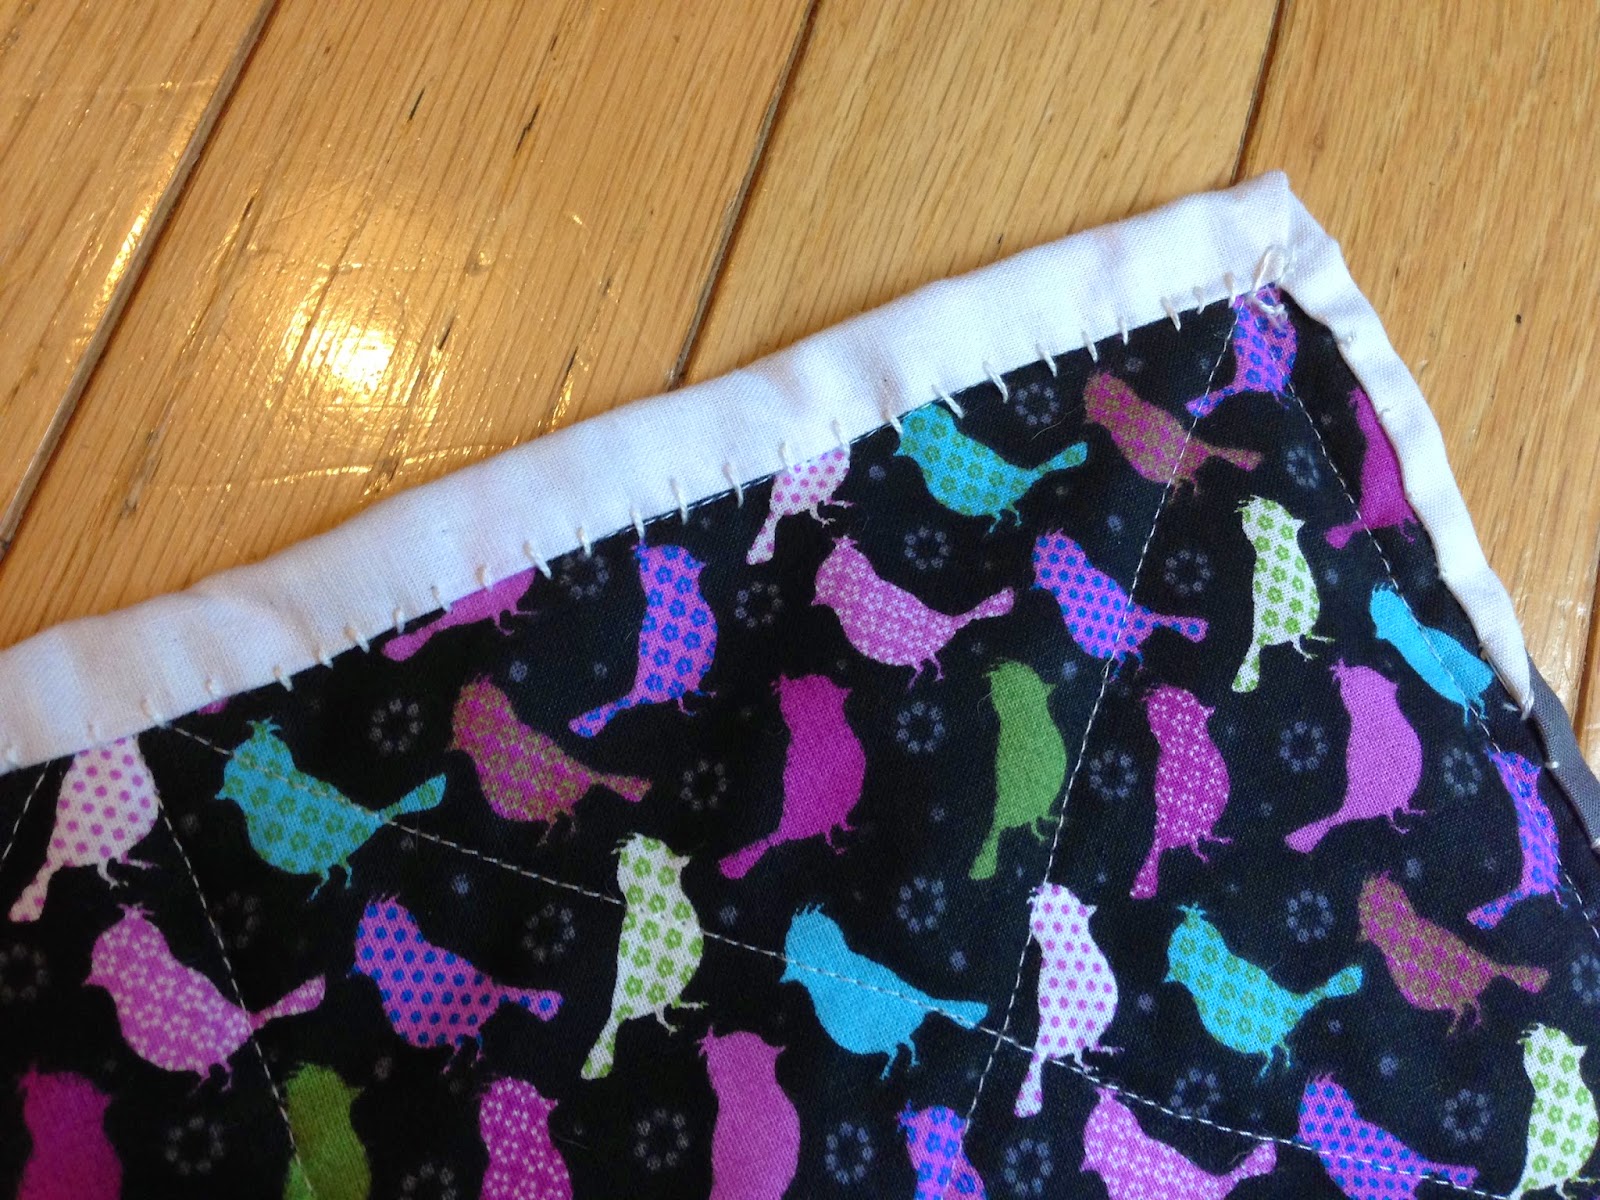
Smaller stitches, more closely spaced. Looking better now!

So there we have it. :) First one done, lots learned, and excited to do another! I'm thinking of doing a herringbone quilt for the living room next. Wish me luck!
No comments:
Post a Comment
You want to comment? Awesome! Have at it, rock star.