May 26, 2014

Red, White, and Blue Streamer Wreath

I saw this idea for a patriotic streamer on Pinterest, and unfortunately the pin goes to a defunct Tumblr page.  Oh well- I got the gist of it from the picture so no harm there.  Best part is that this is something you can make with whatever materials you have on hand.  I already had the right colors of streamers, but could just have easily used tissue paper, construction paper, etc. cut to length or strung together.  This also turned out to be a great craft to do with my four-year-old while we discussed what Memorial Day was.  At this age, he loves spotting and directing patterns, so he was all over making sure the red, white, and blue streamers were in order.
 
Beautiful end result. :)

Supplies

  • Paper plate with the center cut out, to make your hoop
  • Red, white, and blue streamers
  • String or fishing wire to hang the wreath
Directions (photos follow)
  1. Cut center out of paper plate.
  2. Cut 6 lengths of streamer from each color, 2 or more feet long (arm's length).  While you want them all approximately the same length, exact measurements are not required.
  3. Tie streamers onto hoop one at a time.  To do so, fold streamer in half and hold looped end over rim of your hoop, with the loop kind of in the center.  Pull the loose ends of streamer behind the paper plate rim and through your loop.  Pull and adjust until the streamer is secure against the hoop.  If you pull too tight, you'll tear the streamer, but that's what tape is for.  ;)
  4. Repeat until hoop is fully covered.
  5. Tie a length of string around the hoop in one direction, and tie another length in the other direction, making an X over the opening of the hoop.  Tie another length of string where your lines cross, forming the X, and loop onto a garden hook, nail, etc. to display.
Center cut out of plate to make a hoop; streamers ready to go.

Blue streamer already done.  Time to do the next one.  Red streamer folded in half, loop over the plate, hanging out in the opening.

Loose ends of the streamer being pulled around the back of the plate and through the opening of the loop.

Pulled through all the way.  Now to tighten that little necktie-looking situation.

Gently tightened in place

Streamers all knotted in place, strings tied in an X over the hoop, and then knotted in the center and hung by a 3rd string.  I feel like I'm losing out on a football joke here.

Strawberry Shortcake Trifle- Two Ways

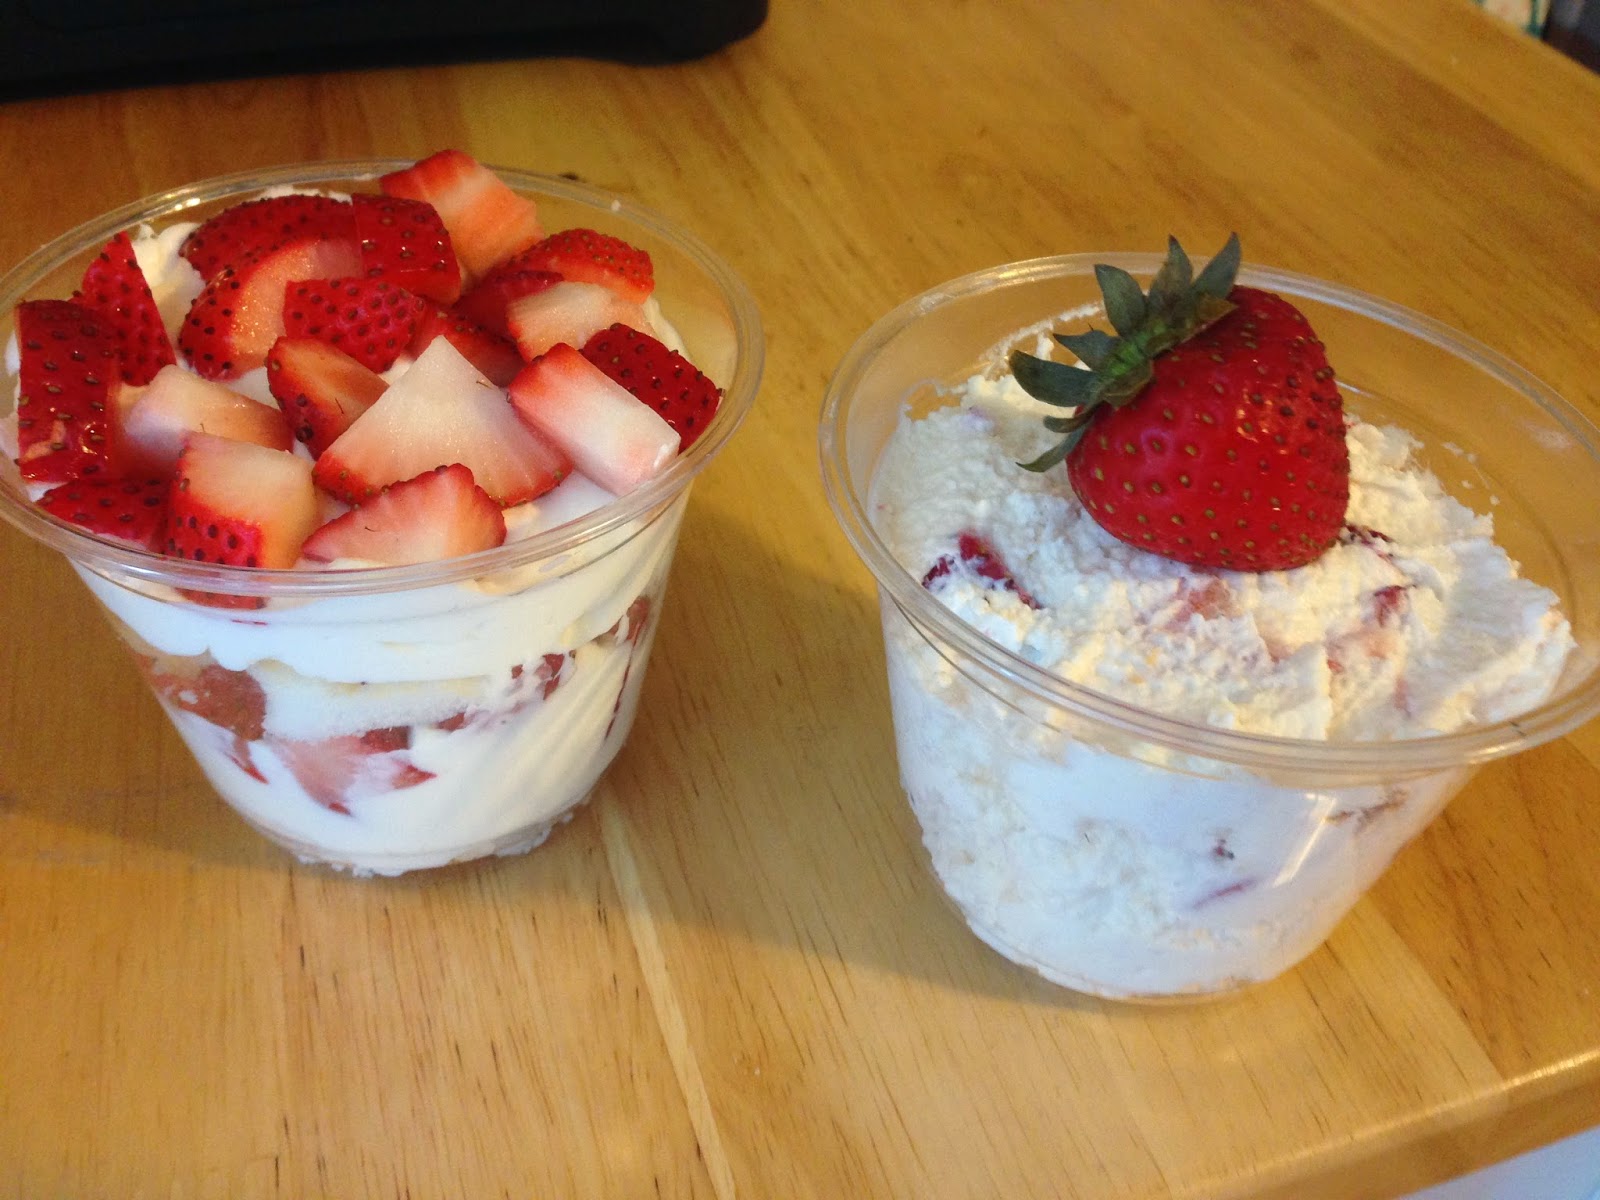
I've been seeing this tasty looking Strawberry Lemon Cheesecake Parfait pin crop up recently, and decided to give it a try this weekend.  While the flavors all seemed spot on, it didn't really look like an appealing dessert.  I decided to try two approaches- a traditional trifle with the components layered, and the mashed up style of the original recipe.  The "pudding" style (as I've dubbed it) does have the benefit of fixing the one thing I don't like about trifles- that you have to get a perfect spoonful through all the layers to get the flavors together.  After having tried both, I have to say that I like the pudding better!  I'll leave it to you to judge for yourself.  :)

The Odd Couple: The Neat and Tidy Trifle and the Wonderful Mess Pudding

[Note: The ingredients are the same for both approaches; the only difference is in whether you layer these ingredients or mix em all up.]

Ingredients

  • 2 cups heavy whipping cream
  • 1/2 cup powdered sugar
  • 1 teaspoon vanilla extract
  • 8 ounces mascarpone cheese
  • 1/2 cup lemon curd (or lemon pudding, or lemon meringue pie filling if you can't find/don't want to make lemon curd; the trade off is that these have milder flavors)
  • 1 pound or more strawberries, chopped
  • 1 whole angel food cake (store bought is JUST FINE here), cut into bite-size pieces
Directions
  1. Whip the whipping cream on high speed ~1 minute, using a stand mixer with the whisk attachment or a hand mixer.  Reduce speed to medium and gradually add powdered sugar, then vanilla.  Return speed to high and beat another minute or more until whipped cream is fluffy and reaches appropriate consistency.  Turn off mixer.  If using a stand mixer, switch to beater attachment.
  2. Add mascarpone cheese to whipped cream, and mix on medium speed until incorporated.
  3. Fold in lemon curd by hand.
  4. For the Trifle: Layer a large bowl or trifle dish first with angel food cake pieces, then whipped cream mixture, then strawberries.  Repeat layers, finishing with strawberries on top.
  5. For the Pudding: Fold strawberries and angel food cake into the whipped cream mixture.  Serve in small cups and top with strawberry garnish.

May 25, 2014

Dragonfly Craft

A couple weeks ago, my son was dead set on making a dragonfly out of a paper towel tube.  I don't know how this idea captured him, but far be it for me to stop creative genius, right?  ;)  It was easy enough to paint a cardboard tube and add on some pom pom eyes, but the real beauty here was trying out this aluminum foil coloring technique I saw on Pinterest a while back.  You glue yarn to paper, and cover with aluminum foil.  Press all around and color in the recessed areas to get vibrant results!  Perfect for dragonfly wings.


Supplies
  • Paper towel tube
  • Paint
  • 2 pom poms
  • Sheet of paper
  • Yarn, string, or pipe cleaners
  • Glue
  • Aluminum foil
  • Markers (Sharpie would be best)
  • Popsicle sticks
  • X-Acto knife or similar
Directions
  1. Paint paper towel tube and let dry.  While drying, make wings.
  2. Cut out 4 wing shapes (2 larger and 2 smaller) from paper.  Glue on yarn in different patterns to create wing designs.  Dragonflies have very elaborate patterns on their wings but just making some interesting line patterns will suffice.
  3. Lay aluminum foil on top of wing shapes and smooth out to see yarn designs come through.  Cut or fold aluminum foil to match wing shape.
  4. Color in recessed areas between yarn lines.  For toddlers, let the colors go wild.  Older kids may enjoy trying elaborate patterns with the colors.
  5. Cut 4 slits in sides of paper towel tube and slide popsicle sticks through.  Glue wings to popsicle sticks- bigger wings on top and smaller on bottom.
  6. Fold in bottom of tube to mimic tapered tail, or crumple and shape newspaper to make tail, then paint.
  7. Glue on pom pom eyes, and you're set to fly!

Caprese Pasta

I recently decided to delve into my older pins that I still haven't made, and had great success with this recipe from How Sweet It Is.  I did make some alterations, like just browning the ground beef instead of making mini meatballs, but in the end my recipe is pretty identical.  Served with a simple salad, this was an excellent meal all around.  My guests loved it, and my family will definitely be seeing more of this dish.  :)


Ingredients
(Serves 4-6)
For the beef
  • 1 pound ground beef
  • 1/3 cup freshly grated Romano cheese
  • 2 garlic cloves, minced
  • 1 teaspoon dried basil
  • 1 teaspoon dried parsley
  • 1/2 teaspoon salt
  • 1/2 teaspoon pepper
For the pasta
  • 1 pound pasta shells
  • 1 tablespoon olive oil
  • 2 garlic cloves, minced
  • 14-ounce can diced tomatoes
  • 1 pint grape tomatoes, halved
  • 10 fresh basil leaves, chopped
  • 8 ounces mozzarella, diced (or 8 oz mini mozzarella balls)
  • 1/3 cup pasta water, reserved
  • Freshly grated Parmesan cheese
Directions
  1. Set a large pot of generously salted water to boil.  Add pasta and cook according to package directions.  Reserve 1/3 cup of pasta water before draining.
  2. While pasta cooks, add all beef ingredients to a large pan and cook until browned.  Set aside.
  3. At the same time you are browning the beef, heat olive oil in a separate large pan set to medium heat.  Sautee garlic about 1 minute.  Add diced and grape tomatoes and basil.  Stir to coat in pan oil and juices.  Mix in up to 1/3 cup of the reserved pasta water to make sauce desired consistency (I didn't use much).  Cook just 2-3 minutes more until grape tomatoes are tender.  Set aside.
  4. In a large bowl mix the cooked pasta, beef, and tomato sauce.  Add the mozzarella and stir gently to combine.  Serve with freshly grated Parmesan cheese and basil garnish, as desired.
Extreme cheesy closeup!

May 3, 2014

Honey Lemon Chicken with Herbs

I recently came across this tasty looking pin on Pinterest, but it was one of those convoluted goose chases.  The link goes to an image, which goes to a web page in another language.  At least Chrome translated well enough for me, and the original pin had the basics covered in the description.  Cue some adaptations and winging it and I came out with a really flavorful way to make chicken!  I can't WAIT to give this a go on the grill.


Ingredients

  • 2 boneless chicken breasts; recommended to make with skin on, though I didn't
  • 1 clove of garlic, minced
  • Zest of 1/2 lemon
  • Juice of 1/2 lemon
    • Optional- reserve the used lemon to cut slices as garnish
  • 1/2 tablespoon honey
  • 1/2 tablespoon olive oil
  • 1/2 teaspoon Herbs de Provence (I used Penzey's Parisien Bonnes Herbes)
Directions
  1. Preheat oven to 375°.  Line a rimmed baking sheet with aluminum foil and spray with nonstick spray.
  2. Mix garlic, lemon juice and zest, honey, olive oil, and herbs in a small bowl.  Arrange chicken on prepared baking dish, and brush with honey lemon mixture on both sides.
  3. Bake 25-30 minutes, flipping halfway through, until fully cooked.  If using lemon slices as garnish, place on chicken during the last 10 minutes.
I recommend making this with my cheesy zucchini bake, which is what I did last night.  YUM.  Each dish had a lot of flavor, but they complimented each other rather than overwhelmed.  Definite keeper.  And like I said, I can't wait to try this chicken recipe on the grill.  I'm sure it'll be amazing.

Update:  Grilling is just as yummy!  My husband really liked that approach.  Just placing the chicken directly on the grill, though, I lost the herbs so it left a stronger lemon flavor without as much of the herb flavor.  Perhaps using a grill tray or something else would help keep more of the herbs in tact!  I also have no idea why one piece came out all grillified looking and the other looks the same as when I made these in the oven.  *shrug*

Unique Teacher Appreciation Gift- Mario Brothers Flower Power

Who knew next week was Teacher Appreciation Week?  I didn't, until yesterday morning.  Well that doesn't leave much time to get situated!  I am thankful that my son's preschool has a different theme to follow each day of the week if you want to, especially because it got me started in the direction on this little gift.
One of the days is for flowers, which is great for all the female teachers but poses a challenge for the lone male teacher in the school, who works in my son's room.  Mister Rob is awesome.  He's young and funny and drives a car covered in bumper stickers for Nirvana and other 90s alternative bands.  I wanted to do right by him, so cue this twist on flower day: Mario Bros. flower power!  Grab an image of that flower and attach it to a baggie of fire ball candy, and you're good to go.  Here's what I concocted.  The Courier New font was a required element, I think.  ;)


Have fun coming up with your own version on this theme.  I can't wait to see what people make.  :D