Showing posts with label Halloween. Show all posts

September 27, 2014

Copycat Pottery Barn Candle Holders: My First Flea Market Flip!


I recently discovered and fell in love with an HGTV show called Flea Market Flip.  It's basically rewarding people for their Pinteresty reinvention skills of an artist.  Now, my husband has always tried to convince me how rewarding a flea market scavenge can be, but after my first experience with an indoor flea market at a rundown strip mall near Pittsburgh, wherein people were selling all sorts of guns and ammo and more knives than I knew existed, I begged off.  It was an ongoing joke to take me to flea markets as a form of torture.  This show gave me a new perspective and willingness to try, though, so we found ourselves at the Harper's Ferry Flea Market in West Virginia last weekend.  We didn't have any specific projects in mind and just meandered, looking for things to catch our eyes.  There was one very cool trunk that I didn't investigate when we walked by, and later regretted because it was gone on our way out.  Lesson learned.  What we did walk away with was this little stash:


2 lanterns: $8
Side table: $5
Pillar candle holders: $2
Magazine caddie: $10

I can't even imagine where else $25 would get me so far.

So the first find was that pair of candle holders.  We were walking down a row and I immediately locked eyes with those.  I hated the bubbled green treatment on them, but they had great shape.  The #1 rule I hear from Flea Market Flip and every other makeover/DIY show I've watched is to look for good bones, and sure enough the underlying shape of those cheap ceramic candle holders was one I liked a lot.  I knew that with a coat of glossy black spray paint, they'd look Pottery Barn worthy.  Turns out I was spot on.  Check out this set I could have spent $70 on instead of my $2.


Oooo I love the feeling of a good deal!  Muahahahaha.

So first things first- cleaning up these holders.  They had old wax drips on them and a layer of dust/grime.  Because they're ceramic, I used a plastic child's spoon to scrape off the wax without damaging the base.


You've gotta go, gunk.

Once the wax was scraped off and I gave them a nice scrub with my Mister Clean Magic Eraser (really- it's magic), it was time to spray paint.
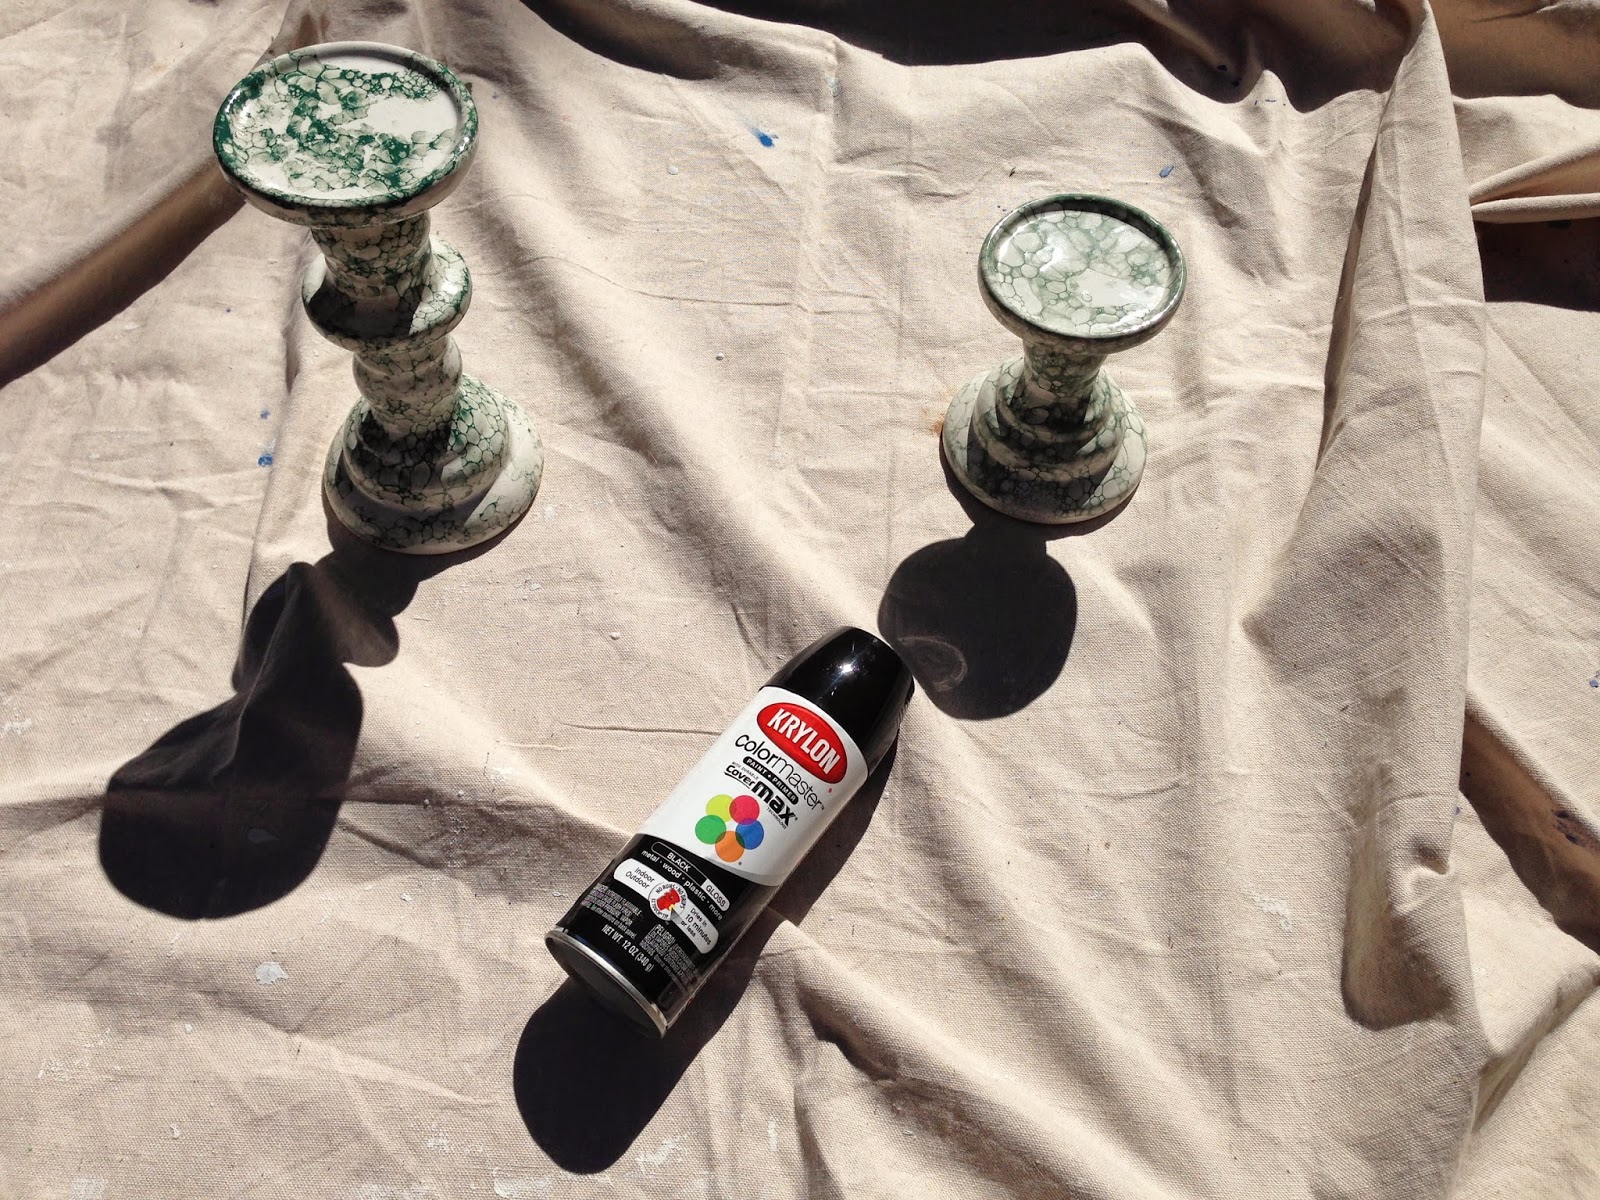
I used Krylon shiny black spray paint and checked the back of the can to make sure it would adhere to glass and ceramic.  The candle holders are made out of ceramic but the coating on them was glassy, and I wanted to be sure the spray paint would adhere well.  I'm happy to report that yes it did!

I sprayed on two coats.  The first one was as shown here, with the holders upright.


I let that dry, then flipped upside down and did coat #2 to catch everything from the opposite angle.  This was my first time spray painting in a LONG time, and I could have been more careful about making sure I did a good job at the base.  It was too sunny outside to really see where I was missing spots, and I only noticed that I didn't have a completely even coat until I was inside.  I am just being overly critical, though.  They look great- I'm just sharing advice on what I encountered. Anyway, when spray painting, remember- nice even spraying at a good distance, and be careful you don't overload with paint and cause drips.

End result: don't they look great?!  And I'm not talking just for Halloween, here.  They'll be wonderful all year long.

September 13, 2014

Mummy Onesie!

This quick baby craft came courtesy of my friend Kelly, who sent me this adorable pin a whole day before the most recent Pinterest party.  Sneaky Kelly!  How could I resist?  Luckily this little treat is SO SIMPLE, I already had everything on hand at home.

So cute!!!

Supplies

  • White baby onesie
  • Gauze or strips of white fabric
  • 2 googly eyes
  • White thread and needle
Directions
  1. Sew strips of gauze criss-cross on the onesie.  I only attached mine at the ends, but I may go back over it and sew down the whole way on each strip.
  2. Poke needle through the back of a googly eye and thread through.  Sew to the onesie and knot firmly.  Repeat for the other eye.
How easy is THAT?!

Fall Pinterest Party Roundup

Today was the latest Pinterest party, and I put those hours to good use!  I made my chubby hubby cookies as my food offering to the crafting Gods, and set out to make 2 frames and a mummy onesie.  I didn't progress to the ghost yard decoration for Halloween, but there's still plenty of time to get around to that.  :)

I have little write ups below, with links to full posts on each craft to walk you through it step by step.

First up was the versatile photo frame.  Painted a frame with some interesting detail, put scrapbook paper on the frame backing, and hot glued a bull dog clip.  I plan to have this at my desk at work, where I can swap out pictures easily and have something colorful in the office.  Lord knows that is necessary.


Next up was the bunny silhouette for the nursery.  I painted one of those cheap laser cut frames from Michaels, added burlap backing, cut out a bunny silhouette, and glued on a little bow for good measure.  SUPER easy and I absolutely love it.  I plan to decorate this bunny throughout the year.  Maybe he'll get a little mask for Halloween and a Santa hat at Christmas.

And lastly, the mummy onesie!  I sewed on some gauze and googly eyes, and we were in business.


Here's my lovely daughter showing her enthusiasm for this cute getup!

October 27, 2013

Grape Demon Eyes (filled with goat cheese and pistachios)

Continuing our trend of creepy and delicious original creations, here's a twist on one of my favorite appetizers: grapes rolled in goat cheese and crushed pistachios.  Same flavors, different display.  While this is a snack that scares off many people for multiple reasons, for those who enjoy it it hits the spot wonderfully.


Ingredients
  • 24 green grapes
  • 24 pistachios, shelled
  • 1-2 ounces goat cheese
Directions
  1. Cut a hole in the middle of each grape and fill with goat cheese.  Press in pistachio.
  2. Arrange in pairs on a plate or serving tray and chill until ready to serve.

Witches' Fingers (chocolate covered pretzels)

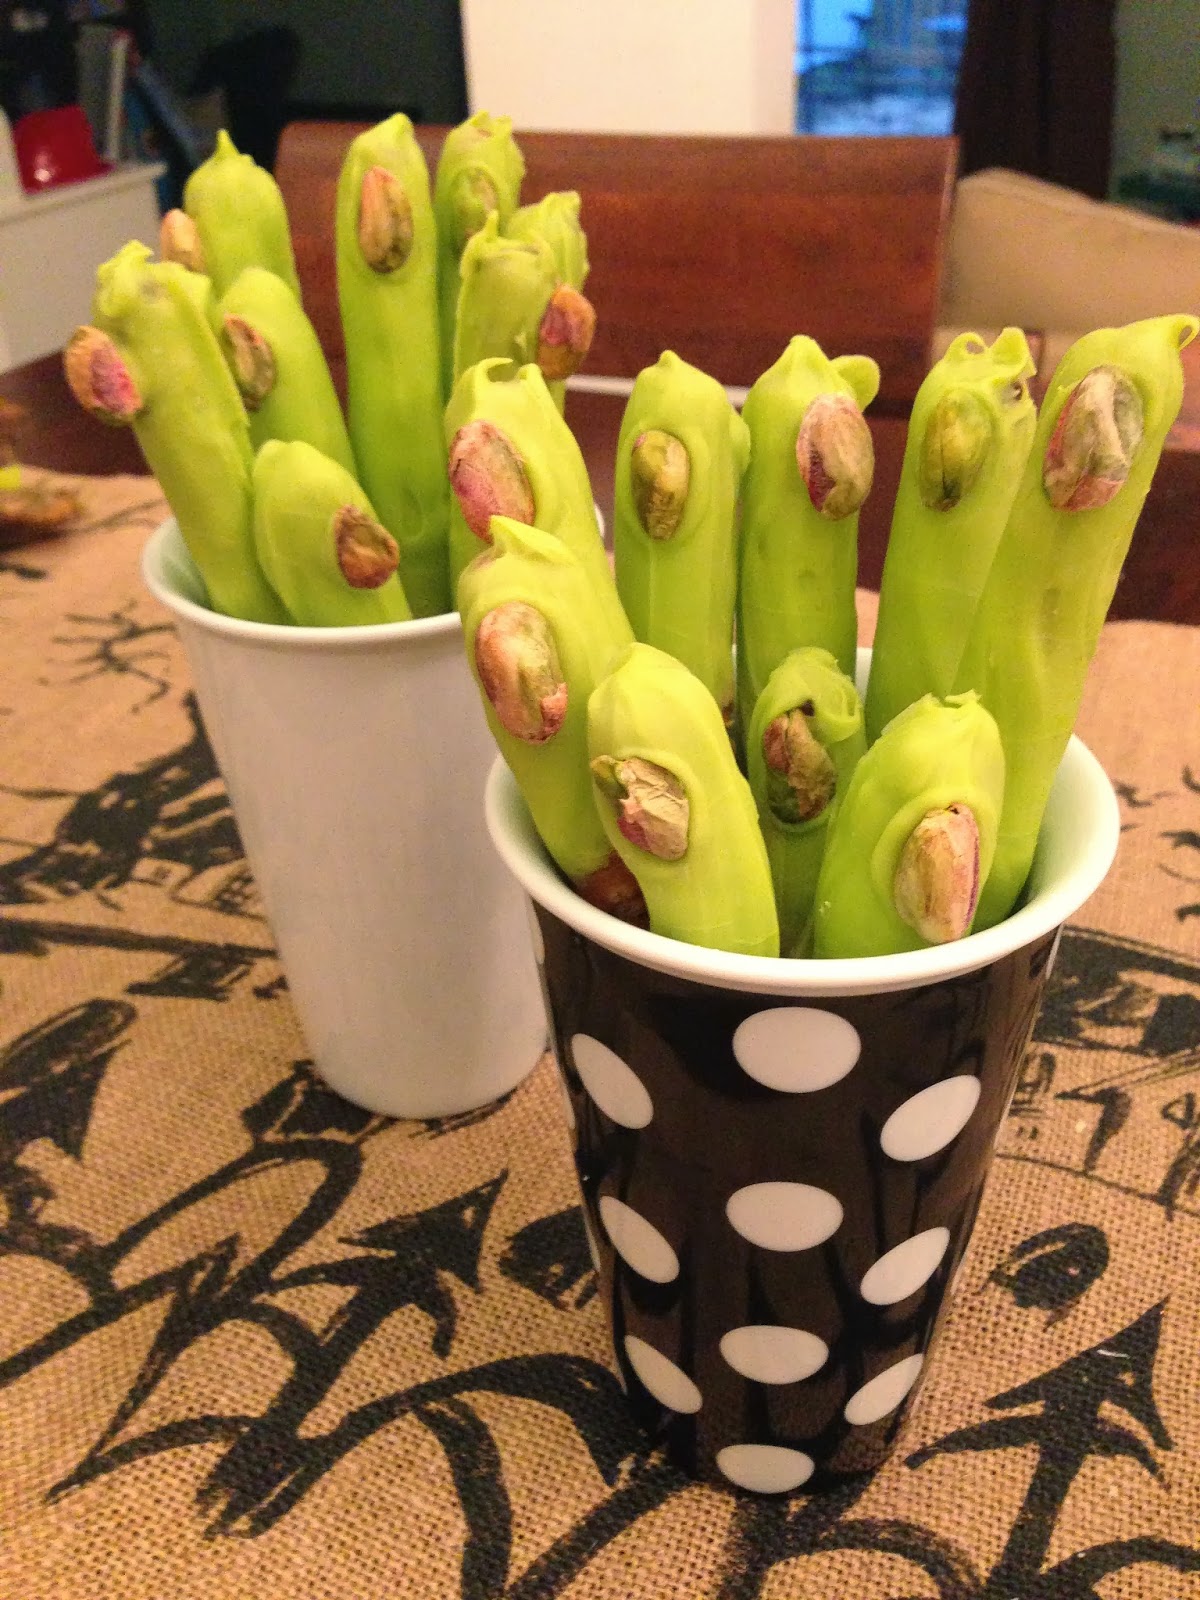
I was very proud of myself for the ORIGINAL Halloween creation (no Pinterest to steal my thunder here!), which was a huge hit all around.  Cover pretzel rods with green chocolate, add a creepy pistachio finger nail, and you're set.  Tasty and ghoulish = just right for Halloween.


Ingredients
  • 1 bag pretzel rods (about 20 rods)
  • 1 bag Wilton green colored chocolate discs
  • 1 tablespoon butter (optional)
  • About 24 pistachios, shelled
  • Witches' Fingers label (optional)
Directions (pictures below)
  1. Line a cookie sheet with parchment paper or Silpat sheet.
  2. Melt chocolate according to package directions.  Optional: mix in butter while melting to make a smoother consistency.
  3. Pour melted chocolate into a tall glass.  I came up with this technique because I'm a velociraptor (read: clever girl), and realized this would mean I could just dip the rods in the chocolate instead of trying any number of inefficient ways to cover the awkward shape in chocolate.
  4. Dip each rod into the glass of chocolate until covered at least 1/2 way.  Lay flat on prepared cookie sheet.  Repeat until all rods are covered with chocolate.
  5. Place a pistachio on the end of each chocolate covered part of the rod, to be the "fingernail".
  6. Suggested additional decorations: extra blobs of chocolate to look like warts; raisins to look like moles; cover parts of the pretzel with torn up marshmallow to make fingers lumpy or have large knuckles.
  7. Place cookie sheet in freezer for 5 minutes or until chocolate is set.
  8. Store in an airtight container at room temperature or in refrigerator if storing for several days.
  9. When serving, I recommend a cute printable like the one I made just using Word.
 Fill the glass with chocolate.  So much easier to cover the pretzels by dipping!  Stir occasionally.

Aaaand dip!

So easy!  Even my 3-year-old was able to do some.

Line em up on your Slipat- or parchment paper-covered cookie sheet.  Also, photobombs by the family dog are welcome.  Add pistachio fingernails.

Freeze until set, then arrange for display.  I really like how perfect these to-go coffee mugs were because they hid the pretzel part, just showing the creepy fingers.


Labels make everything better, no?

October 20, 2013

Batty Goody Bags

I really have tried to keep the crafting mayhem in check, but I was determined to find a cute way to do the goody bags for the Halloween party.  A quick Pinterest scour and I was set.  Even better: all I needed to buy were the black bags.  I already had the other supplies at home!


Supplies (for 4 bags)

  • 1 5x7 sheet of white foam 
  • 1 5x7 sheet of black foam
  • Scissors
  • 4 paper bags
  • 8 googly eyes, preferably different sizes
  • Hot glue gun and glue
Directions
  1. Fill bags with treats and glue or tape closed.
  2. Cut out smiles with fangs from the white foam.
  3. Cut out bat wings and ears from the black foam.
  4. Glue all pieces, as well as googly eyes, to bags.

Pumpkin Hunt Treats

Next weekend is our first ever kids Halloween party.  Yay!  One of the activities I have in mind is to do an Easter egg hunt with pumpkins.  I saw this super cute idea from Martha Stewart to have tear open treat pouches shaped like pumpkins.  I thought it would be great to use those for a little pumpkin hunt.


I just filled them with a piece of candy and a sticker, nothing too crazy because the kids will have goodie bags, too.

Supplies

  • Orange tissue paper
  • Green masking tape or florist tape (they had the green masking tape in the school supply aisle at Target)
  • Candy, stickers, or small toys to wrap up in pumpkins
Directions
  1. Cut the tissue paper into 4 pieces, or whatever size necessary to wrap up around your goodies.
  2. Pull up the corners and twist around the top to form a stem and close up the tissue paper.
  3. Wrap tape around the top, and then twist excess to form the vine.  Fold a larger square at the end to be a leaf.
Very simple, and I like that it's more the impression of a pumpkin than these perfect pumpkin shapes like crazy Martha made.  ;)


Pumpkin Die-o-rama!

Ahhh Pinterest Parties.  A chance to get out of the house, spend some time doing all the fun pins I might not otherwise get to, and basically have a 3-hour therapy session complete with cheese and desserts.  Yesterday was another one for the books and I'm glad we have another one coming up so soon.  So what did I work on yesterday?  I spent about 30 minutes on my pumpkin die-o-rama and the rest of the time in pom pom hell, but that's for another post.
I got this amazing idea from Pinterest last year, just after Halloween.  I'm so glad Pinterest exists so I can just look through my Fall board to remember these fun projects!  A trip to Michaels was all I needed to get the goodies for this fun scene, and it really was easy to put it all together.


Isn't that so great!?!?  I have two electric votives in there.  One is behind the haunted house, and the other is buried in the moss on the left.

Supplies

  • Large white hollow foam pumpkin.  Michael's pretty much sells these half off all fall.
  • Serrated pumpkin carving knife
  • Wet floral foam block (green)
  • 1 medium bag fake moss
  • 4 small ravens
  • 3 small skeletons
  • 3-d haunted house scrapbook sticker
  • Halloween scrapbook sticker set (included the moon, tree, grave stone, bat, and spider stickers)
  • 2 small flameless electric tea lights
  • Hot glue gun and glue
Directions
  1. Use the serrated knife to cut out the opening in the front of the pumpkin.
  2. Cut the foam block to fit inside your pumpkin.  I cut it in half, put the large half in the center of pumpkin, and cut the remaining part in two, to go on either side of the large piece.
  3. Hot glue the top of the foam and cover with moss.  Fill gaps between foam block and pumpkin with loose moss.
  4. Place one votive in the back of the pumpkin, and rest haunted house sticker in front of it.  You'll want to be able to move the haunted house to turn the candle on and off, so don't secure it in place.  It should be able to rest against the candle and pumpkin and stay in place just fine.
  5. Place scrapbook stickers throughout the pumpkin.  I did hot glue the moon because it was a thicker, glassy thing that came with the haunted house.  I wasn't sure if it would stick well to the pumpkin so when in doubt, hot glue.
  6. Place the skeletons wherever desired.  I left two whole (one is laying by the grave, the other is hanging from a noose, hot glued to the top of the pumpkin), and broke one up to have bones scattered around the scene.
  7. Place the ravens where desired.  I do recommend hot gluing them in place, especially so you can have them floating or resting on top of things.  I have one sitting on a rib cage and another glued to the haunted house.
  8. Hide remaining tea light under a fluffy patch of loose moss, again so you can remove to light and put back easily.
Ta da!  Look how impressive you are, with almost 0 skill required.  :)


October 8, 2013

Toilet Decoration

Well, in a sign of craftiness taken to a new level, I present you with my house's current (and only) toilet decoration.  The toilet monster?  Potty poltergeist?  Suggested names welcome!  I also must note that I am not the only person to ever embark on this project.  I got the idea from someone else.

I also apologize for neglecting my poor blog.  The last class really drained me, but thankfully my hubby and I got a MUCH needed vacation afterward.  Now that I'm back, we'll see how much I can keep on top of the blog posts as I suffer through my very last class.  Aaaahhhmazing.  


Supplies
  • 2 pieces of black construction paper
  • Googly eyes (or white construction paper)
  • Tape
Directions
  1. Tape two pieces of construction paper together so you have one nice loooong piece.  I did need to tape two pieces of paper to make the design long enough to wrap around the right side of the toilet and onto the back.  Otherwise, the chopped off look is just weird.
  2. Use a straight edge to draw a diagonal line on your construction paper.  Draw out fingers next to the line.  Cut out along line/fingers.
  3. Erase any pencil lines, or just flip design over so clean side is showing.  Glue on googly eyes and let dry.
  4. Remove lid from the toilet tank so you can line the paper monster up without any gap showing at the top.  Tape design in place, with the small part of the triangle just over the toilet handle.  Wrap construction paper around side of toilet and tape to back.  Put lid back and admire the view.
  5. Bonus: everyone is now encouraged to put the toilet seats down.