Showing posts with label DIY. Show all posts

November 22, 2014

Ornament Wreath


I have been wanting an ornament wreath for years now.  Each fall/winter I see Pinterest blow up with these awesome looking wreaths, but I can never find inexpensive shatterproof ornaments to do it myself.  I'm also not ok with shelling out $100 for one of these store bought guys.  This year, I finally found it- $5 for a set of 12 shatterproof ornaments at Bed Bath & Beyond.  Yes!!!  And of course once I clued in to the term "shatterproof" I saw tons of listings on Amazon to get anywhere from 60 to 100+ of these bad boys.  Anyway, now that I'm in the know, I'm happy to share my great wreath with you.

Supplies

  • 4-6 dozen shatterproof ornaments
  • 2-3 dozen mini ornaments
  • Foam wreath form
  • Hot glue gun and glue
  • Knife
Directions
  1. Cut hole in wreath form large enough to fit the top of your large shatterproof ornament into (the part you normally put the hook in).  Put a dab of hot glue in the hole, and set the top of the ornament into the hole.  Hold a minute to set.  Repeat times a gajillion until the wreath form is evenly covered in larger ornaments.
  2. Hot glue a circle around the top of a mini ornament and glue into gaps between the large ornaments.  Repeat times a gajillion until gaps are well filled in.
  3. Hang!  Bow optional. :)
This really isn't a complex project.  The key is to varying the placement of your ornaments so they have a pretty organic flow and don't look like perfectly lined up rows of ornaments.  You want them to look random and bubbly, and you use those small ornaments to fill in the spaces so you don't see your wreath form underneath.  That's it!

First layer down.  Looking good!  The base is well covered, I alternated red and silver, shiny and matte, and the inner part of the wreath out to the edge.

Now we've got the mini ornaments layered on to fill in those gaps.  I even pulled out and rearranged and added more of the larger ornaments as I went.


October 25, 2014

Side Table Makeover: $5 Flea Market Flip!


Well the last couple weeks have been very busy, but I promise I've still been cooking, quilting, and DIY-ing.  Today's adventure was to make over a happy little side table I got at the Harper's Ferry Flea Market.  Remember in my post about the copycat Pottery Barn candle holders, when I showed off the batch of goodies my husband and I got for $25?  Well this is the side table from that haul.


I liked the shape, and it's a great little size to sit next to the couch and hold a drink while I'm watching TV.  It was wobbly and just needed to be reassembled with some wood glue, really.  I also wanted to sand it down and give it a nice coat of navy blue paint so it could be a happy, well adjusted member of my living room furniture family.

See?  What a nice size.

Our before shot.

Disassembled.

Sanded!

Primed.  I used the Zinsser primer again- the one I used on the dresser makeover.

Painted!

The after picture.  Ooo. Aaa.

Just used basic craft paint for the table, and wood glue in each joint when I reassembled.

Fin!

September 27, 2014

Copycat Pottery Barn Candle Holders: My First Flea Market Flip!


I recently discovered and fell in love with an HGTV show called Flea Market Flip.  It's basically rewarding people for their Pinteresty reinvention skills of an artist.  Now, my husband has always tried to convince me how rewarding a flea market scavenge can be, but after my first experience with an indoor flea market at a rundown strip mall near Pittsburgh, wherein people were selling all sorts of guns and ammo and more knives than I knew existed, I begged off.  It was an ongoing joke to take me to flea markets as a form of torture.  This show gave me a new perspective and willingness to try, though, so we found ourselves at the Harper's Ferry Flea Market in West Virginia last weekend.  We didn't have any specific projects in mind and just meandered, looking for things to catch our eyes.  There was one very cool trunk that I didn't investigate when we walked by, and later regretted because it was gone on our way out.  Lesson learned.  What we did walk away with was this little stash:


2 lanterns: $8
Side table: $5
Pillar candle holders: $2
Magazine caddie: $10

I can't even imagine where else $25 would get me so far.

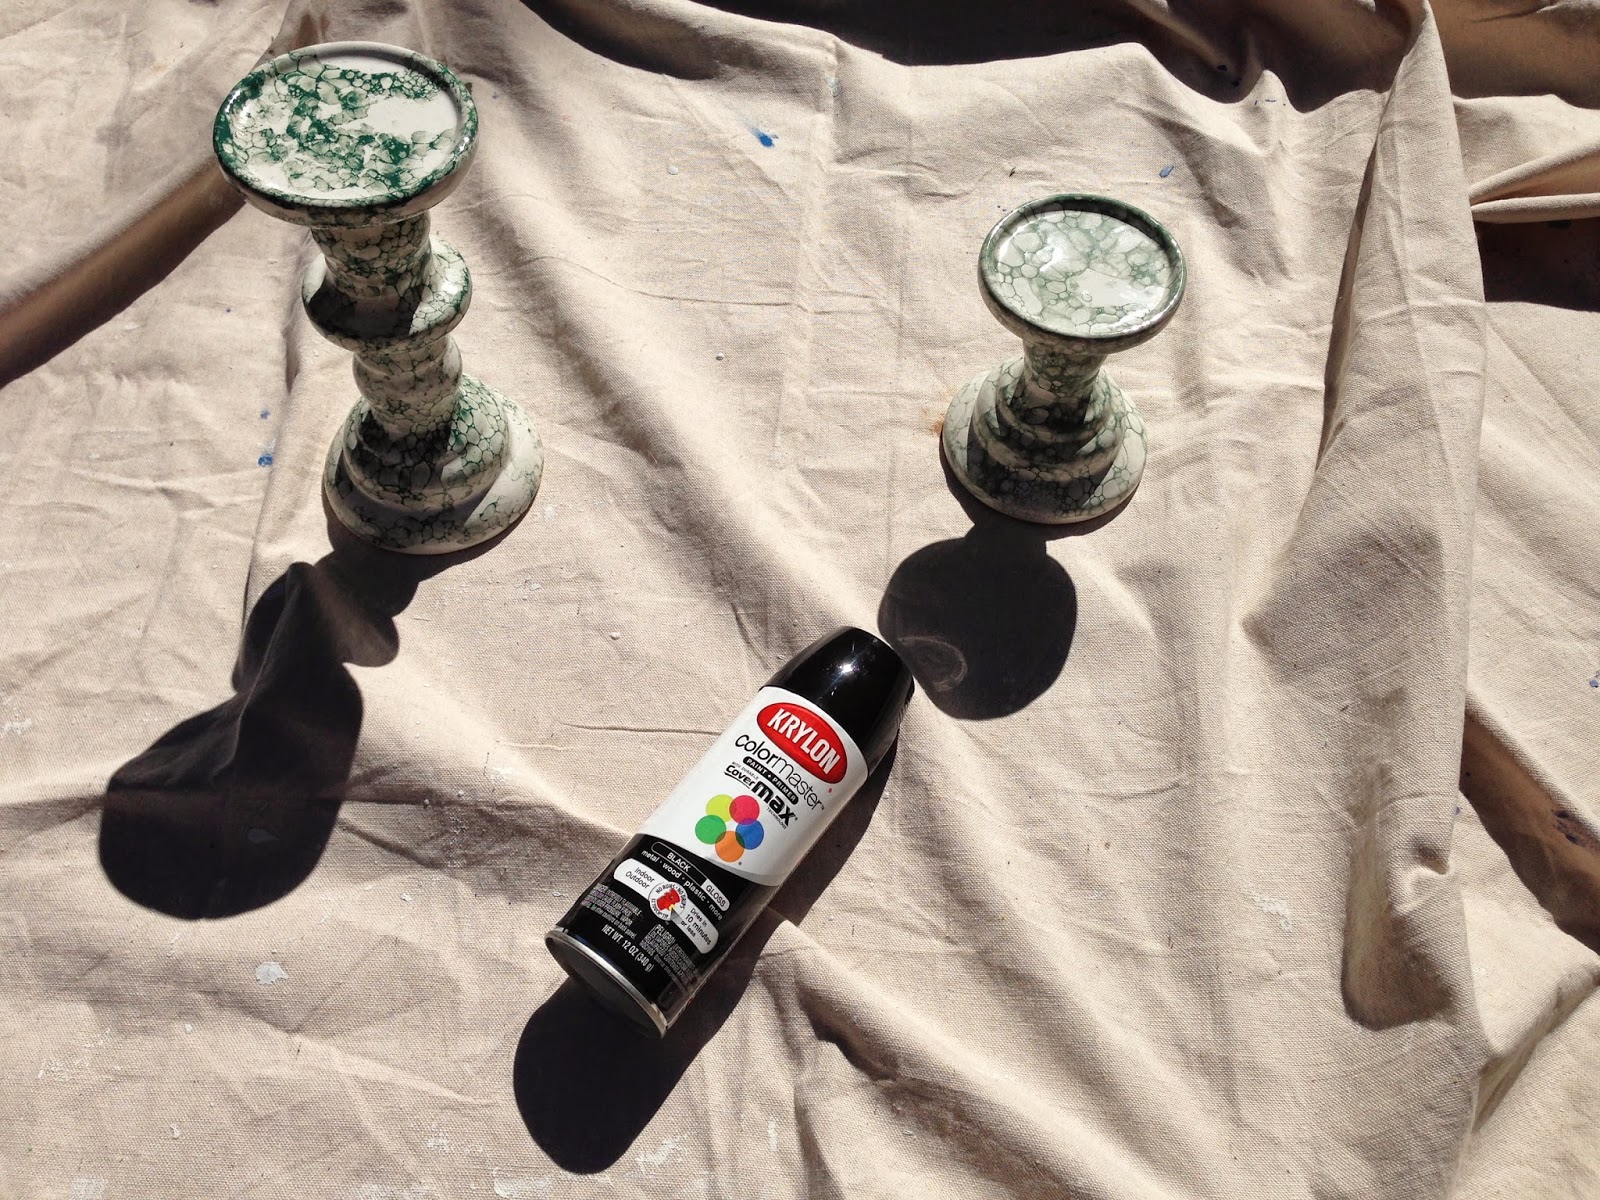
So the first find was that pair of candle holders.  We were walking down a row and I immediately locked eyes with those.  I hated the bubbled green treatment on them, but they had great shape.  The #1 rule I hear from Flea Market Flip and every other makeover/DIY show I've watched is to look for good bones, and sure enough the underlying shape of those cheap ceramic candle holders was one I liked a lot.  I knew that with a coat of glossy black spray paint, they'd look Pottery Barn worthy.  Turns out I was spot on.  Check out this set I could have spent $70 on instead of my $2.


Oooo I love the feeling of a good deal!  Muahahahaha.

So first things first- cleaning up these holders.  They had old wax drips on them and a layer of dust/grime.  Because they're ceramic, I used a plastic child's spoon to scrape off the wax without damaging the base.


You've gotta go, gunk.

Once the wax was scraped off and I gave them a nice scrub with my Mister Clean Magic Eraser (really- it's magic), it was time to spray paint.

I used Krylon shiny black spray paint and checked the back of the can to make sure it would adhere to glass and ceramic.  The candle holders are made out of ceramic but the coating on them was glassy, and I wanted to be sure the spray paint would adhere well.  I'm happy to report that yes it did!

I sprayed on two coats.  The first one was as shown here, with the holders upright.


I let that dry, then flipped upside down and did coat #2 to catch everything from the opposite angle.  This was my first time spray painting in a LONG time, and I could have been more careful about making sure I did a good job at the base.  It was too sunny outside to really see where I was missing spots, and I only noticed that I didn't have a completely even coat until I was inside.  I am just being overly critical, though.  They look great- I'm just sharing advice on what I encountered. Anyway, when spray painting, remember- nice even spraying at a good distance, and be careful you don't overload with paint and cause drips.

End result: don't they look great?!  And I'm not talking just for Halloween, here.  They'll be wonderful all year long.

September 13, 2014

Fall Pinterest Party Roundup

Today was the latest Pinterest party, and I put those hours to good use!  I made my chubby hubby cookies as my food offering to the crafting Gods, and set out to make 2 frames and a mummy onesie.  I didn't progress to the ghost yard decoration for Halloween, but there's still plenty of time to get around to that.  :)

I have little write ups below, with links to full posts on each craft to walk you through it step by step.

First up was the versatile photo frame.  Painted a frame with some interesting detail, put scrapbook paper on the frame backing, and hot glued a bull dog clip.  I plan to have this at my desk at work, where I can swap out pictures easily and have something colorful in the office.  Lord knows that is necessary.


Next up was the bunny silhouette for the nursery.  I painted one of those cheap laser cut frames from Michaels, added burlap backing, cut out a bunny silhouette, and glued on a little bow for good measure.  SUPER easy and I absolutely love it.  I plan to decorate this bunny throughout the year.  Maybe he'll get a little mask for Halloween and a Santa hat at Christmas.

And lastly, the mummy onesie!  I sewed on some gauze and googly eyes, and we were in business.


Here's my lovely daughter showing her enthusiasm for this cute getup!

September 7, 2014

Tin Containers as Fridge Storage

I've seen this idea floated on Pinterest for a while now.  Allegedly, you could put a magnet inside a tin container and it would magnetize the whole thing to stick to your fridge.  Not true.  BOO.  Still, with a bulldog clip, you can still take advantage of your cute old tin (in this case, an old bank) for holding pens.  I have a Chiclets tin holding coupons as well, but in that case I don't have an open side to use the clips on.  I need to stick magnets to the back of that puppy for it to be functional.

August 24, 2014

DIY Curling for Kids

This is a WAY overdue post from February!  While watching the winter Olympics this year, my son fell in love with curling.  He wanted to do it himself, and with some quick improve we had our own home version set up in the living room.  He'd play along while he watched the US team each night and we all got a kick out of it.  I hope you can take the same idea and play with your little ones, too!

Supplies

  • 2 plastic plates, like an outdoor or child's plate
  • Painter's tape, washi tape, or masking tape
  • Soft brush, like one used with a dust pan
Directions
  1. Tape off a square and a smaller target in the center of the square.  Tape a starting line far enough away from the target to be a bit of a challenge for your little one, but still close enough that they can slide the plate into the target.
How to Play (for 4 or more kids)
  1. Each round, both teams get to play.  Team 1 player sits at the line and pushes their plate toward the target.  Other teammate(s) pretend to swipe the ice in front of the plate with the soft brush.
  2. Team 2 gets to go.  Player sits at the line and pushes a plate toward the target; other teammate(s) pretend to brush the ice.
  3. At the end of the round, each team with a plate touching the box or the bull's eye gets points accordingly.  If both plates are touching, both teams get points (they do not cancel each other out).
  • Plate touching the large square (but not touching the bull's eye) = 1 point
  • Plate touching the bull's eye = 3 points.
Play 5 rounds, alternating which team starts each round.  Team with the most points wins!

If you've got just one kiddo playing like mine, improvise or just have fun shoving the plate at the target and seeing how they do!


Layered Circle Skirt

A little while back, I made a couple cute circle skirts for my baby girl.  She's getting bigger, and the newborn size skirt has started looking more like a tutu, so I decided to add a layer.  Easy peasy, and while I was at it, I ripped the old messy stitches on original skirt's the bias tape and re-stitched.  Things are nice and clean now, and extended the life of the skirt a couple more months!  I thought I'd share the easy steps so you can keep up with my sewing lessons learned.  :)

Supplies

  • 1/2 yard fabric- same as top layer, or coordinating color/pattern
  • Bias tape
  • Sewing notions
Directions
  1. Fold top layer of circle skirt into quarters.  Fold 1/2 yard fabric for bottom layer into quarters.  Lay folded top layer on folded bottom layer, as shown below.
  2. Trace curve out of corner of bottom layer, making a bigger opening than that of the top layer (~1" further down from corner).  Measure out at least 2-3" past hem of top layer and cut.
  3. Unfold the top and bottom layers, and place them on each other, right side up.  You should have two donuts, with fairly similar openings.
  4. Flip upside down, and pin the larger skirt layer to the smaller top layer, just past the elastic of the smaller layer's waist.  Pleat every inch or so to use up the excess fabric and create waves that mimic the ripples in the top layer.  Sew.
  5. When you flip the skirt right-side-up again, your layers should be nicely attached.
  6. Pin bias tape, right side against the right side of the fabric of the larger bottom layer, and sew in the fold of the bias tape.  Cheating and sewing as you go, instead of pinning in place, may result in a surprise shortage of tape when you reach the end.  Oops!  I decided this just determined where the back of this otherwise perfectly uniform skirt belongs.
  7. Fold over the raw edge of the skirt, and fold again.  Pin and sew.
  8. Done!

August 20, 2014

Lofted Bed Curtains (aka, under the bed tent)


For a long time now, I've had this idea in mind to make a cute curtain to hang under my son's bed when we finally lofted it.  Initially, I thought I'd make a tent to resemble the trolly on Mister Rodgers' Neighborhood/Daniel Tiger's Neighborhood.  After my son outgrew that phase more, and started seriously loving cars, I shifted the idea to be a curtain that resembled a garage.  I thought a concrete wall with some applique windows, tires, perhaps an oil drum and toolbox would do the trick.  This was also a new chance to develop more sewing skills!  I took my son to the fabric store with me so he could pick out the colors for all his garage goodies, and talk about what items he wanted to be displayed on the garage.  He chose the red fabric for the garage, and I came up with the idea of painting on the white mortar so it looked like a brick garage.  We really had a lot of fun thinking it out together, and my son loved watching me cut out the different objects and sew them onto the curtains.  They're now up in his room, and hide a little hot wheel track world under his bed.  It's definitely a hit, and can be as easy or as complicated as suits you and your skill set.  Have fun!

Supplies (for a twin size bed)

  • 2 1/2 yards base curtain fabric to cover one side of the bed; additional if continuing curtain to cover more of the exposed area under the bed
  • White paint and paint supplies (brush, drop cloth, etc.)
  • Rectangular container or cutout as brick guide
  • Fabric scraps, fat quarters, or 1/4 yards for each of the detail pieces
  • 2 yards velcro made for sewing

Directions

  1. Lay out base curtain fabric, and paint on brick mortar (white paint), using a cutout, tupperware, or other guide to get a brick shape.  Let dry.
  2. Measure opening under the bed when lofted.  This will help you know just how wide and tall your curtains should be.  The curtains should be tall enough to cover the opening under bed without dragging on the floor and wide enough without flopping past the edges of the bed.  Add 1" to the width, so you can have 1/4" seams on each end, and 1/4" seam on each side of the middle opening to the curtains.  Add 1/2" to the height for 1/4" top and bottom seams.
  3. Cut straight edges, preferably using cutter and clear ruler guide, for the top and bottom sides.  Cut the curtain in half vertically to provide an easy opening in the middle during playtime.
  4. Fold over edges, pin, and sew to keep curtain edges from unraveling during use.
  5. Cut out applique pieces such as tires, toolbox, and windows.  Try to be proportionate with your items, but some goofy mismatches can be cute.
  6. Pin pieces and sew in place.  I sewed 1/4" in from the edges, because I wasn't yet skilled at doing the applique stitches that go back and forth over the edge.  That means the outer edges of my pieces are a bit floppy, but as I said, you can make this as easy or complicated as you want to suit your skill set.  Don't sweat the imperfections, because this is MEANT to look whimsical and imperfect.
  7. Cut the velcro in half.  Sew on the fuzzy part of the velcro along the top edge of each half of the curtain, according to manufacturer instructions.  I sewed mine AFTER removing the paper backing, and I don't know if that made the difference in why my sewing needle got all gunked up and jammed on me, but I definitely recommend doing things as intended here.  Winging it is unwise, as I learned.
  8. Stick the prickly side of the velcro to the back or underside of the bed frame, as desired.  Press firmly and hold in place.  You want that velcro side to STICK to the bed and not peel off at the first tug or two at the curtain.
  9. Attach the curtains to the bed and PLAY!
My little helper getting ready to paint some bricks!

Tracing around the tupperware container.  4-year-old helpers mean you quickly let go of perfection.  :)

Laid out to dry.  Some of the paint smudged and made splatters when I put it in place, and they created a great random and authentic look that I could not have possibly done intentionally.

This project taught me to looove my clear guide ruler/cutter!

Oil drum and toolbox sewn on.

My son wanted to name his garage Joey Cl[a]wson.  I have no idea who "Jowe" (Joey) is, or why his garage's name looks like graffiti, but this goes in my son's room not mine, so he gets his way.

Big ole tires all stacked up!

This is a HAPPY little guy!  Note the camping lantern providing under bed light.  Perfect for a little mechanic!

August 18, 2014

My First Quilt!

Last night, I finished my very first quilt.  BIG sense of accomplishment here!  I had been thinking about trying a quilt for my daughter's nursery, and within days of that thought was given some fabric for just that purpose.  That was all the nudge I needed!  A month and lots of lessons learned later, I have this gem to show off:


I used the great tutorials from Lella Botique as well as a few other Pinterest pins, the Googles, etc. with bits of advice I picked up over time.  "Stitch the ditch" for example is a choice phrase I loved before I even knew what it meant, let alone got to do it in practice, singing "stitch the ditch!" in my head as I worked.
I'm not going to walk through how I got all this done, as the tutorials do that quite well and I didn't take pics along the way, but I will share some things I learned from experience (and jot them down to jog my memory later).

So, I started this project after getting the pink toile fabric with the Mother Goose scenes and the white birds.  I decided to cut out my two favorite scenes and some of the bird border.  The scenes were great but more traditional than my usual decorating style.  This actually worked well for the nursery, where I've been blending mod design with feminine touches.  Think geometric bedding and a shabby chic lamp.  So continuing with that, I paired the toile with a mix of mod and classic fabrics.  I thought the yellow stripes, grey bunnies, and pink/white squares did the traditional trick nicely.  Chevrons, arrows, and black fabric with birds brought out the mod.  I loved the black fabric and used that for the backing on the quilt.

Lesson 1: editing.  You know I have no problem editing, and that certainly held true with quilting.  I actually bought a couple more kinds of fabric which didn't make the team in the end.  While I loved them in the store, when everything was laid out on the table they just weren't jiving with the rest.  At first I was fighting it, but as I removed those squares and rearranged I saw just how right it was to keep them out.  While the thrifty side of me didn't like "wasting" that fabric I had just paid for, my artsy side knew this was a good move.  I saved the other squares and will keep them on hand for future projects because like I said, I did like them.  I'm not sure how I could have done that editing job in the craft store prior to purchase, but c'est la vie.  This lead to...

Lesson 2: planning.  I quickly learned that in quilting, rough estimates don't do the job.  You really do need to effectively plan out your piece before you set foot in a fabric store.  This way you'll know just how much you need in total fabric, and with some good calculations you'll be able to make simple adjustments as you change the number of fabrics you fall in love with from say, 5 kinds to 7.  Don't forget the backing fabric or the binding to do the edges.  Actually figure out how much you'll need for that.  I lucked out that my thought of "1 yard will do the job for the backing" sufficed, but didn't leave me with much to spare.  My hunch that a fat quarter would give me enough fabric to do the binding was definitely not accurate.

Lesson 3: Be comfortable making adjustments.  The instructions I had followed were all for basic quilts with 6" squares, not making any kind of patterns with the blocks.  Just fine, but I had these two larger pieces.  How did I make those work?  Logical me thought that if I just added some fabric to the larger pieces to make them total up to 12" square all would be well.  I didn't realize/think through that when the surrounding squares were sewn together, they would not in fact be 12" wide or 12" tall because I was losing bits all over to the seams.  Oops.  I had to take apart some pieces, sew together again, take apart more, sew again, etc. until I got things appropriately cut down to size and situated properly.  This meant that the text at the bottom of the scenes (Hey Diddle Diddle and Little Bo Peep) got sucked into the bottom seams, but I made my peace with that because far be it for me to flip out over this lesson.

Lesson 4: Improvise.  Now, this is similar and yet different from lesson 3.  This isn't just about making do- it's about being creative as well, and making the project your own.  I think this is key to sewing for me, and makes these things mine and better than factory made.  I quilted Xs through the fabric squares, but didn't want a big X through each of the Mother Goose scenes.  How to quilt those pieces in place, then, and keep the batting from shifting around on the inside?  Improvise by back stitching incorporated into the scenes.  In Little Bo Peep, I stitched the outline of the barn and one of the sheep.  For Hey Diddle Diddle, I sewed in with the clouds which is all but invisible, and along the dog.  I was so happy with how that turned out!


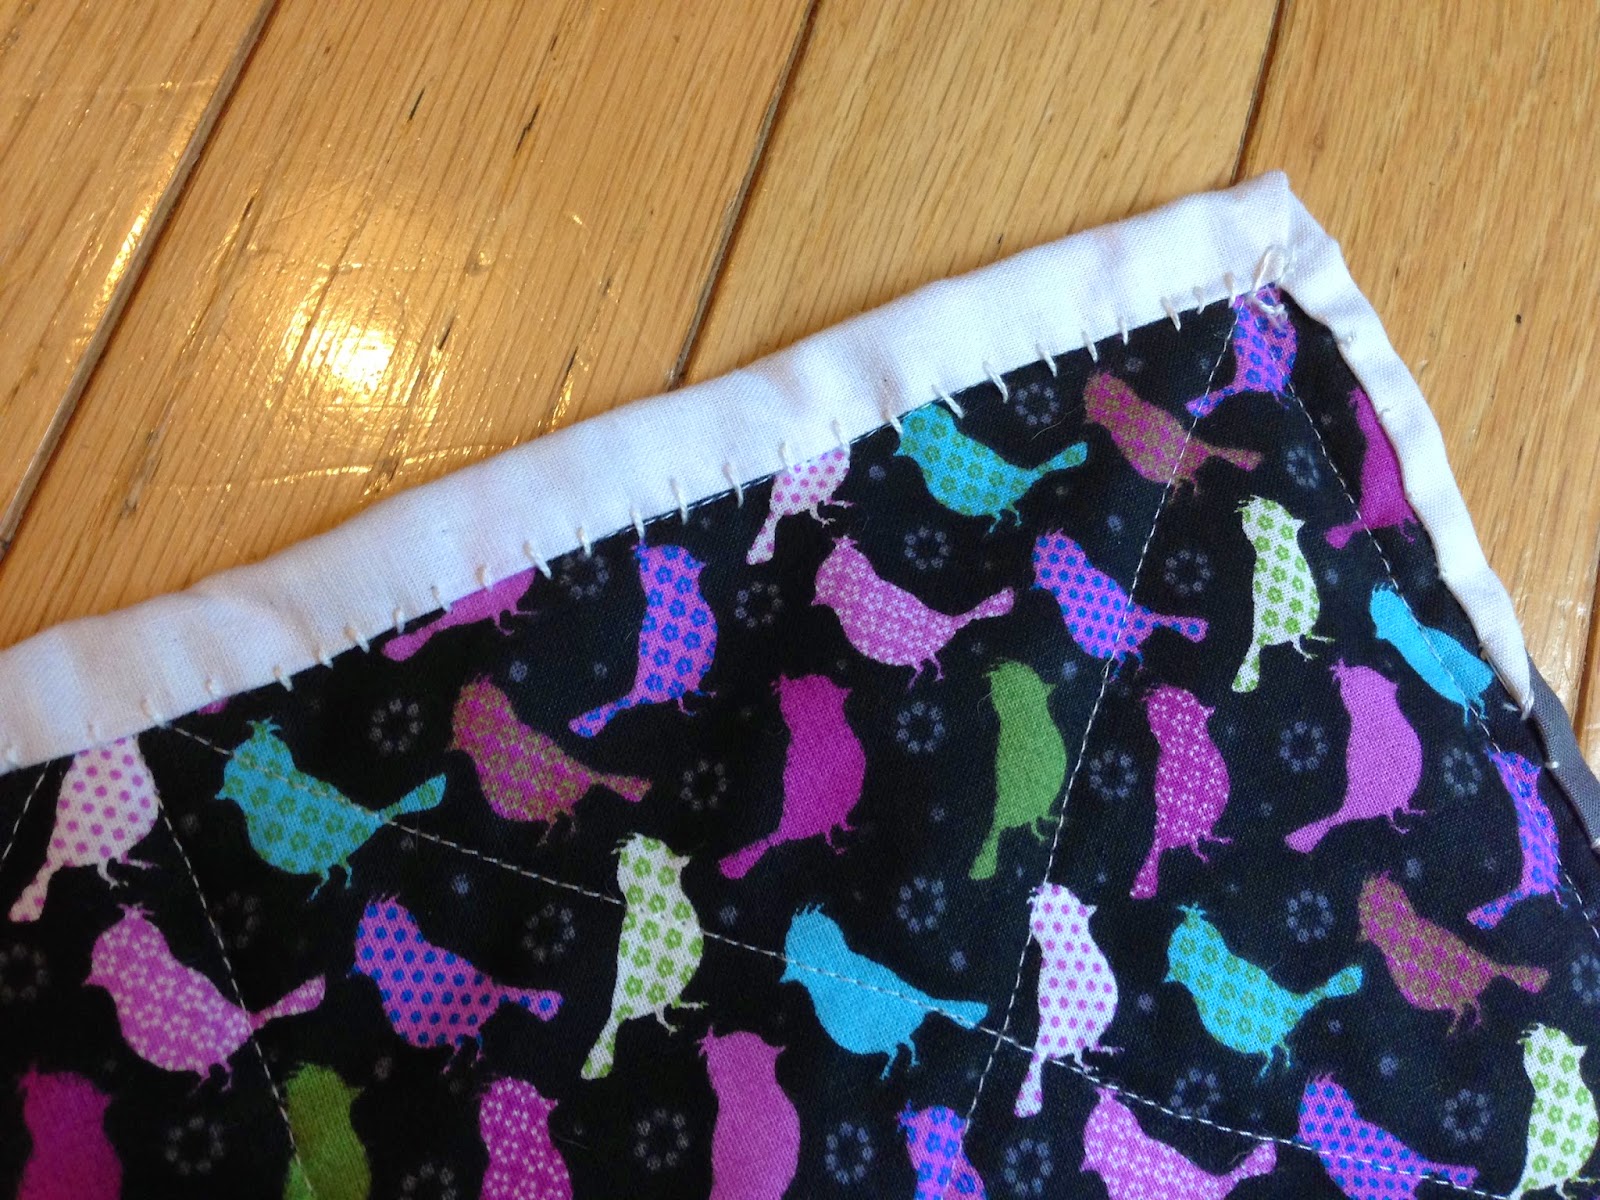
Lesson 5: Be patient and forgiving.  I needed some coaching from a friend when I was distraught over my imperfect lines, and avoided beating myself up for not getting things just right or having to redo portions.  This was my first try- these lessons are to be expected and in fact really good to go through.  As I stitched the binding on the back, I just had a mantra of "practice makes perfect" and kept at it, even though I felt like my initial stitches looked like the work of an earnest but clueless 5-year-old trying to sew.  By the end of the stitches, I was pretty proud of myself.  When I looked again this morning, things didn't look nearly as haggard as I had made them out to be in the moment.  So time, distance, and patience really are worthwhile here.

A bit Frankenstein-like?  Perhaps a bit clumsy, but honestly not SO bad.

Smaller stitches, more closely spaced.  Looking better now!

So there we have it.  :)  First one done, lots learned, and excited to do another!  I'm thinking of doing a herringbone quilt for the living room next.  Wish me luck!