June 23, 2014

One-Pot Pasta with Shrimp

I should probably just sign up for a daily Martha Stewart recipe or something by now, because I seriously love pretty much every recipe I've tried from this woman's domestic machine.  The most recent of these is a one-pan pasta dish, which I only modified a bit.

What an appetizing bowl of pasta to serve up for the family!

Ingredients

  • 12 ounces linguine
  • 12 ounces cherry or grape tomatoes, halved or quartered if large
  • 1 onion, thinly sliced (about 2 cups' worth)
  • 4 cloves garlic, thinly sliced
  • 1/2 teaspoon red pepper flakes (I used a little less because I worry about heat, but could have easily done the full 1/2 teaspoon or more)
  • 2 sprigs basil, plus torn leaves for topping
  • 2 teaspoons coarse salt, plus more to taste
  • 1/4 teaspoon freshly ground pepper, plus more to taste
  • 4 1/2 cups water
  • 1/2 to 1 pound shrimp, peeled and tails removed (I actually used pre-cooked shrimp)
  • Drizzle of olive oil
  • Freshly grated Parmesan cheese, for serving (I actually skipped this, and liked it better just with olive oil)
Directions
  1. Place all ingredients except for shrimp and Parmesan cheese in a large straight-sided skillet or pot.  I used a pot because I was not confident that all of this would fit in my largest pan.  Bring to a boil and toss with tongs occasionally.  Boil 9 minutes, or until pasta is al dente and water is almost all evaporated.  Add shrimp to pot the last minute of cooking time and cook until just pink and beginning to curl.  Do not overcook.
  2. Season to taste with salt and pepper.  Garnish with torn basil, drizzle of olive oil, and Parmesan cheese.
Seriously, how easy is that?!?  Some chopping and 15 minutes to boil/cook everything, and you have a pretty impressive dinner to dish out.  Perfect for a weeknight meal.

Everything all situated in my stock pot.

Bubble bubble!  This is the last minute when I tossed in my shrimp.

June 22, 2014

Summer-Themed Thank You Gift

For the last month or so I've been prepping for my maternity leave, delegating different tasks at work, creating all sorts of fun documents and spreadsheets- exciting things.  One part of that that I was actually excited about, though, was putting together little thank you gifts for my coworkers who were picking up most of my tasks for me.  I had a summer baby, so I was definitely thinking of summery things that would be appreciated as part of a thank you gift.  Nail polish, buff blocks, iced coffee mix, and coffee gift cards in large cups with straws seemed like a great mix!  Sure enough, my friends really loved the treats and the gesture.  It's a good thing I was so excited about this, because sure enough little baby girl was born just a few days after I handed out these goodies!

Gift as given to each coworker.

Close up of the tag.  I just nabbed a pic from Google and typed over it. :)

All the goodies spread out.  I got Panera and Dunkin Donuts gift cards depending on what I knew their preferences to be.

Mini Key Lime Cakes

The blessing and curse of Tastefully Simple is that you know just how good the food tastes, and you want to make all of these special treats, and just have to wait patiently for the right occasion to make them.  This was true of the key lime cheese ball mix I'd bought nearly a year ago.  One of the recommended ways to make it was to use it as a topping on Tastefully Simple's almond pound cake, which sounded delicious.  I wanted to make that little treat for a retirement party for one of my employees, but I didn't want to spend an hour prepping individual servings.  My edit was to serve up the different components and let everyone build their own little key lime cake, which worked out wonderfully.

Ingredients
  • Key Lime Cheese Ball mix from Tastefully Simple
  • Almond Pound Cake mix from Tastefully Simple
  • 2 cups or more strawberries, sliced

Directions

  1. Prepare cheese ball and cake according to package directions.  Place cheese ball in center of serving platter.
  2. Cut cake into cubes, size depending on number of servings you want to have--bigger cubes for a dozen people; bite-size cubes to serve 40 as I did.  Arrange on platter.
  3. Slice strawberries and serve with other ingredients.
I recommend writing up a little set of instructions to go with your components so you aren't forever explaining to your guests how they can serve themselves, and what the ingredients are.  A little chalkboard would be perfect for this!  I didn't think of it until I was at work, so I just printed out a little sign that I placed next to the serving platter.

All prepped!  Pound cake in 3 of the serving dishes and strawberries in the fourth, with the cheese ball in the middle.

End of the buffet line!

June 20, 2014

Effective Communication is Hard When Sleep Deprived and There's a Crying Baby in the Room

Well, exciting news for the blog- my family has grown!  Little baby girl was born this past Monday, a good month ahead of schedule.  She's a cheeky girl, this one.  All the same, my husband and I are crazy about her and doing well juggling a newborn, 4-year-old, and an overprotective dog.  My husband has started a blog to share his adventures and mishaps as a newly-minted stay at home dad- 57 Ways to Screw up my Children.  It's a fun read, especially seeing our random conversations captured.  That's his baby, and I'm not going to direct any of its content, but at about 2ish something am last night, I definitely got the idea for a blog post and wasn't going to make him write it.  Hence this guy- a shift from my normal recipes and crafts.  Enjoy.  ;)

So a perfectly natural and assumed part of having a baby is that you are going to be up through the night.  A lot.  You will get tired and it will be harder sometimes than others.  You know this going in, especially with baby #2, but that doesn't mean that you are any more functional for that knowledge and preparedness.  Cue 2-something am last night, where I was reminded that effective communication between two sleep deprived adults is hard.  Set a screaming baby in the room, and suddenly buttons are pressed all over and you find yourself experiencing some more animalistic feelings.  Let me set a tableau for you that I'm sure goes on in any family with a newborn, fully aware of my feminine hyperbole:

Parent 1: Wakes up.  Blinks and stares at crying baby.
Parent 2: Wakes up.  Stares at bedroom wall in a daze, sitting on edge of bed.
Baby: Cries.
Parent 1: Looks over at baby, looks at Parent 2, points at baby.
Parent 2: Stares at Parent 1 in a daze.
Parent 1: Points more emphatically at crying baby.
Baby: Crying, turning pink.
Parent 2: Picks up crying baby, begins to adjust swaddle.
Parent 1: For unknown reason, displeased at this action by Parent 2.  Puts hands on hips.
Parent 2: Stares at Parent 1 in a now confused daze.  Snuggles baby.
Baby: Still crying.
Parent 1: Pulls hair in confused exasperation
Parent 2: Resorts to primal gestures and expressions.  Bares teeth.
Parent 1: Responds by batting air with clawed hands.
Parent 2: Huffs and walks out of room with baby; goes to nursery.
Parent 1: Follows closely.
Baby: Cries louder.

At this stage, both parents and the baby are all operating on instinct and that little stub at the base of the brain, while the "smart" part of the brain is still fast asleep.  Luckily, swaddling has become an instinctual skill for both parents, so Parent 2 is able to swaddle the baby without trouble, performing the actions almost automatically.  While a useful skill, it does not further effective communication between the two parents.  While they are more awake now, and begin to use their words instead of beast-like gestures, those words don't make much sense and are drowned out by baby cries, and furthermore lead to emotional sensitivities because even the most basic, non-argumentative comments turn into threats when shouted.  Let's continue our scene:

Parent 1: I need to nurse-
Baby: Cries.
Parent 2: WHAT?!
Parent 1, affronted: Don't yell at me!  I was just saying-
Baby: Cries
Parent 2: I'M NOT YELLING!  I JUST CAN'T HEAR YOU OVER THE-
Baby: Howls
Parent 1: WELL IT FEELS LIKE YOU'RE YELLING AT ME.
Parent 2: FOR THE LOVE OF... WHAT DO YOU NEED?
Parent 1: I KNEW YOU WERE YELLING AT ME!  JUST GIVE ME-
Baby: Cries, face turning red
Parent 2: WHAT?  GIVE YOU WHAT?
Parent 1: OMG JUST GIVE ME-
Baby: Turns into a demon; cries more
Parent 2: I. CAN'T. HEAR. YOU.  WHAT DO YOU-
Baby: Cries
Parent 1: THE BABY!  THE FREAKING BABY!
Parent 2: NO NEED TO BE UPSET!
Parent 1: OMG I HATE LIFE!

At this point, a basic message (give me the baby so I can nurse her) has finally been conveyed, though with battered feelings and irrational responses peppered along the way.  Parent 1 nurses, the baby magically turns calm, and both parents go back to bed.  At this point, the helpful frontal cortex switches on in both parents, now that it is no longer needed.
loop animated GIF

This leads to the next phase of helpful nighttime thinking: laying in bed and making up mental lists for the next day.  These lists feel Very Important and are impossible to squash at the time.  However, they are deceptive.

List, as perceived by sleep-deprived parent lying awake in bed at 2:30 am:
  • Thing to schedule tomorrow
  • Bills
  • Useful question to ask the doctor
  • Very Important Stuff
  • Apologize to other parent
List, as actually thought by sleep-deprived parent lying awake in bed at 2:30 am:
  • I need to sprinkle the dog tomorrow
  • George Washington
  • Hieroglyphics (not actual thought)
  • It is very useful for society to have manhole covers
  • I love that baby
Thankfully, the only item recalled from either list in the morning is that that baby is adored and loved by both parents.

June 15, 2014

Circle Skirt for Baby

Once I found out I was pregnant with a baby girl, I couldn't wait to try sewing tiny little girl things.  I pinned this tutorial for a reversible circle skirt, along with some others for leggings and dresses.  The skirt seemed the most basic for me to start with, especially when also following the embedded link to instructions for a basic circle skirt.  A friend of mine who knows what she's doing (seriously, check out her blog) and I planned a "baby girl sewing day" so she could come over and keep a watchful eye on me as I butchered this process and she put me to shame by whipping up a whole dress in the time I struggled through one skirt.  :)  That said, once I had one skirt done and learned some things, the second went much more smoothly!  And the second is what I used for these pics to walk you through it bit by bit with me.  I am ALL ABOUT getting tips on how to do things more easily, avoid mistakes, and/or how to go about this kind of thing in the future, so please share away!

Skirt #1!  Lookin good, but if you are inspecting the seam on the grey band at the bottom, you go "well, it was a good effort."  ;)

Supplies

  • 1/2 yard patterned cotton fabric
  • 1/2 yard solid cotton fabric for lining
  • 1/2" elastic- approximately 12" or less for newborn/0-3 month size?
  • Safety pin
  • Bias tape


So, how did I go about this?  I started with measurements, as directed by a link within the instructions I pinned.  She did a great job listing it out, so I'm just pasting in her directions:

* Measure your waist
* Add two inches to that number. You need these extra two inches so the fabric has “give” and will actually “stretch” when it’s sewn on to the elastic. It will create a very subtle gather to the skirt but will make it easier to get the skirt on and off. This will make more sense as you sew.
* Take your “waist + 2 inches” measurement and divide it by 6.28, and you have the radius!

I used a newborn onesie to get a waist measurement as instructed, added 2", and then divided by 6.28.  The radius for baby girl's skirt was 2.14 I believe.

As for how long I wanted the skirt to be, I had no idea.  My guru friend suggested just using a dinner plate as a starting point for the circle skirt, and that idea seemed very reasonable to me!

I placed my plate in the center of the fabric I was using for this skirt...

Then I measured out 3" from the plate's edge to get a good-size skirt going.  I used a washable fabric pen to mark along the way (below).  With skirt #1 I just traced the plate, but I worried the skirt was a bit short in the end.  I figured the extra few inches would either be just right, or bump the skirt into the 3-month range, but either way I was happy.

Cut the fabric leaving behind a big square with your circle in the middle of it.  Fold in half, then half again.

Next, this is where that radius measurement comes in!  Measure out the radius distance from the folded corner of your fabric.

Measured and marked.

Then cut!  This is the middle of your skirt, to go around baby girl's waist.

Next up, we're going to cut the edge of the skirt- the plate + 3" we traced earlier.

Wee!  Wasn't that fun?

Unfold, and you have a large donut.  I swear it's the perspective that makes this look off-center...  Yes.

Now here's where it helped to have a friend on hand!  Sneaky sneaky, I followed her advice and folded my plain white lining fabric into quarters, then simply laid my folded circle on top to use as a guide.

Skirt traced, ready to cut!

After cutting, you've got your two skirts to sew together.  At this point, flip the patterned fabric upside down so that the good side is facing the "good" side of your lining fabric.  If your lining is like mine, both sides were identical.  But either way, my big lesson learned was that if you just start zipping these donuts through your sewing machine without paying attention to your good side of the patterned fabric, you'll reach a point where you go "oh crap..." because your skirt is not cute, but instead looks sad and faded because you have the wrong side of the patterned fabric facing out.  BOO.

So what do we do?  Flip the fabric so the nice side is down!

Pin your circles together at the middle, and sew!  I used white thread which coordinated really nicely with everything and matched the lining.  Try to sew close to the edge, but at least 1/4" from the edge so it doesn't shred and not "take."  These are my very educated sewing terms, people.

Ok, sewn!  I'm not sweating where the circles aren't perfectly aligned, because next we're going to flip inside out.

Aaaand flip!  This was where I went "oh crap..." with skirt #1 but not with skirt #2.  Take that!

Press your beautiful inner seam.

Next, we're going to mark off where we'll sew a second circle, to hold the elastic.  Rather than fuss with measuring tape, I just used the elastic as my guide to mark off the circle about 1/2" from my clean pressed edge.  Also?  This is where white lining came in nicely!  Easy to see my marks.

When marking this circle, make sure to leave a gap about 2" wide because you'll need an opening to thread the elastic through.  If you sew it all the way around, then you have no way to get that elastic in!  I drew a couple vertical lines to remind myself to stop.  :)

Ok, now sew that circle, minding your gap.  Oh I'm so funny with random British references.  ;)  Here we see where my sewing went nicely around, leaving my space to thread in the elastic.  Again, helpful friend helped by advising to run the safety pin through one end of the elastic, to help in nudging it through the little housing I just made.  After doing this a couple times, I can see how useful this tip is.  Without the safety pin to grab and nudge along, I have no idea how you'd finagle that elastic all the way through.

Ok elastic, get in your home!  Quoting Happy Gilmore is also a strong suit of mine.

If you had x-ray vision, you'd see that this is me holding the safety pin in the little pocket and nudging it on its way.  I also first wrote that as "If you had 3-D vision" and something seemed off about that.  Ohhhh to be 8 months pregnant with an oxygen-deprived brain.  It's good times.

Puuuulll that elastic along.  I tried smoothing it out a bit as I went on this skirt.

At a certain point, the elastic has its own schemes in mind and starts to naturally bunch.  Don't fight it.

In the end you pull that end through victoriously, and will have two ends to sew together.  Trim the tailing end of the elastic so that you'll have 1-2" of overlapping elastic to sew together.  Take a minute to be happy for your victory because the elastic is no fun to sew.

I honestly have no advice for this stage, other than to just start and do your best to sew a nice x or crazy boxes or something secure on that overlapped portion of the elastic and then call it a day.  Once sewn together, flip your skirt back to be all nice and tidy and sew off the opening you'd left earlier.

Next, it's on to the bias tape to create a nice edge to your skirt hem!  This was another crucial time to have my friend on hand because I was staring at that bias tape like it was a mythical beast, no idea how to sew it properly in place even after a couple Google searches.  Basically, you'll lay the bias tape along the edge of the skirt, and sew inside the seam closest to the edge.  Once that's sewn, you fold the tape over the bottom of the skirt and then sew again.

Let's start with pinning.  That's the easy, fun part right?

Pin pin pin.  Overlap an inch or two of bias tape at the end, then cut.

Sew inside that bottom seam.

I really dislike sewing that overlapping portion.  Eew.

Anyway, next you've folded the bias tape to go around the bottom of the skirt, and now it's time to sew that teeny tiny little edge in place.  Omg this is tricky for a newbie like me, but I did it!

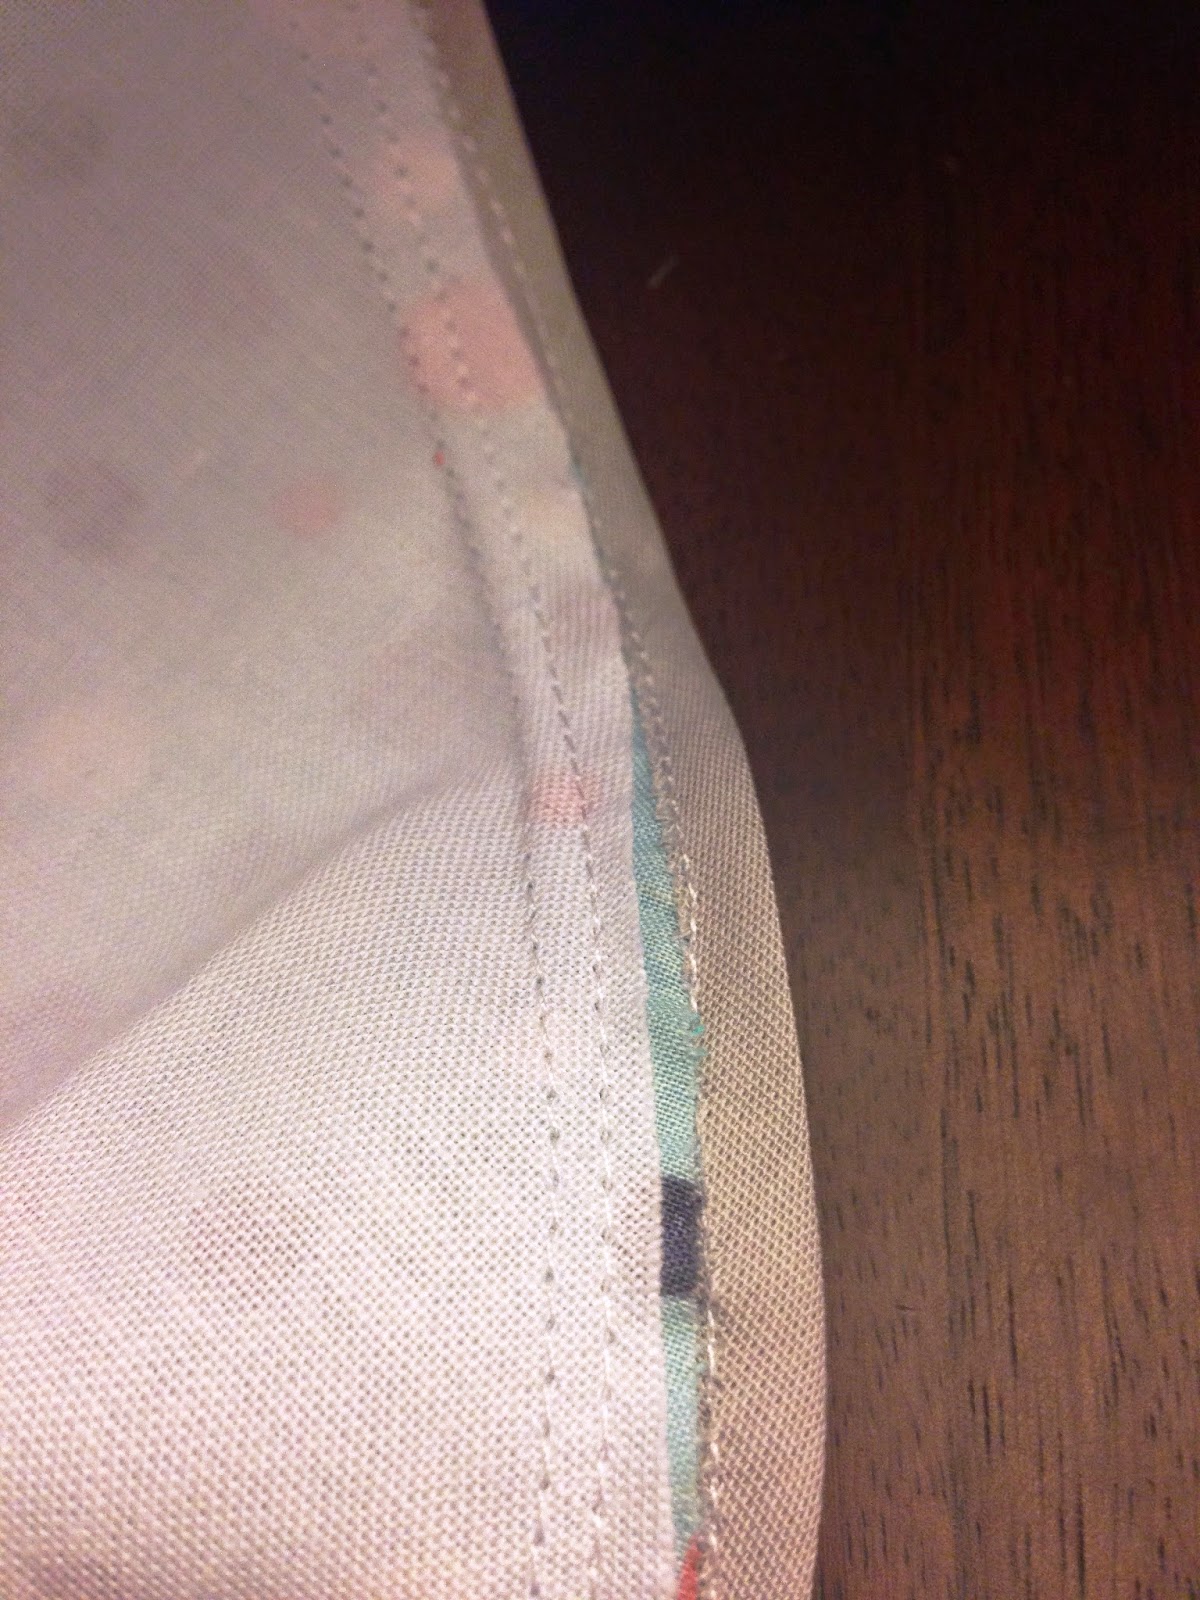
Now, just because I succeeded in sewing down that grey bias tape edge doesn't mean that my fabric was all nicely secured and not flapping out like some unruly loose edge to tell the world "I'm an adorable skirt for a baby but I'm rotten on the inside, and I will DIIIIE if ever machine washed- muahahaha!"  With skirt #1, this caused me stress and I had lots of silly sewn lines trying to remedy the problem one patch to the next.  With skirt #2, I told those little hellion loose edges they weren't going to get the best of me or make my work look sloppy, so what I did was sew a THIRD circle in between my two bias tape sewing marvels.  This third line worked wonderfully because it made sure that all fabric was sewn down, and when the skirt was flipped over, it looked intentional and nice!

Ta da!  Skirt is done, and this time if you inspect the hem you won't be all "that poor girl..." as you look.  HAH!  Don't ask me why sewing is so competitive in my head, but it is and I own that about myself.

Anyway, there you go.  Wonderfully detailed instructions with all the right terms, resulting in a flawless product.  You're welcome, Internet.  ;)

Ham and Cheese Pretzel Pinwheels

This recipe is SO easy and super tasty- the perfect thing for a quick snack, low effort meal, or impressive appetizer when your friends stop by.  I got the recipe from Tablespoon, and my only change was in the dipping sauce.  Rather than use the cheese sauce, I mixed up some honey dijon mustard with mayo for a milder flavor for me, and my husband doused his in yellow mustard.  I say mustard is 100% the way to go with these!
Make them.  Now.  :)


Ingredients
(Serves 4)
  • 1 can Pillsbury refrigerated pizza dough (I like the classic one; Tablespoon used the thin crust)
  • 8 slices of cheddar cheese
  • 8 slices deli ham
  • 1 egg, beaten
  • Coarse sea salt
  • 1 tablespoon butter, melted
  • 1/3 cup honey dijon mustard
  • 1/3 cup mayonaise
Directions
(Pictures follow)
  1. Preheat oven to 425°.  Cover a baking sheet with aluminum foil and spray with nonstick spray.
  2. Unroll pizza dough onto a cutting board.  Top evenly with cheese slices and then with ham slices.
  3. Tightly roll up dough length-wise.  Pinch seams to seal.  This is important!
  4. Slice log into 16 equal slices.  Be careful to cut with a sawing motion, not just by squishing.  Set each slice on the prepared baking sheet.
  5. Brush slices with beaten egg, then sprinkle sides and tops with coarse sea salt.
  6. Bake 15-20 minutes until golden brown and cheese is melted and bubbly.  Note: My cheese always browns.  I'm not sure if a lower temp over a longer time would alleviate that.  I just peel away the darker bits, so no sweat there.  Just a warning/idea.
  7. Remove from oven and brush with melted butter.  Sprinkle with more salt.
  8. Mix mustard and mayo until well combined and serve in prep cups with the pinwheels, or in a bowl in the middle of your pretzel platter.
Dough rolled out and topped with cheese.  I know I said to do this on a cutting board, and here I am showing you that step on the baking sheet.  Trust me, I was happier when I did this on a cutting board.  My bites also turned out better when I didn't jam cheese onto every square inch, and instead used just 8 slices.

Top with ham.  Overlapping is good in my opinion!

Log all rolled up and seam pinched.

Cut into even slices, each about 1-2" thick.

All baked.  See what I mean about some of the cheese getting really dark?  I just used a fork to grab the darker bits and peel off before serving.