September 27, 2014

Copycat Pottery Barn Candle Holders: My First Flea Market Flip!


I recently discovered and fell in love with an HGTV show called Flea Market Flip.  It's basically rewarding people for their Pinteresty reinvention skills of an artist.  Now, my husband has always tried to convince me how rewarding a flea market scavenge can be, but after my first experience with an indoor flea market at a rundown strip mall near Pittsburgh, wherein people were selling all sorts of guns and ammo and more knives than I knew existed, I begged off.  It was an ongoing joke to take me to flea markets as a form of torture.  This show gave me a new perspective and willingness to try, though, so we found ourselves at the Harper's Ferry Flea Market in West Virginia last weekend.  We didn't have any specific projects in mind and just meandered, looking for things to catch our eyes.  There was one very cool trunk that I didn't investigate when we walked by, and later regretted because it was gone on our way out.  Lesson learned.  What we did walk away with was this little stash:


2 lanterns: $8
Side table: $5
Pillar candle holders: $2
Magazine caddie: $10

I can't even imagine where else $25 would get me so far.

So the first find was that pair of candle holders.  We were walking down a row and I immediately locked eyes with those.  I hated the bubbled green treatment on them, but they had great shape.  The #1 rule I hear from Flea Market Flip and every other makeover/DIY show I've watched is to look for good bones, and sure enough the underlying shape of those cheap ceramic candle holders was one I liked a lot.  I knew that with a coat of glossy black spray paint, they'd look Pottery Barn worthy.  Turns out I was spot on.  Check out this set I could have spent $70 on instead of my $2.


Oooo I love the feeling of a good deal!  Muahahahaha.

So first things first- cleaning up these holders.  They had old wax drips on them and a layer of dust/grime.  Because they're ceramic, I used a plastic child's spoon to scrape off the wax without damaging the base.


You've gotta go, gunk.

Once the wax was scraped off and I gave them a nice scrub with my Mister Clean Magic Eraser (really- it's magic), it was time to spray paint.

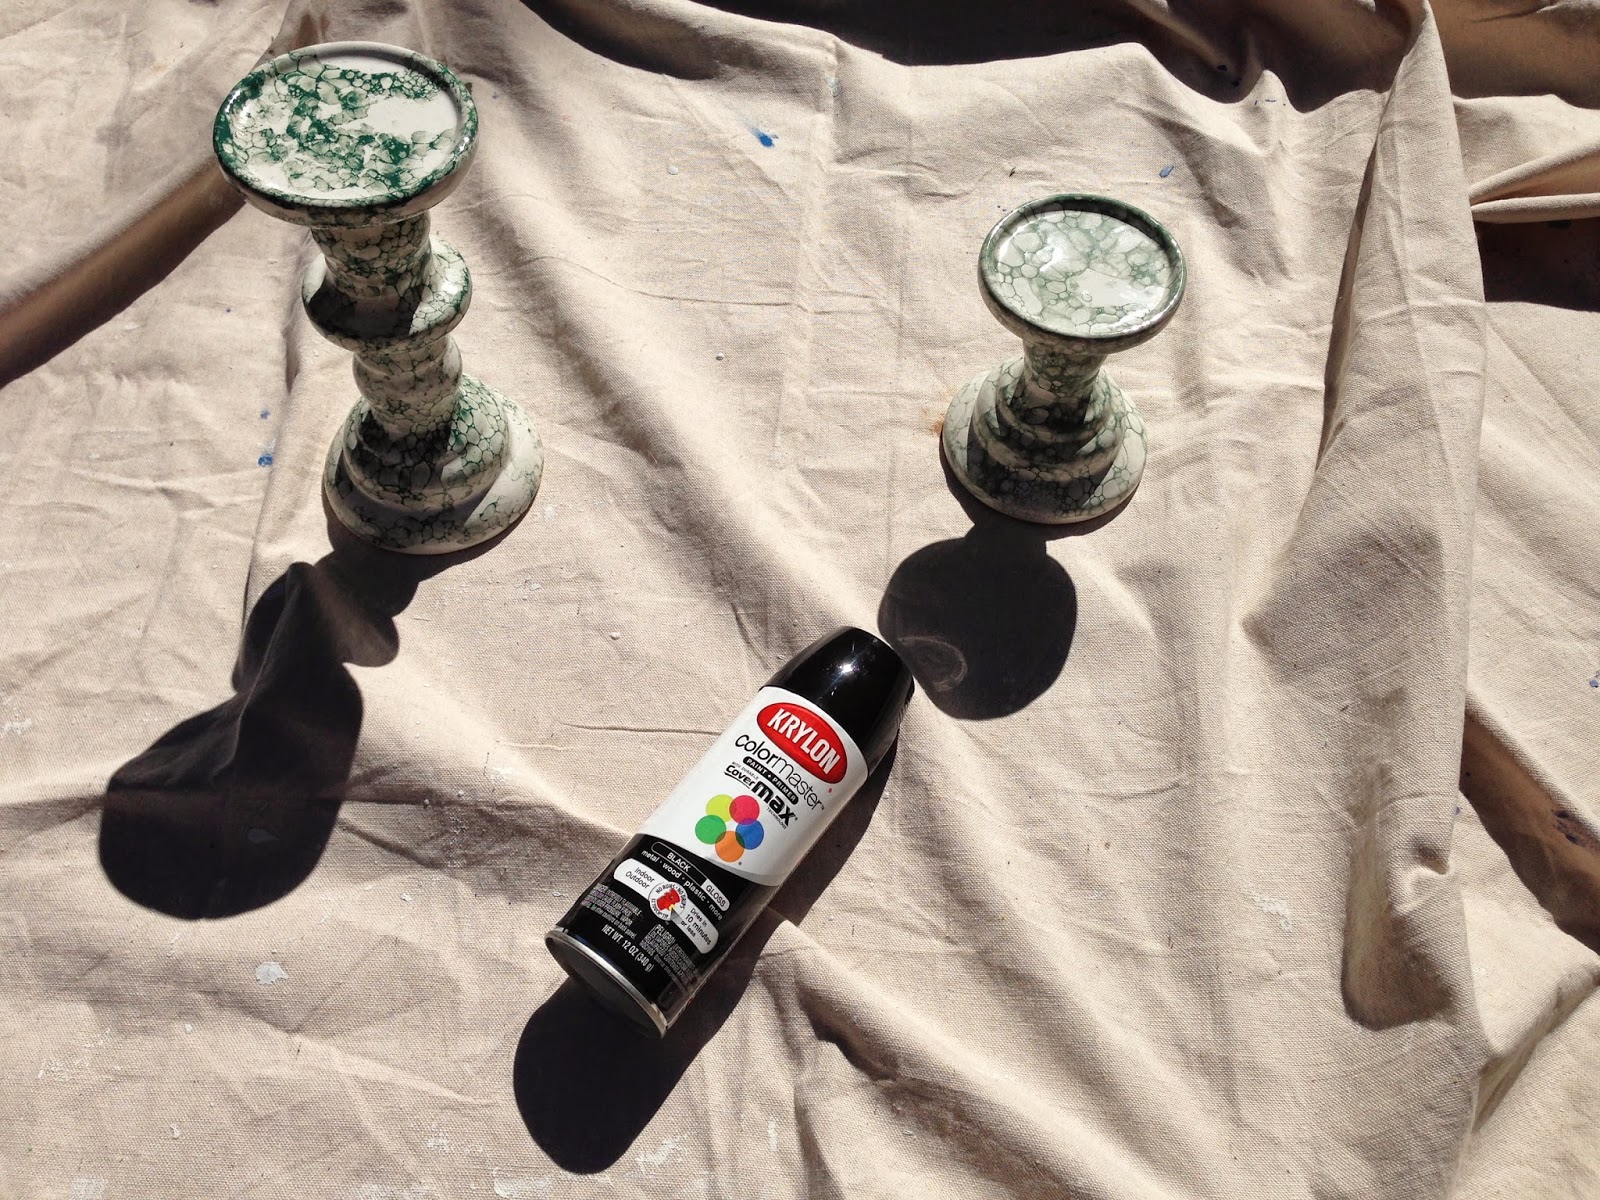
I used Krylon shiny black spray paint and checked the back of the can to make sure it would adhere to glass and ceramic.  The candle holders are made out of ceramic but the coating on them was glassy, and I wanted to be sure the spray paint would adhere well.  I'm happy to report that yes it did!

I sprayed on two coats.  The first one was as shown here, with the holders upright.


I let that dry, then flipped upside down and did coat #2 to catch everything from the opposite angle.  This was my first time spray painting in a LONG time, and I could have been more careful about making sure I did a good job at the base.  It was too sunny outside to really see where I was missing spots, and I only noticed that I didn't have a completely even coat until I was inside.  I am just being overly critical, though.  They look great- I'm just sharing advice on what I encountered. Anyway, when spray painting, remember- nice even spraying at a good distance, and be careful you don't overload with paint and cause drips.

End result: don't they look great?!  And I'm not talking just for Halloween, here.  They'll be wonderful all year long.

September 20, 2014

Easy Chicken and Orzo

Another reliable dish for my weeknight meal lineup is this delicious Parmesan and basil orzo from My Tiny Oven with some diced Italian chicken mixed in.  Simple, tons of flavor, and even better you just set things to cook and walk away for most of the cook time.  Love it!


Ingredients
  • 3 tablespoons butter
  • 1 1/2 cups orzo
  • 3 cups low sodium chicken stock
  • 6 tablespoons fresh basil
  • 3/4 cup grated Parmesan cheese
  • Salt/pepper to taste
  • 2 large boneless, skinless chicken breasts
  • Italian seasoning
Directions
  1. Preheat oven to 375°.  Place chicken in a baking dish and season with salt, pepper, and Italian seasoning to taste.  Bake 28-35 minutes or until cooked through.  Cut into bite-size pieces.
  2. While chicken bakes, prepare the orzo.  Melt butter in a large saucepan over medium heat.  Add the orzo and saute for a few minutes, until it starts to turn golden brown (5-10 minutes).
  3. Add the chicken stock, cover, and simmer 20 minutes until stock has been absorbed.
  4. Remove orzo from heat and stir in the Parmesan, salt, pepper, and cooked chicken.  Serve with additional salt and/or Parmesan on top.
Tasty tasty!

September 18, 2014

Broken Herringbone Quilt: Work in Progress Part 3

This quilt is coming along nicely!  I'm maybe 80% of the way done with the quilt top (all the fabric pieces).  This week's detour was when I realized that I was starting to get some redundancy in my pattern- the same combo of pieces together.  No bueno!  Some rearranging and a critical eye helped me navigate those waters successfully, and get me back on track.  Here's where things stand now:


And in fact I'm even further along than that.  All those individual scraps are sewn into their Ts at least, ready to be attached to columns 3 and 4.

Here's how things looked along the way.

First bit of columns 1 and 2 sewn; laying out the bottom half of each column.

Got the Ts sewn for columns 1 and 2- just need to attach for nice long columns of fabric!

Also starting to think out how I'm going to manage the edge of the quilt.  I think I'll just attach little triangles to fill in the gaps, but to accomplish that I'll just sew on the fabric strips and then cut the excess, rather than try to sew teeny little triangles.

And that's it for now!

September 13, 2014

Mummy Onesie!

This quick baby craft came courtesy of my friend Kelly, who sent me this adorable pin a whole day before the most recent Pinterest party.  Sneaky Kelly!  How could I resist?  Luckily this little treat is SO SIMPLE, I already had everything on hand at home.

So cute!!!

Supplies

  • White baby onesie
  • Gauze or strips of white fabric
  • 2 googly eyes
  • White thread and needle
Directions
  1. Sew strips of gauze criss-cross on the onesie.  I only attached mine at the ends, but I may go back over it and sew down the whole way on each strip.
  2. Poke needle through the back of a googly eye and thread through.  Sew to the onesie and knot firmly.  Repeat for the other eye.
How easy is THAT?!

Framed Burlap and Bunny Silhouette

I came across this super cute framed bunny silhouette pin a while ago, and loved the idea of it in my daughter's woodland-themed nursery.  The original blogger meant it for Easter but pfft, why limit yourself like that?  They also painted the silhouette on their burlap, while I just cut mine out of construction paper.  I think my way is great, naturally.


Supplies

  • Frame, such as this laser cut frame I got at Michael's for just a few bucks!
  • Paint
  • Burlap- enough to fill frame opening
  • Black paper
  • Ribbon
  • Hot glue
Directions
  1. Paint frame white and let dry.
  2. Cut burlap to size, and use hot glue to attach to frame back.
  3. Print bunny silhouette outline (found here or here or going with any Google image search result you're happy with) on black paper.  Cut out bunny shape.  I cut inside the outline, rather than leaving that thick black ink outline on my bunny.
  4. Glue bunny to center of burlap.  
  5. Tie ribbon into a bow and glue to bunny's neck.
Optional: Decorate your bunny for the season!  Give him a trick-or-treat bucket, pilgrim hat, Santa hat, wings and a bow and arrow, etc.  Let your bunny be an active guy in your home!

Versatile Photo Frame

I think just about everyone on Pinterest has seen this pin of a cute frame with a bulldog clip, for both cute display and an easy way to swap out pictures as your kids grow.  I've been wanting to do this for a while, and finally got all the goodies to make it happen at a Pinterest party.  I am VERY happy with how mine turned out!


Supplies
  • Frame, with or without a back
  • Paint, preferably in a bright color
  • Scrapbook paper, big enough to fill your frame
  • Bulldog clip
  • Hot glue gun
Directions
  1. Remove glass, matting, etc. from frame.
  2. Paint frame and let dry.  If desired, scuff up painted frame a little to add some texture and a worn appearance.  If you zoom in on my pic, you can see where I left it a bit streaky in spots and scratched up a bit in others.
  3. Cut scrapbook paper to fit.  Glue to frame backing.
  4. Hot glue bulldog clip, either directly to glass or to the scrapbook paper if you aren't using glass in your frame.
  5. Swap pictures out all year long!

Fall Pinterest Party Roundup

Today was the latest Pinterest party, and I put those hours to good use!  I made my chubby hubby cookies as my food offering to the crafting Gods, and set out to make 2 frames and a mummy onesie.  I didn't progress to the ghost yard decoration for Halloween, but there's still plenty of time to get around to that.  :)

I have little write ups below, with links to full posts on each craft to walk you through it step by step.

First up was the versatile photo frame.  Painted a frame with some interesting detail, put scrapbook paper on the frame backing, and hot glued a bull dog clip.  I plan to have this at my desk at work, where I can swap out pictures easily and have something colorful in the office.  Lord knows that is necessary.


Next up was the bunny silhouette for the nursery.  I painted one of those cheap laser cut frames from Michaels, added burlap backing, cut out a bunny silhouette, and glued on a little bow for good measure.  SUPER easy and I absolutely love it.  I plan to decorate this bunny throughout the year.  Maybe he'll get a little mask for Halloween and a Santa hat at Christmas.

And lastly, the mummy onesie!  I sewed on some gauze and googly eyes, and we were in business.


Here's my lovely daughter showing her enthusiasm for this cute getup!

September 7, 2014

Tin Containers as Fridge Storage

I've seen this idea floated on Pinterest for a while now.  Allegedly, you could put a magnet inside a tin container and it would magnetize the whole thing to stick to your fridge.  Not true.  BOO.  Still, with a bulldog clip, you can still take advantage of your cute old tin (in this case, an old bank) for holding pens.  I have a Chiclets tin holding coupons as well, but in that case I don't have an open side to use the clips on.  I need to stick magnets to the back of that puppy for it to be functional.

Broken Herringbone Quilt: Work in Progress Part 2

Picking up where I left off from last week's quilting, I am ready to share the results of sewing all those quilting Ts together!

So far, things are going well.  I learned a couple important lessons along the way, like leaving about an inch of loose fabric at the edges so I can sew these Ts together, and creating some semblance of order in my progress.  Let's break it down.

Step 4: Sewing the Ts (basic quilt component for the broken herringbone quilt)

As I planned out in Step 3, I sewed my pieces of fabric together, in order, to create a T.  All seams are 1/4".

Here I have two Ts done and sewn together, on the left hand side.  The rest of my fabric is laid out, awaiting assembly line sewing.


So how did I attach the Ts to each other?  Let's take a look.  First, this is where I realized that I needed my fabric to have a loose edge so I could sew one T to the other.

Unfold the bottom left corner, then flip the next T upside down, so you can sew right sides together. 

All sewn together. 


Here we are on the next T down, continuing the steps. Unfold corner.

 Flip next T upside down and sew together. 


 Again, I have attached Ts.  Next, let's show sewing the vertical seam.

Flip my fabrics so right sides face each other, and sew down that vertical seam with the same 1/4" seam I've been using all along.

Flatten the existing seams down as you sew, in the same direction, so you don't get weird fabric bulges along the way.  Do this consistently throughout the quilt.  Not only is it OCD happy to have all seams going in the same direction, it creates consistent texture to your finished quilt.  See below?  I flattened the seams going up.  A couple Ts later, I realized how much easier it was to fold them down.  So down it is for the remainder of the quilt.


 All sewn together.  See now neat and tidy these seams are?

Repeat repeat repeat.  I have the starts of two vertical columns of herringbone going now.

Last night I started planning out the next couple vertical columns.  After sewing those, I'm going to start measuring out to ensure I have the full width of my quilt.  I may need another column or two.  Once the width is set, I'll start laying out the full length of the quilt.  And while I'm at it, I may see if it's easier to stitch this in rows rather than columns.  Because I'm a glutton for punishment, changing up my approach halfway through.  ;)