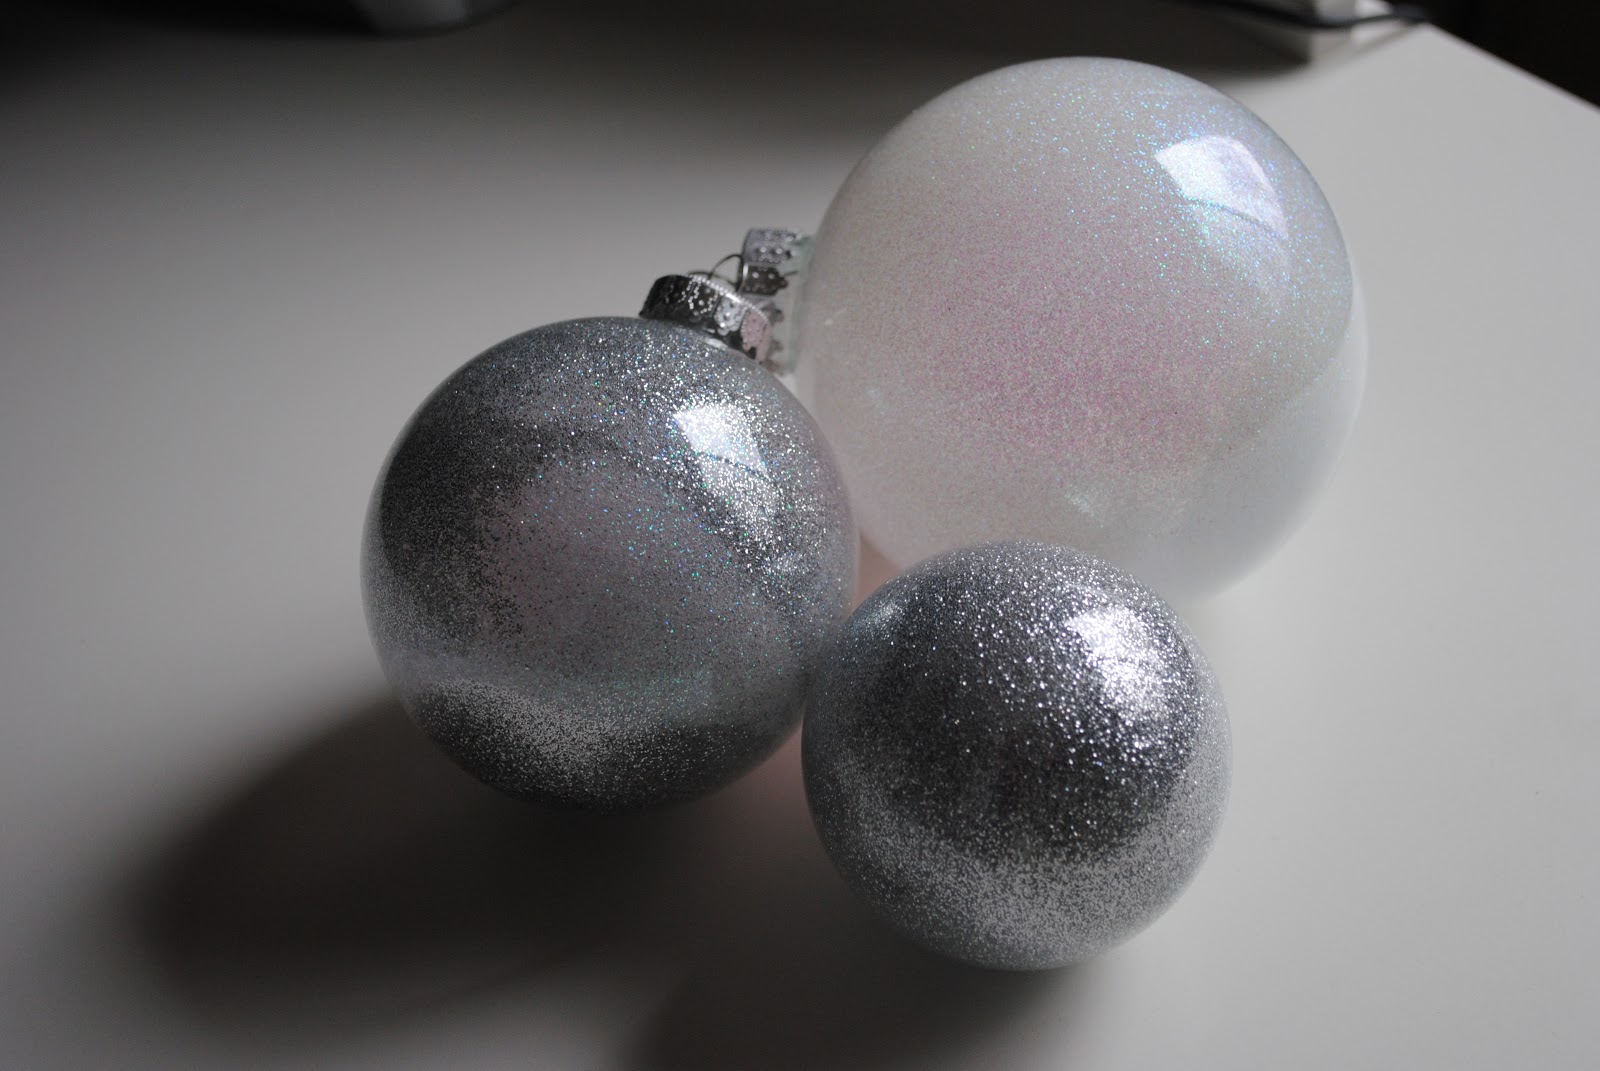


Glitter ornaments are clever and pretty easy to make. I was excited to find a way to have glittery ornaments that actually wouldn't spread glitter to everything within 10 feet of them. The secret to these is floor polish. Weird, but it works!
Supplies
- Clear ornaments (glass or plastic)
- Glitter
- Pledge floor finish with future shine (you can't make substitutions on the kind of finish. I got mine on Amazon (yay free shipping), but it's sold at Walmart and hardware stores like Ace or True Value)
- Funnel or paper to make a cone
Directions
- Take the topper off of the ornaments. Pour in about 1 teaspoon of Pledge into each ornament.
- Gently rotate the ornament to evenly coat the inside with Pledge. You don't want to shake (air bubbles will cause lumps in the glitter later). You may want to cover the top of the ornament with a paper towel while you try to coat the very top of the ornament. If you just cover with your fingers and get the Pledge on your fingers, it gets a bit sticky. Then you get fingerprints on your ornament (or your friend Marian does, and worries about it). You won't notice them when the ornaments are done, but it makes things messier than they have to be.
- Pour out excess Pledge back into bottle.
- Put funnel or paper cone into neck of ornament. Pour in a generous amount of glitter (a couple tablespoons worth). Take out funnel and set aside somewhere that can be glittery (I had a trash box next to me for crafting madness). Again gently rotate the ornament to evenly coat with glitter.
- Pour out excess glitter back into container.
- Pop your topper back in and you're done!
Painted glass ornaments were deceptive from the original pin, but still really nice in the way they turned out in the end. The pin said to put drops of paint into an ornament and shake to get the effect seen in the picture. I don't believe that's what they did- it looks more like someone painstakingly painted the inside of their ornaments. Anyway, here's how I did it.
Supplies
- Clear ornaments (plastic or glass)
- Acrylic paint
Directions
- Pour a streak of paint into the ornament, trying to angle so that it drips along the side. Alternate colors in a couple areas of the ornament. Gently swirl the ornament to get a marbleized effect with the paint. It worked best when I would add just a couple streaks of paint, swirl, add a couple more, etc. rather than try to add all the paint in the beginning.
- Optional: put a small straw in the opening of the ornament, and blow to push the paint around. I didn't really notice this making much of a difference, but it did change the way the paint moved around in the ornament.
- Add drops of paint strategically around the ornament to cover any blank spots, and gently rotate to thoroughly coat.
- I recommend draining the excess paint into a plastic cup. I didn't, and I can see where some of my ornaments had excess paint dry in a pool on one part of the inside. It's not bad, and creates an interesting shadow when held up to the light, but it will affect how evenly the ornaments hang I'm sure.
- When dry, put toppers back in the ornaments. If you put them in while still wet, they may streak the paint at the top of the ornament, making blank spots.
Confetti ornaments are an adaption from a pin making confetti tumblers, which in itself is a knockoff of glasses sold at Anthropologie. So the idea several times removed just came down to me going Seurat on an ornament and getting bored. Hence why there's only one, and it's not nearly as densely covered as the tumblers in the pin. I needed coaching to go that far. Still, very pretty!
Supplies
- Clear ornaments (glass or plastic)
- Acrylic paint
- Paint brush (q tips would work just fine too, but you'd need a batch of them. They'd wear down with the number of dots you need to make.)
Directions
- Take the topper off of the ornament. Squeeze blobs of paint into a paper plate (or palette if you're fancy).
- Paint different color dots all over bottom part of ornament, being careful to alternate colors regularly. Keep in mind that the first layer is the one primarily seen in the ornament, so it's most important to keep that one varied. When you start overlapping colors, it's ok to be a little less OCD about how much variation you have.
- This is a "can't see the forest for the trees" project, to be sure. You have to hold the ornament different ways, at different angles, and even have other people take a look at it for you to see if you're covering it evenly. For some reason I had a hard time getting paint on one portion of the ornament. My brain just wouldn't accept it, even though my friends and I could clearly see one spot was a bit more bare than the rest. See the right side of my ornament? Oh well. Accept the quirkiness.
- Pop your topper back in and rally yourself if you want to do more than one. :)
This last one was what I was most excited to make. I was thrilled when I got the idea for a golden snitch ornament from Pinterest. My husband and I love Harry Potter, and we can't wait for our son to be old enough for the books. Being a nerd, I did a Google image search of golden snitches, and made some modifications to the picture I first saw on Pinterest. I wanted its wings to look more like they did in the movies, and while I agreed there were some swirly gold patterns on the ball I didn't care about making THAT exact of a replica. We need to set expectations appropriately here. I also didn't like the way they glued the wings to the ornament. They looked clunky, so I found another way to secure mine.
Supplies
- Small gold ornament
- Gold ribbon with wire (can't just be silk ribbon- you need to be able to manipulate and shape it)
- Glitter gold paint
- Paint brush and scissors
- Glue (optional)
Directions
- Paint designs on ornament and set aside to dry.
- Cut proportionate lengths of ribbon for the wings. Mine are about 4" for each wing for a 2" diameter ornament.
- Shape wings with a subtle curve to look like snitch wings!
- Trim bottom side of each wing to have an arch, similar to the shape from the movie still I linked to.
- Cut vertical slits in the bottom half of the wings so that they can move and kind of flutter. My slits were every 1/2" or so.
- When ornament is dry, pull off topper. Put ends of ribbon into neck of ornament and replace ornament topper to hold them in place. You may need a dab of glue to secure them.
And that's the end of my ornament crafting revelry. It was great and fun and I'm really proud of how nice they look, considering that this was my first attempt at projects like these. Enjoy!
No comments:
Post a Comment
You want to comment? Awesome! Have at it, rock star.